By Peter Morrissey
There’s just something inherently cool about being able to pour your own beer at home from a tap just like you see at your favorite bar or pub. For us and many others, it’s a novelty that hasn’t worn off - but aside from the fun-factor there are plenty of other benefits to be reaped by packaging your finished homebrew into a keg rather than bottles. Faster and reduced cleaning and sanitation time, as well as oxygen-free pressure transfers are just a couple of the many benefits that spring to mind.

Undoubtedly the concept of starting a kegging operation can be daunting and perhaps a little intimidating for the uninitiated. Even the term “pressure transfers” sounds complicated and confusing enough - but like most things, once they’re explained and better understood they become much easier to face. You do need a few bits of equipment to get a kegging setup underway which we’ll cover in this article, but in our opinion it’s definitely a worthwhile investment, and there are a number of options that can help try and keep the costs down.
So strap in and pour yourself a cold one - we’re diving down the beer kegging rabbit-hole to get you up to speed on kegging - what it is, why you should be doing it, and what you’ll need to get started.
What Is A Beer Keg?
First things first - what exactly is a beer keg? There are several different varieties of kegs available for homebrewers to use, though the basic concept is the same for all of them. They’re single, large volume vessels designed to hold beverages under pressure to allow for carbonation and dispensing. They feature a mechanism for attaching gas and beer lines so you can carbonate and of course, serve from them. These mechanisms vary slightly between types of kegs which we’ll cover in more detail below.
Types Of Beer Kegs:
1. Half Barrel/50L/Full Size Kegs
Most people have probably seen these types of kegs stacked outside bars, pubs and restaurants. These are the “full size” kegs typically used by the commercial brewing industry for distributing their beverages to licensed venues. They’re made of stainless steel, have a large volume (up to 15.5 Gallons) and require an A-type or D-type coupler to allow gas and beer lines to be connected to them. Their size, weight and volume means they’re not often used by homebrewers, though you do sometimes see them with the tops cut off and converted into homebrew boil kettles that sit on propane gas burners, commonly referred to as “keggles” - a cross between a keg and kettle.

2. Corny Kegs
Corny kegs are named after Cornelius Inc - the company that originally designed and manufactured them for use by the soft drink/soda industry. They are also referred to as cornelius kegs, soda kegs or homebrew kegs.
They are made primarily of stainless steel, and feature three openings on the top - a large, centered opening for cleaning and filling, as well as smaller openings on either side of the large one for pressurizing and dispensing. These smaller openings are typically fitted with ball lock posts, although pin lock posts can also be used but aren’t as common.
These kegs are by far the most popular for homebrewers - being made of stainless steel they’re incredibly robust and with a 19 litre/5 gallon capacity they’re the perfect volume for homebrewers. Their relatively narrow footprint also means that several can be snuck into a fridge so you can have multiple kegs and taps hooked up at the same time.
3. Plastic Kegs
Plastic kegs are relatively new on the market, and as the name suggests are constructed of PET plastic. Being made of plastic they do have a limited life-span, but can then be recycled and present a more cost effective option to other keg types made of stainless steel like the aforementioned corny keg - especially when getting started. The technology behind plastic kegs can be quite advanced with features like oxygen protective barriers to all but eliminate oxygen ingress through the plastic walls too. They’re available in just about all sizes from 20 litre/5.2 gallons all the way down to 8 litre/2.1 gallons.
Different connection types are available for plastic kegs, but the most popular are ball lock posts - the same as what is featured on corny kegs, so you can essentially think of these as cheaper, plastic corny kegs.
With the explosive rise in popularity of craft beer and home brew kegging/draft systems, don’t be surprised to see commercial craft breweries start to offer pre-filled small plastic kegs as a takeaway option in addition to traditional cans and bottles.
4. Mini Kegs
Think of mini kegs as miniature versions of the corny keg. They’re made of stainless steel and typically feature special heads to allow ball lock disconnects to be attached for pressurizing and dispensing. You typically use mini kegs with mini sources of carbon dioxide gas as a portable kegging solution for taking to parties etc.
They come in various shapes and sizes, and volumes range from 2L up to 9.5L - with the latter being a half-sized corny keg.
How Do Beer Kegs Work?
Regardless of what kind of keg you’re working with, the basic premise of how it functions remains the same. The keg is filled with beer (more on this later), and then whatever space is left within the keg (referred to as “headspace”) is filled with gas. Carbon dioxide gas is most commonly used, though some beer styles like Guinness use a mixture of nitrogen and carbon dioxide.
The gas applied to the headspace is absorbed into the beer which carbonates it and makes it fizzy. The level that is absorbed depends on several factors - such as how much gas pressure is applied into the headspace and the temperature of the beer. Colder beer absorbs more gas more readily, and eventually the beer will reach a point where it stops absorbing gas from the headspace and reaches equilibrium. Carbonation is measured in “volumes”, and you can use a carbonation chart as a guide to know how much pressure to apply to reach a desired level of carbonation at a particular temperature. Carbonation levels vary between different beer styles, but somewhere between 2.4 and 2.6 volumes is a good starting point for most beers.
The keg will feature a tube/line of some sort to allow the beer out - on most kegs this will be a stainless steel tube (called a “dip tube”) that reaches to just above the bottom of the keg which is where the beer is drawn from. Some kegs (like mini or plastic kegs) will feature a vinyl or plastic dip tube that is attached to a ball float (known as a floating dip tube) that draws beer from just underneath the surface of the beer. The dip tube (floating or not) connects to a coupler or ball/pin lock post, then on the other side of this post/coupler a line of plastic or vinyl tubing is connected. The other end of this line is then hooked up to a faucet, tap or beer gun, that when opened allows the beer to flow out of the keg. Since the keg is kept under pressure (from the gas in the headspace), this pressure forces the beer out of the keg via the path of least resistance - which when opened is the beer tap/faucet.
For those visual learners like us, here’s a high quality cross-section diagram outlining the key elements of the most common and popular keg type, the corny keg.

Why Is Using High-Quality Kegs Important?
Just like almost every aspect of brewing and brewing equipment, quality is important, and keg quality is no exception. High quality kegs will give trouble free operation by ensuring they don’t leak the two critical things they’re designed to hold - liquid (beer) and gas. The problem with a keg that leaks beer is fairly obvious and will quickly lead to a pool of precious amber liquid at the bottom of your fridge or kegerator. Thankfully these leaks are easily identified since you can see any beer escaping from somewhere it shouldn’t be.
Gas leaks on the other hand are not as easy to identify since carbon dioxide gas is invisible, odorless, and if dealing with a slow leak won’t make any noise. Gas leaks can cause a multitude of problems. Firstly, they’ll mean that you can’t maintain the required amount of pressure in the headspace of the keg to reach your desired carbonation level, thereby resulting in flat beer. In addition to this, if the keg allows gas to escape, it can also let other gas (like oxygen) into the keg which is a guaranteed way to cause beer spoilage to rapidly occur through the effects of oxidation. Finally, there is of course the the financial impact of losing a tank of carbon dioxide gas from a pesky leak.
Benefits Of Using Beer Kegs For Your Brew
Convenience
Nothing beats the convenience of having a draft beer setup at home and pulling your own meticulously brewed beer from a nice shiny tap. Only fancy a half-glass? No problem, that’s all you need to pour out - a luxury you don’t have after opening a bottle or can which will go flat and more than likely oxidize if left opened in the fridge overnight.
In addition to this there’s probably the biggest single benefit of kegs and that is cleaning - specifically the reduced amount of cleaning involved. Most of us when we get into brewing set out with a starter kit and a heap of bottles but quickly realize how painfully laborious it is to clean and sanitize dozens of bottles in preparation for every batch of beer. Add to this the fear of infection and potential bottle-bombs from getting a little lazy with even just one bottle and it’s enough of a worry and hassle for some to give brewing away as a hobby all together.
Cleaning a single keg is such a quick and painless task - especially if you get (or build) a keg cleaning kit - something we’d strongly recommend as the top opening of a corny keg is just a bit too small for an adult arm to fit in for scrubbing. Such a kit typically features a bucket and submersible pump with an attached arm that reaches into the keg. Gas and liquid post connectors can also be included so when the pump is switched on, cleaning solution from the bucket is pumped and shot out through the arm and gas/liquid posts. Simply sit the inverted keg on the cleaning arm, plug it in and away you go - cleaning has never been so easy! And since we’re usually dealing with stainless steel kegs, you can use warm or hot water which often helps to break down any particularly stubborn build up in the keg. Leave it running whilst attending to other tasks in the brewery, or simply sit back with a tasty homebrew and reminisce about the not-so-good old days of scrubbing bottles for an hour or two.

Cost-Effective
Getting started with kegging can be a relatively cost effective method of packaging your beer. Many of the parts you need to get setup can be found on second hand market places - like corny kegs and fridges for example. No more needing to buy additional bottles after the ones you gave to your friend(s) never came back. No more buying bottle caps, or carbonation drops.
When starting out you also have the option to go with cheaper PET plastic based corny kegs to help reduce the initial financial outlay in getting setup. This is a good way to get going without breaking the bank.
If you’re able to go for stainless kegs though, these will last a lifetime if looked after, with the only consumable parts being a few rubber seals that cost a few dollars to replace and should last at least a couple of years before needing to be swapped out.
Freshness & Quality
Freshness is of paramount importance when talking about craft beer. One of the biggest challenges with maintaining freshness of beer is preventing the effects of oxidation which will negatively impact a beer’s color and cause off flavors often likened to that of wet cardboard or sherry. Combating oxidation is one of the biggest challenges when bottling, and is especially prevalent with the ever-popular hop-forward styles like IPA’s which are much more prone to the effects of oxidation.
With kegs you’re able to leverage the benefit of oxygen-free pressure transfers to get your beer from fermenter to keg which means you can essentially eliminate any contact with oxygen during transfer which keeps your beer fresher for longer. This in-turn will help to improve the quality, shelf life and stability of your beer as well after it has been packaged.
Versatility
Kegs are very versatile, with some brewers opting to use them as fermentation vessels - also known as “kegmenters”. Many of the benefits of kegs for serving also apply when being used as fermenters. Stainless steel is the optimal material for fermenters because of its light weight, durability, strength, and impermeability to light and oxygen which is ideal for yeast health and preventing oxygen ingress. When fermenting in a corny keg, some slight modification by trimming the steel dip tube so it doesn’t reach as far to the bottom of the keg is recommended in order to prevent too much trub pickup when transferring after fermentation (or simply use a floating pickup tube instead). After accounting for losses from said trub you’ll inevitably end up with a finished volume a little less than the full 19 litre/5 gallon capacity, but it still presents a worthwhile, viable, convenient and cost effective option for many homebrewers, especially when compared to the cost of a brand new pressure capable stainless steel fermenter.
Kegs can also be filled with more than beer - just about any carbonated beverage can be stored and dispensed from a kegging setup. Cider, kombucha, seltzers, soda and hard spirit mixes, or even just sparkling water are all great alternatives to have on-tap and serve from a keg.
There are plenty of different sized kegs available too, meaning if you’re restricted for fridge space you can start off with smaller size kegs, or mix and match kegs of different sizes to utilize as much space as possible within your fridge. You can even set up a “daisy chain” by connecting mini kegs to full size kegs so you always have a mini keg full and ready to take on the go with you at a moment's notice!
Kegs, Bottles and Cans: What's The Difference?
Here we have the three most popular storage vessels for beer, so let’s break them down to see what the differences are, and the pros and cons for each. We’ve already covered a lot about kegs, so let’s start with bottles.
Beer Bottles
No doubt everyone is familiar with beer bottles, but it’s worth noting that not all beer bottles are created equal. Bottles are typically made of glass, and the color of the glass that is used is important. Lighter coloured glass such as clear or green are ineffective at blocking the ultraviolet (UV) light rays that are responsible for beer spoilage that is commonly referred to as “light struck” or “skunking”. Brown bottles are the most effective at preventing this by blocking more of these UV rays.

Beer bottles can present a good packaging option for homebrewers as they’re readily available, and if made of glass are quite robust, being capable of holding a fair amount of pressure, and can be cleaned with hot water and more abrasive/harsh chemicals than plastic bottles. Bottles can be sealed with a capping device, which are easy to find, cheap, and simple to use. Bottles can also be re-used multiple times, but you do need new caps each time you wish to use and seal them.
The problem with bottle caps is that they are known to leak relatively small amounts of air over time, so are not recommended for longer term storage as the effects of oxidation are likely to come into play due to the inevitable oxygen ingress via the lid. You can get special “oxygen scavenging” bottle caps that help with this but opinions on the effectiveness of these are varied.
There are also PET plastic bottles - which are typically brown in colour. As we mentioned above, brown is better at preventing UV light penetrating through to the beer inside. Being made of plastic these bottles are cheap, but they aren’t completely impermeable to air and oxygen so they aren’t well suited to anything longer than short term storage. They’re also harder to clean since you can’t use hot water, harsh cleaners or abrasive brushes on them as it may damage the plastic that can lead to flavor contamination, leaks or deep scratches where nasty bacteria can hide and cause in-bottle infections.
Regardless of whether you’re using plastic or glass bottles, another big issue when packaging into bottles is preventing oxidation when filling. Since an empty bottle is inevitably filled with air from the atmosphere, it’s nearly impossible to prevent oxygen contact when bottling using a simple bottling wand. The solution to this is to purge the bottle with carbon dioxide gas before filling and then using a counter pressure bottle filler or beer gun, but you do need a source of carbon dioxide gas to be able to do this.
Beer Cans
Moving on to cans, and you’ve probably noticed a rapid rise in the popularity of cans for the distribution of craft beer in recent years. This is largely due to the fact that unlike bottles, cans are completely impermeable to light and oxygen, making them perfect for storing beer, particularly craft beer that is often heavily hopped and is more susceptible to spoilage from oxidation.
Cans are very much like really small kegs in this way, but unlike kegs are not designed for multiple uses. Being single use means that new cans and lids have to be purchased and used for each batch. A special can seaming machine is also required to seal them after being filled and these start at several hundred dollars for a basic/manual unit - a significant cost especially when compared to the humble bottle capper. Cans are definitely superior to bottles in terms of maintaining freshness for longer periods of time, but it comes at a cost. As with bottling it’s also advisable to purge cans with carbon dioxide gas prior to filling in order to prevent oxidation from occurring after packaging.

Beer Keg
Kegs as we’ve been discussing are versatile and an excellent option for storing beer. Like cans they are immune to the damaging effects of light and oxygen when sealed, however some additional equipment is required to get a keg setup and able to be served from. They’re relatively large volume is typically a benefit, but it means some extra work is required if you want to be able to share your beer or repackage it into bottles or cans. A beer gun or counter pressure bottle filler is a worthwhile investment in order to be able to package from your keg into bottles.

In our opinion, the ideal setup is to have your beer packaged into a keg for medium-long term storage, and then use a counter pressure bottle filler to fill some bottles when required for sharing, taking to parties or entering into competitions. Counter pressure bottle fillers are reasonably affordable, and since you’ll have a carbon dioxide gas bottle as part of your keg setup that can be used with your counter pressure bottle filler, you won’t need anything else besides some beer and gas line to connect it all together.
How To Fill A Beer Keg
So you’ve finished fermenting your latest batch of beer, and have your shiny new keg ready to go, so how do you go about getting your beer into the keg? There are a number of different options you can use to do this - the quick and easy way, but we’d strongly recommend utilizing one of the more advanced methods outlined below. We’re going to focus on corny kegs since they’re the most popular/common option for homebrewers.
- Gravity Transfer. The easiest method for transferring is to have your fermenter situated higher than your keg and let gravity do the work for you. Connect a transfer hose to the tap/spigot of your fermenter. Pop the lid off your corny keg and put the other end of the transfer hose inside, as close to the bottom of the keg as possible. You want to minimize splashing to reduce your chances of oxidation. Open the tap on your fermenter, patiently wait for the keg to fill, then close the tap, remove the hose and put the lid back on the corny keg when done. Pretty simple stuff but you’re more than likely going to suffer from oxidation by transferring this way - though you can pre-purge the keg with carbon dioxide gas before filling to try and prevent this from happening.
- Closed loop transfer. Similar to a gravity transfer, you’ll need to have your fermenter situated higher than your keg. You’ll also need a pressure capable fermenter. Ensure the pressure in the fermenter and keg is equal - around 10psi is a good starting point. You can ensure the pressure is equalized by connecting a gas jumper line between the fermenter and keg. Connect the liquid out post of your fermenter to the liquid out post of the corny keg. Since the pressures are equal, no beer should start transferring yet, so we need to disconnect the gas line from the keg and bleed a little bit of pressure from it using the built in pressure relief valve (PRV). As soon as you do this, the pressure in the keg will be lower than the fermenter, which will create a vacuum and the beer will start flowing from fermenter to keg. Then connect the gas line back to the keg to create the loop and the siphon effect will continue to function. This is a great method as it all but eliminates any oxygen contact for your beer during the transfer process as you’re transferring from a fermenter pressurized with CO2, into a keg pressurized with CO2.
- Closed Pressure Transfer. This is very similar to the closed loop transfer, but rather than using gravity and a siphon effect to transfer the beer, we’ll simply ‘push’ the beer out of the fermenter and into the keg using CO2 gas pressure. This means that having the fermenter sitting higher than the keg is not necessary when using this method. As with the closed loop transfer method, ensure the gas pressure in the fermenter and the keg is equalized - connect a gas jumper line between the two in order to do this then remove it. Connect your CO2 regulator to the fermenter and set it to the same pressure that the keg and fermenter are at. Next, connect your beer jumper line from the liquid out of the fermenter to the liquid out post on the keg. Since the pressures are currently equal between fermenter and keg, nothing should happen so we need to drop the pressure in the keg to initiate the transfer. You can do this by briefly pulling the PRV on the keg, or alternatively you can connect a spunding valve to the gas post of the keg and slowly unwind the adjustment until you start to hear gas escaping through the valve. The transfer will now begin. If you’re using the PRV method you’ll need to repeatedly pull it to continue to reduce the pressure in the keg as it fills (hint: using a spunding valve is significantly easier than doing it this way). You do use a little bit of CO2 from your bottle by doing it this way but this is the method we’ve always used for transferring with great results, and without the need to lift the fermenter so it’s higher than the keg.

Spike Closed Pressure Transfer Kit
The instructions above are a little brief so don’t be put off if you don’t fully understand it. There are loads of YouTube videos and tutorials that cover these steps in more detail. It’s definitely worthwhile utilizing option 2 or 3 above to all but eliminate oxygen pickup to help your beer stay super fresh for as long as possible.
What Equipment Do I Need for Kegging?
Now that we’ve sold you on the benefits of kegging, you’ll be wanting to know exactly what you need to get your kegging setup underway. Let’s break it down now with all the basic equipment required to get going.
A Fridge/Freezer
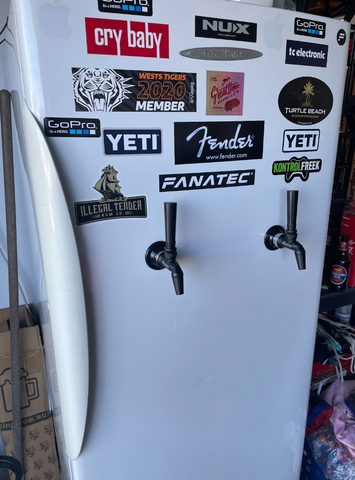
One of the most important things you’ll need is something to store your kegs in to keep them cold. You can opt for a purpose built “kegerator” - a small fridge custom designed for holding kegs and with built-in provisioning holes for a font to be attached that your beer taps are affixed to. These kegerators can be a little expensive though, so alternatively you can make your own “kegerator” or “keezer” using a new or second hand fridge or freezer.

Second hand marketplaces often have used fridges or freezers at really affordable prices and are well worth considering when starting out. Some care needs to be taken when drilling holes in fridges to feed lines and install taps to ensure you don’t hit any refrigerant lines or other components hidden within the fridge walls or body. If using a chest freezer a timber collar is often built and fitted between the freezer body and the lid. The collar serves as a place to mount your taps and also raises the lid height to ensure a full size corny keg will fit inside with the lid down. There’s loads of guides and info on building either of these, and as a bonus, a fridge or freezer for kegging can also be used as a fermentation chamber to allow for temperature control during active fermentation - win-win.
Taps/Faucets and Shanks
Beer taps are fairly self explanatory and are relatively cheap. There’s plenty of different colors and styles available, but we’d recommend sticking to popular and well known brands as a dodgy or leaking tap could have rather dire consequences!

Shanks are what allow you to connect a beer line to your tap, and help hold your tap in place or mounted to a surface. If you’re mounting your tap to a fridge door, you’ll need a relatively long shank (they can be as long as 5 inches) which features a flange, coupling nut to connect to the tap, and a locking nut on the other end to hold the shank in place. If mounting to a purpose built font or tower, a small form factor shank can be used.
Another option if you don’t want to build a freezer collar or drill holes in a fridge to mount your taps to is to use a beer gun (sometimes called a pluto gun), or a picnic tap and leave it connected and sitting on top of the keg inside your kegerator/keezer.
Kegs
Obviously you’re going to need at least one of these, but be warned, you’ll almost definitely end up buying more. We’d recommend going for corny kegs and if your budget allows go for the stainless option straight away. Otherwise, if money is tight or you’re just dipping your toes in the water to see if kegging is for you, a plastic based PET corny keg may be a better option to start with. Make sure you get ball lock posts as they’re much more common than the old pin lock style. Second hand market places are also a good place to pick up stainless corny kegs at bargain prices - old and damaged seals can be quickly and easily replaced for only a couple of bucks, but be wary of any other significant damage, particularly to the lid opening that may prevent it from sealing properly when closed.
CO2 Bottle
You’ll need a source for carbon dioxide gas for carbonating and dispensing from your keg. They come in a number of different sizes and what size you should get will largely depend on where you’re going to store it. Purpose built kegerators often have brackets on the back that can neatly hide a smaller CO2 bottle. Larger bottles are more cost effective but are taller so use more vertical space, though you won’t have to get them refilled as often. For small party keg setups you can use small soda stream style CO2 cylinders as well.
CO2 Gas Regulator
CO2 bottles hold loads of carbon dioxide gas at a much higher pressure than what we need for using in a keg system. For this reason, a CO2 gas regulator is required to control and reduce (regulate) the large pressure from the CO2 gas bottle to a much smaller pressure for use in our keg(s). Regulators are gas type specific so make sure you get one designed for use with CO2 gas/cylinders. Most CO2 cylinders use a Type 30 connection. If you’re going for a smaller variety of cylinder like a soda stream you’ll need to make sure you get a regulator with a suitable connection type to match.
Gas and Liquid Disconnects
These are small little devices that connect your gas and liquid lines to the gas and liquid posts on your keg. Ball lock disconnects are the most common, so go for these assuming you’ve also got ball lock posts on your keg(s). For each keg you’ll need one gas disconnect and one liquid disconnect. You’ll also need to decide on whether to use a disconnect with a barbed fitting to attach your beer/gas line to, or use push in fittings - more on these shortly.

Beer/Gas Line
You’ll need beer and gas lines which are plastic or vinyl lengths of hollow tubing that the beer or gas will travel through. You can use the same type of line for both beer and gas, and they’re typically measured by internal diameter (ID) and outer diameter (OD). The gas line connects from the output valve of your CO2 regulator to the gas disconnect fitted to your keg. The beer line connects from the liquid out post on your keg to the shank with the tap/faucet that you’re dispensing your beer from.
Push In Fittings
In order to connect your liquid/gas line to your liquid/gas disconnect, you have a couple of options. The first is to use a disconnect with a barbed connection with which you slide the beer or gas line over the barb and secure it in place with a clamp. The alternative is to use push-in fittings that require no clamps or special tools, and feature special locking mechanisms that create a leak-proof seal when the liquid/gas line is inserted into the fitting. We’ve always used push in fittings with good results, but others experience endless issues with leaks and swear by the reliability of barbs and clamps. Go with whatever you’re more comfortable with or are able to get more easily.
Final Thoughts
So there you have it, a crash course in all things kegging. There is quite a bit of information to unpack, but it’s well worth investing the time if you’re interested in setting up your own draft beer system at home.
As we’ve covered above, the benefits of kegging are plentiful - reduced cleaning time and effort is just one major advantage, but with the versatility you can leverage from a keg setup like having a keg to use as a smaller stainless fermenter, plus a dedicated beer fridge you can use for temperature controlling fermentation, there’s loads of reasons why you should look at starting to package your beer into kegs.
If money is an issue then consider slowly building up your inventory of all the little bits and pieces you need to get going rather than trying to purchase everything all at once - it’s also worth considering the cheaper option of plastic kegs to help keep costs down as well as scouring used marketplaces for second hand items at bargain prices.
Your local homebrew store will more than likely have everything you need to get going too, and can give further advice on your own particular setup if you need help.
FAQs
How long does beer in a keg last?
Since beer stored in a keg is in a completely sealed and sanitary environment - free from the damaging effects of oxygen, light and any other contaminants, the length of time it can be stored is quite high. Assuming the keg has been completely purged of any oxygen prior to filling you can expect at least several months but results will vary depending on many factors like storage temperature and even the type of beer you have. Heavily hopped beer styles like IPA’s are best when consumed fresh, usually within a couple of months.
Other styles may benefit from a longer aging period before they hit their prime, so aging beers in a keg is not an uncommon practice. Chances are you’ll finish drinking whatever you have in your keg long before it goes bad!
How do you know when a keg is empty?
A keg that has run dry is often referred to as being “kicked” or “blown”.. and you’ll have no doubt when it happens as you’ll start to get small amounts of foam and loads of noisy gas coming out of the tap upon opening it. It’s a bittersweet experience as it’s always sad to have run out of beer in a keg, but it presents an opportunity to clean it and fill it again with more beer (or something else)!
Can you refill a keg?
Absolutely! And this is one of the great things about kegs - they are designed to be refilled and used over and over again.
Do kegs only hold beer?
Kegs are capable of holding much more than just beer. Any carbonated beverage can be stored and served from a keg - cider, kombucha, pre mix spirits like bourbon and cola mixtures, seltzers, or plain old sparkling/soda water are all great options, and are often used as bargaining chips with partners to get a kegging operation underway.