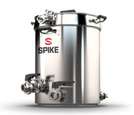
New to homebrewing? Start with a Spike Kettle
4 min
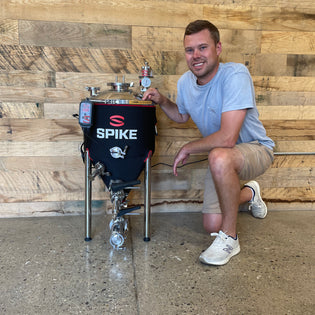
Hey, I’m Stephanie, your friendly neighborhood Spike Customer Experience Representative! I’m going to share with you my personal homebrewing set up with my Spike Kettle, along with some tips, tricks, hopes and dreams. Are you looking to start with a Spike Kettle, but aren't sure how? Well, hopefully this will get your gears turning!

Currently I brew 5 gallon batches on a custom Spike 10-gallon kettle, which includes ports for a drain, whirlpool and a thermometer. My method of choice is Brew in a Bag (BIAB), using a propane burner, a brew bag, a pulley system and a few other standard accessories! This setup has been developed over my time at Spike (about a year and a half), and I’ve brewed on this specific system a half dozen times.
One reason I chose this setup is because I’m renting, so I don’t have the option of setting up the requirements needed for an electric system. Our kettles work great on propane, and they hold heat really well! Another reason I like BIAB is that it's a shorter Brew Day! I can brew some beer and still make it out to a friend's cookout—bringing beer I brewed prior of course. Lastly, when I’m ready to upgrade, I can easily use this kettle as a boil kettle in a two or three- vessel setup. All in all, this setup is perfect for someone who enjoys making good beer but has spatial and financial limitations.
I think it’s important to note here that I did not buy all of my equipment at once. I added certain accessories over time. Additionally, I didn't really have my process down until I made a Saison, a few brews in, which was the first (and still!) the “best beer I’ve ever made.” So with that said, here are some of the things I added and techniques I learned to improve the overall quality of my beer.

Pulley system
If you’re using a brew bag, a pulley system is extremely helpful to lift up your bag at the end of your mash. Unfortunately, my muscle strength is lacking which made the first few Brew Days without the pulley pretty taxing. Holding a heavy wet grain bag over burning propane and hot wort during a 80F sunny day was not pleasant to say the least. The purchase of the pulley system was necessary. I don't know why I waited so long to get one!
Whirlpooling
Currently I use one carboy for primary fermentation and I do not transfer to secondary. So for clearer beer I whirlpool for longer than I would on one of our electric systems. I start whirlpooling at 15 minutes before the end of the boil and keep on whirlpooling all the way through chilling. I have an immersion chiller, so allowing the wort to whirlpool around the chiller while in the kettle actually makes the wort cool down faster as well. Kills two birds with one stone!
Choose the right style
By no means is my current set up ideal for lagers. I also do not have temp control capabilities for my carboy. I found my best beers made this summer were those styles that use yeasts that like hot temperatures. These were two Saisons and one Hazy IPA with Kviek yeast. These yeasts ferment best in high temperatures, so I just left my carboy in the garage for a week and let it rip! Leaning into my environment and what is possible when picking styles aided in my brewing success.
Don’t let the oxygen in!
We all know that oxygen and beer do not get along. But how did I accomplish minimal oxygen leaking into my beer with this simple set up? I avoided dry hopping as much as possible. When necessary, I bumped up the hopping schedule so that I was dry hopping during primary fermentation only. When dry hopping during primary, I could assume that the very active yeast would gobble up any oxygen that entered the carboy in the process. Another way I avoided oxygen in my beer was with a DIY closed pressure transfer siphon that I created from online research. I recently came to own an anti-gravity pump, so I will be using that instead on my next brew!
"Just take your time and build as you go..."
As mentioned earlier, I’m super happy with my kettle because I can easily build upon this setup in the future—I totally plan on it! Some ideas for my immediate future include upgrading from my carboy to a Flex + and getting a counterflow chiller. Down the line I might consider adding in the Spike Solo Basket instead of using a brew bag, and maybe even adding some ports in the back so I can go electric. Who knows, maybe someday I’ll be the proud owner of the Trio. That’s the goal right?

If you love homebrewing, but have limitations like me, there are still so many ways you can make great beer with Spike! I thoroughly enjoy my setup and love finding new small ways to improve. I also must mention that many of my buckets, carboys, and random accessories or parts were passed down to me from friends. Reach out to your beer or brewing community for used equipment. Just take your time and build as you go, and don’t bite off more than you can chew. As they say, Rome wasn’t built in a day.
As a former career bartender and current beer connoisseur, Stephanie Freimuth brings years of experience to her Customer Experience role at Spike. Whether you're a guest at her bar or a customer in her inbox, she puts a smile on your face.