By Maria Podetz
Ahhhhhh the cold, crisp, clean sensation of a freshly homebrewed lager tickling your throat all the way down; few experiences are as gratifying. My name is Maria and, like you, I love all things beer: researching it, brewing it, drinking it, and learning about it alongside like-minded individuals. So, pitter patter, let’s get atter; from one passionate homebrewer to another, here’s how to make a damn good lager.

What Makes A Lager Great?
Brewing a lager is not as forgiving as brewing many Ales, simply because you can’t easily mask off-flavours through the use of Hops. For this reason, a great lager, to me, is a lager that is balanced in its taste-profile because that indicates a properly brewed and conditioned lager and is an impressive feat marking an accomplished brewer.
More specifically, the difference between a good lager and an exceptional lager can often be differentiated by the water profiles used and the regions in which the agers originate.
Luckily for homebrewers, and brewers alike, we can closely replicate water profiles through the usage of filtered water and added minerals. That being said, until the day I die, I’ll swear that the Stella Artois I drank in downtown Brussels would put any other Stella in the world to shame; was it the authentic water profile freshly brewed in its birth country, or the fresh Belgian chocolates that accompanied my beer?
Beats me, all I know is gimmie more.
What Does Lagering Actually Do?
On the most simplistic of levels, lagering is a chemical process that conditions your homebrew utilizing bottom-feeding yeast, low temperatures, and time. The lagering process occurs sequentially after your brew’s fermentation and before its bottling/consumption, with a duration lasting anywhere from four weeks to several months depending on your specific brew.
In my own head, I equate lagering to Cinderella after she met her fairy godmother; here we have a tale of a lovely young girl that just needed a little dusting-off and TLC to become her shiniest self in order to nab her prince charming.
Lagering your beer is the same; it removes unwanted off-flavour-producing compounds (her fireplace cinders) while also carbonating (the dress), clarifying (the glass slipper), and transforming your beer into its most crisp and clean self (the crown).
Even though it’s just a fairy-tale analogy, I’m pretty sure making your own kick-ass Lager won’t hurt your chances of meeting Princess/Prince charming – although it might blur them.
What Pressure Should I Ferment A Lager At?
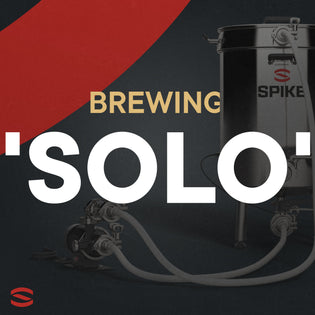
One of the many benefits of some Spike fermenters is that you can ferment under pressure, ultimately saving time in your overall brewing schedule by reducing fermentation time, reducing the need for forced CO2 through natural carbonization and thus reducing overall cost (as if we’re into this hobby to save money, haha), minimizing undesirable esters created by high fermentation temperatures, and freeing-up your brew gear earlier to start your next brew.
When talking pressurized fermentation, it’s yeast’s world and we’re just livin’ in it. Lagers generally pressurize in the 18PSI range (between 15-20PSI), depending on your yeast packet specifications (high-end liquid yeasts typically denote optimal yeast pressures on-packet for each of their specific lager yeasts).
Overall, lager yeasts react well under pressure and ferment at high temperatures while simultaneously decreasing fermentation duration. In sum, if you ferment under pressure, you’ll produce clean and clear lagers much more quickly than the alternative.
What Temperature Should You Mash At For A Lager?
Depends, bro – what kind of lager turns your crank? Assuming you want the picture-perfect light, crisp, traditional lager, then mash on the low temperature side around 148° F (65°C). If you plan to conduct a 2-Step-Mash, mash a little lower at around 144° F (62°C) before you put another log on the fire and increase to 156° F (69°C) for mashout.
8 Top Tips For Brewing the Perfect Lager
1.Patience is Key
3 hours of planning, 6 hours of brewing, 3 weeks of fermenting, 2 months of aging, 9 maids a’ milking, 7 swans a’ swimming, and a partridge in a pear tree. Listen: I, of all people, get it —lagering is a long process, but if you’ve managed to have enough patience and perseverance to convince your significant other that a homebrewing setup is an absolute essential and a new dishwasher is not, then I’m confident you’ve got the grit and dedication required to make a damn good Lager.
As with most things worth obtaining in life, patience is key; this is especially true of brewing a mouth-watering lager. Since lager yeast thrives at lower temperatures than ale yeast, lagers take longer to ferment than ales. Where most ales can be brewed and savoured inside of three weeks, lagers take anywhere from four weeks to several months from brew to beard. It is for this reason that many industrial brewers favour production of non-lager beer, as these brews require less fermentation time, less overall equipment usage, and have a quicker turnaround time for consumption and sale.
The notion of throwing back a crisp, smooth, refreshing, and perfectly-carbed homebrewed lager will undoubtedly tantalize even the most patient homebrewer’s tastebuds, but it’s important to understand that, by rushing any part of the lagering process, a brewer will significantly increase the risk of creating off-flavoured beer and wasting the fruits of their labour. My general rule of thumb: if you’re at all unsure if your lagering process is complete, then it’s not complete. When in doubt, wait a few more days and, I promise, it will taste that much better!
2.Temperature Control
Lagers require specific lager yeasts and, as a living organism, different types of yeasts require different temperatures to both survive and perform most optimally; most specifically, lager yeasts typically thrive between 60° F (15°C) to as low as 38° F (3°C) – much cooler than ale yeasts.
If you’re brewing with some sexy, shiny fermenters, you can likely set and forget your fermentation temperature. Alternatively, if you’re brewing with bad-ass classic gear like a 5-gallon fermenting bucket that lacks built-in temperature control, you may have to get creative with temperature control solutions to ensure your yeast thrives at a consistent temperature.
Whether storing in a naturally cool place like a basement or garage, using a Rubbermaid container to make a controlled ice bath for your fermenter, brewing lagers in seasons with historical temperatures in the appropriate range, or fashioning a good ol’ swamp bath (google it), there are many ways to create low-cost lager fermentation temperature controls. Heck, if you’re handy, or know a handyperson who will work for beer, you can even rewire that old refrigerator in the basement where the vegetables go to die.
Whichever solution you choose, be sure to monitor the temperature from the inside of your bucket with a bi-metal thermometer, or from the outside of your bucket with something as simple as a stick-on thermometer; Spike’s got a great one for a great price!
In short, channel your inner ‘Dad’ as the self-proclaimed keeper of the thermostat and house temperature—except with your fermenter.
3.The Right Ingredients for the Right Lager
If you’re a homebrewer like me who is in this game just to get funky and create, then you aren’t motivated by making the picture-perfect lager. But if you’re in it to win it, you’ll want to be precise with your recipe and remember to select ingredients that offer a clean, light, and crisp finish classic of a lager; AKA steer clear of hops and malts that offer heavier ale characteristics robust in flavour and aroma and stick to classic lager hops like hallertau and saaz and use a malt such as pilsner.
Lastly, remember that there are plenty of different kinds of lagers to get creative with; in fact, the first German lager was actually dark in colour.
4.Utilize A True Lager Yeast
Using a specific type of lager yeast for your desired homebrew will enhance the outcome of your beer. When I’m spending upwards of 2 months anticipating savouring my homebrewed lager, I always opt for a high-quality liquid yeast strain because it contains live yeast strains suspended in nutrient-rich broth which, in my experience, produce a cleaner and more interesting flavour profile.
Additionally, many liquid yeast companies, such as White Labs, offer data sheets with incredibly specific fermentation temperatures for achieving an optimal brew.
My advice? Skip your morning coffee run and instead opt for the fancy yeast; trust me, your tastebuds will thank you later.
5.Consider A Yeast Starter
Since lager yeast ferments at lower temperatures, the yeast reproduces at a slower rate and consequently risks fermentation spoilage from invading microbes. Yeast starters, however, contain significantly higher quantity (and more active) yeast cells and thus act as a counterbalance to the lower and slower fermentation nature of lager yeasts.
A starter is a great way of making sure that there are enough yeast cells for your beer to completely ferment – this is especially true of lagers, which can need up to double the amount of yeast compared to an ale.
6.Use A Wort Chiller
Nothing kills a party quicker than premature fluids – ammiright?! Premature wort fermentation is no exception. Using a wort chiller will facilitate a low enough temperature transfer of wort to fermenter and prevent premature fermentation and lager off-flavours caused by high wort transfer temperature to your fermenter. The risk of brew oxidation is heightened as it cools from its initial hot temperature, so the objective is to lower the wort’s temperature as swiftly as possible.
A rapid chill, which is facilitated by a wort chiller, also creates what is known as a ‘cold break’ in your finished beer. A cold break will not occur with a slow chill, only a rapid chill, and if a cold break does not occur, your finished beer will have a ‘chill haze’ – this is simply an unclear/hazy appearance in the beer due to the presence of proteins that are eliminated from the beer with rapid chilling, but not with gradual chilling. It’s worth noting, too, that unclear/hazy beer has less of a shelf-life than clear/un-hazy beer; but this isn’t a problem for most homebrewers, since we are typically as passionate about guzzling our beer as we are brewing it and usually don’t have to worry about it lasting months and months.

7.Use A Two-Stage Method of Fermentation
A two-stage method of fermentation is essentially transferring your fermented wort into a secondary fermenter after fermentation has completed and before your long-haul lager conditioning for several weeks begins. In essence, if you don’t have a yeast-dump in your brew gear, yeast (or yeast cakes) will have collected in the bottom of the fermenter you initially used and, conditioning for a couple months in that same primary fermenter may cause the caked yeast to produce off-flavours.
Primarily, though, transferring to a secondary container (keg, carboy, etc.), will avail your current fermenter so that you aren’t a sitting duck (or brewer) for the next few months while your lager conditions. Finally, practicing secondary fermentation will also result in a more clarified beer and, as you know, brewers and beer connoisseurs alike love raising that crystal clear glass of lager upward to the sunlight before we throw er’ back and gulp with pride.
If you live in a humid climate like I do on Cape Breton Island in Nova Scotia, choosing to condition a lager within a fermenter will cause excessive condensation on the exterior of your fermenter – meaning towels or the like to catch the runoff if your brew space doesn’t have built-in drainage. For this, and a few other reasons, my personal preference is to condition my lagers in kegs, within the homemade Kegerator (rewired deep-freeze), under consistent temperature control.
P.S. Just in case the thought crosses your mind, ensure you don’t pitch a second batch of yeast after transferring to a secondary vessel; there’s still ample viable yeast cells from your primary fermentation floating within your homebrew to support the conditioning process.
8.Conduct A Diacetyl Rest
All cold fermentations, such as lager fermentations, naturally discourage the elimination of diacetyls due to low fermentation temperatures. Since the presence of excess diacetyls often creates off-flavours in your lager, consider conducting a diacetyl rest in your fermenter toward the end of your primary fermentation.
Over 5-6 days, simply increase the temperature of your fermentation by a degree each day (up to 62°F/16.5°C); this simple/slight warming of the wort will aid the yeast in diacetyl minimization, encourage the yeast to consume the sugar more completely, and will keep your lager tasting nothing but delicious indeed!
Final Thoughts: If It Feels Good, Brew It

Many moons ago, at the start of my beer-loving journey, I remember asking a connoisseur friend which specific beer glass I should use for which specific beer type – to which, he simply replied, “whichever glass makes you happiest.”
I’ve brought this sentiment forward as I learned to brew beer and then gradually developed into a more serious beer brewer. In summary, if it feels good – do it. Or, more accurately, if it feels good—brew it.
We aren’t in the game of homebrewing to sell beer, we’re in this game to create, improve, and delight in the journey as much as that carbonated, delicious destination.
To that end, please let me know in the comments if you have any additional hot tips for making a kick-ass lager; I’d love to make your acquaintance and see inside your brain!
An avid homebrewer, Maria resides in Nova Scotia, Canada, where she thoughtfully creates beer from her little green backyard brew barn. Co-founder of the @BeerBrewnettes social media platforms, Maria helps to create and publish daily content on all things beer-related: for homebrewers and beer-lovers alike, you can join the adventures of the two Beer Brewnettes on YouTube, Instagram, and Facebook via https://linktr.ee/BeerBrewnettes