Imagine the satisfaction of popping open a beer you crafted yourself, right at home. Each bubble, each amber-hued liquid swirl, and every nuanced flavor is your creation.
]]>Imagine the satisfaction of popping open a beer you crafted yourself, right at home. Each bubble, each amber-hued liquid swirl, and every nuanced flavor is your creation. Welcome to the exhilarating world of home brewing. Hi, I’m Josh from Spike, and today we're diving into a beginner-friendly brewing journey with the Spike Solo Brewing System. Whether you're a seasoned brewer eyeing an upgrade or a curious beginner eager to take your first step, this guide is your brewing compass, pointing you to that perfect beer.
The Spike Solo Brewing System is your trusty sidekick in the brewing adventure, akin to that versatile multi-tool in your crafting kit. Engineered for both new and experienced brewers, the Solo is a turnkey system offering a harmonious blend of simplicity, versatility, and top-quality materials. With the Solo at your brewing station, you're all set to create commercial-quality beer in the coziness of your home.
All Solo Systems come with the brew kettle (flat or bottom drain), control panel, basket and all connections. We do recommend the Spike Flow brew pump and Counterflow Wort Chiller to complete your setup.
Space, the final frontier for many a homebrew enthusiast. But fear not, the Spike Solo is designed with a compact footprint, as meticulously planned as a well-organized workshop. Be it your kitchen, basement, garage, or back patio, the Solo fits in seamlessly. And when Brew Day wraps up? It stows away just as smoothly, eagerly waiting for your next brewing escapade.
Brewing with the Spike Solo is as straightforward as following a recipe in your favorite cookbook. Broken down into six simple steps - heating water, adding grains, filtering, boiling, whirlpooling, and chilling - brewing becomes an intuitive and manageable process, even for those just beginning their brewing journey.
The Spike Solo System comes in a variety of sizes to cater to your brewing needs - 10, 15, and 20 gallons. Each size has an option for The 'OG' a flat-bottom kettle or The Tank a bottom-drain system. This flexibility lets you choose the system that best fits your brewing aspirations, just like picking the right tool for a specific crafting project.
The Solo, whether in the The OG or The Tank variants, is a shining example of Spike's dedication to quality and usability. Boasting features like tri-clamp fittings, sanitary welded coupler design, precision-laser slits, and a solid 304 stainless steel construction, it's akin to having a high-precision toolkit for brewing. It’s heated using a powerful heating element, includes a 6-foot power cord and heating element cord, and comfortably holds wet grain on the kettle lip during vorlauf or while the basket drains.
Just as the best craftspeople continually refine their techniques, we at Spike are always innovating. We're excited to introduce our latest addition to the home brewing toolkit - the Spike Solo Panel! This new panel is designed to demystify the transition from propane to electric brewing. Think of it as your personal electric brewing assistant, helping you navigate unfamiliar waters with confidence and ease.
The Spike Solo Panel is more than just a pretty face with its large and easy-to-read LCD screen; it's a fully equipped brewing tool that eliminates the need for autotuning. We've carried out countless hours of testing and development to make this panel not just reliable, but super easy to use. Think of it as turning a box of assorted technical nuts and bolts into a neatly organized, easy-to-use toolkit.
One of the standout features of the new Solo Panel is its versatility. We know each brewer has their unique setup, much like every craftsman has their preferred workstation. So we've made the Solo Panel mountable both vertically on the wall and horizontally on a table or brew bench.
You can even connect it to the Solo Brew Table using the new Solo Panel Stand for an ultra-slick setup. And worry not about cord management; built-in cable hooks help keep everything tidy, regardless of the panel's orientation.
Ease of use is at the heart of the Solo Panel. If you've ever had an app crash on you mid-Brew Day or grappled with a touch screen that's decided to go dark, you'll appreciate the simplicity of the Solo Panel. No more relying on WiFi or Bluetooth; this panel is as reliable as a sturdy workbench and just as easy to use.
And keeping in line with Spike’s outstanding high-quality products, the Solo Panel is assembled meticulously at Spike. We built a room specifically for putting all the electrical elements together because, as the old saying goes, "If you want something done right, you have to do it yourself!" We're proud to say that the Solo Panel embodies this philosophy perfectly, ensuring you have the best brewing experience possible.
Embarking on the home brewing journey with the Spike Solo Brewing System is like opening a treasure chest of possibilities. With its user-friendly design, space-efficient footprint, high-quality materials, and the promise of the upcoming Solo Panel, brewing is no longer a far-fetched dream but a reachable reality.
So here's to the brewing adventures that lie ahead, to the mastery of flavors, and to the shared joy of savoring your very own homebrew. With the Spike Solo System, you're not just brewing beer - you're brewing experiences.
With the Spike Solo, you can brew a wide variety of beer styles, from light ales to robust stouts. Its flexible design enables you to experiment and perfect your favorite brews.
The initial brewing process can take around 6 hours. Following this, your brew will need to ferment for 1-2 weeks before it's ready for bottling and additional aging.
Absolutely! The Solo System comes with a standard lid, but can be upgraded with a CIP Lid. This and other additional features make the Solo a versatile choice that grows with your brewing journey.
The Spike Solo Brewing System is an excellent choice for beginners. It combines simplicity, versatility, and quality, offering a user-friendly platform for newcomers to learn the art of brewing. With a compact design, easy-to-follow process, and the flexibility to experiment, it's an ideal starting point for your brewing journey.
The Spike Solo Brewing System simplifies home brewing by breaking it down into six easy steps - heating water, adding grains, filtering, boiling, whirlpooling, and chilling. Its turnkey design and easy usability make brewing less intimidating for beginners, while its quality materials and features ensure advanced brewers can experiment and refine their brews with ease.
Absolutely. The Spike Solo Brewing System offers flexibility with its 10, 15, and 20-gallon variants. Whether you're looking to brew smaller 2.5 to 5-gallon batches or larger 5 to 10-gallon batches, there's a Solo System to suit your needs. Its adjustable design allows you to scale your brewing process based on your requirements.
The Spike Solo Brewing System is designed for both beginners and advanced brewers. It offers features like tri-clamp fittings, sanitary welded coupler design, and precision-laser slits, typically found in commercial brewing systems. Furthermore, with the upcoming Spike Solo Panel, advanced brewers can enjoy an enhanced electric brewing experience with a versatile and easy-to-use panel.
The Spike Solo Panel is a game-changer for electric brewing. With a large, easy-to-read LCD screen, no required autotune, and plenty of mounting options, it simplifies the electric brewing process. It's turnkey and ready to use straight out of the box, making it an ideal upgrade for those transitioning from propane to electric brewing.
Yes, the upcoming Spike Solo Panel is designed to seamlessly integrate with existing Spike Solo Systems. If you're looking to enhance your electric brewing setup or transitioning from propane, the Spike Solo Panel is the perfect addition, offering simplicity, versatility, and an easy-to-use interface.
The Spike Solo Brewing System stands out with its blend of simplicity, versatility, and top-quality materials. Its compact design makes it suitable for any space, while its six-step brewing process simplifies the brewing journey for both beginners and experienced brewers. The upcoming Spike Solo Panel further enhances its capabilities, making electric brewing more accessible and efficient.
Josh Lindquist is the Continuous Improvement Manager at Spike Brewing. When he’s not immersed in his work (which he absolutely loves by the way) he can be found rock climbing, playing sand volleyball or researching the hottest trends on the newest tech gadgets.
More Articles
]]>Hello everyone! My name is Erik Sauve, the Vice President at Sauve and Son Farms. Our farm is located in the Yakima Valley in Washington State, in the small town of Mabton. My family has been farming hops since 1938. We currently grow 10 different hop varieties both proprietary and public.
]]>
Hello everyone! My name is Erik Sauve, the Vice President at Sauve and Son Farms. Our farm is located in the Yakima Valley in Washington State, in the small town of Mabton. My family has been farming hops since 1938. We currently grow 10 different hop varieties both proprietary and public: Simcoe, Cascade, Amarillo, Citra, Mosaic, Columbus, Warrior, Ekuanot, HBC 682, and Idaho 7.
Growing up around the farm, I knew at an early age that this was what I wanted to do for the rest of my life. I then received my education at Washington State University, graduating with an Agricultural Degree.
We just fired up our harvest season almost two weeks ago, and I hope to pass on some knowledge of this exciting time of year for us and just how sought-after Fresh Hops are by brewers local to Washington and across the country.
Let’s start with the basics…
Fresh hops are considered to be “wet hops” that have just been picked from the field, and have gone through the picking machine process, but have not yet been kiln dried to the lower moisture content of 9-10%.
Fresh hops can be received from any hop farm currently in harvest.
Fresh hops can be any hop variety grown. However, mostly aroma hops are requested rather than alpha hops that tend to pack more bitterness.
There is continued debate on what Fresh Hops really are. Some argue that fresh hops are wet hops that have not been kiln dried, while others believe both wet hops and recently kiln dried hops are both considered to be “fresh”.
Using fresh hops requires roughly 3x the amount of hops that you would use when using pellets. That is because the fresh hops are not concentrated to pellets and also have a lot of green material that can absorb wort.
Fresh hops are usually used post boil in a whirlpool like stage. Extracting the oils and lupulin from the wet hops before knocking out into the fermenter.
Fresh hops are harvested mechanically in the field by a top cutter that cuts the top of the vine into the back of the hop trucks. Hop bines are then transported to the picking machine where the truck is unloaded and the bines are moved through the picking machine to separate the cones from the leaves and stem. Leaves and stems are separated and sent out to a large “trash” pile to breakdown into compost, while the hop cones are sent into the kiln facility to be dried.
Fresh hops are not stored for very long as the cones can begin to degrade quickly. Usually fresh hops are picked up from our farm and driven straight to the brewery to be used within minutes or a few short hours of being picked in the field. That is where the appreciation of fresh hop beers comes from.
Fresh hop beer styles can range from IPAs, Pale Ales, Pilsners to whatever a brewer is wanting to try out.
Fresh hop IPAs are definitely the most popular in Washington State.
I think fresh hops are changing the beer industry in a few different ways, but more so on creating friendships and relationships with brewers. Fresh hop orders usually mean that the brewer themselves, or members of the staff will drive out to our farm to pick them up.
If time persists, we like to tour them around our facilities and show them the process it takes to supply them with the hops. This allows our connection with the beer industry to be more understood and appreciated. Likewise on our part, I love to see the dedication brewers have to making quality beer and am always grateful to fill orders when asked.
I usually try to make it out to breweries that come by our farm during harvest to show our gratitude for making the trip, as well as try some delicious beers they have made.
Erik Sauve is the Vice President at Sauve and Son Farms. Their farm is located in the Yakima Valley in Washington State, in the small town of Mabton. His family has been farming hops since 1938, and they currently grow 10 different hop varieties both proprietary and public.
Each letter represents a category, featuring links to the best of what Spike has to offer. From innovative brewing equipment and recipes to insightful blog posts on various brewing techniques, these resources are meant to enrich your brewing knowledge and skills.
Click on the hyperlinked keywords to explore the full breadth of content and equipment provided. Let's delve into the art and science of brewing with this comprehensive resource list.
Dead Bird Brewing Company is Wisconsin’s only all vegan brewery and winery, and believe me, I’m aware of the irony of that. I’m Nick Kocis, owner and brewmaster at Dead Bird, and yes, we have a wonderful story about finding a deceased sparrow in our first home brew kettle that my bartenders have heard me tell more than a few times.
If you stop by our taproom on North 5th St in Milwaukee, you’ll notice a bit more than our vegan food menu. Our parking lot has gorgeous patterned pavers. We have a lovely garden planted with native Wisconsin plants under our beer deck. The deck itself is recycled plastic as our flight boards. If you take a few big steps back and peer up to our roof you’ll see 208 solar panels facing south. All of these from the vegan food to the native plants are all part of a move to sustainability in all parts of our company.
Go back far enough and all beer is vegan. The German Reinheitsgebot laws of beer purity set down in 1516 limited beer to three ingredients water, barley, and hops with yeast being viewed as a process ingredient, something that was added to create the beer but wasn’t in the finished product. Over the years other things joined this “Process Ingredient” category. Herbs were added to create unique flavors, minerals were added to mimic water chemistry from other regions, fining agents were added to provide clarity with or without filtration. These fining agents are some of the first not readily apparent ingredients on the short list of things that can make a beer non vegan.
In the modern day there are lots of ways to provide brilliantly clear beer in the glass. Large breweries use centrifuges to spin solids out of beer down to microscopic levels. Plenty of breweries use filters to polish beer. Lots of these also use fining agents to ensure less particles are entering their expensive equipment. Traditionally fining agents ranged from seaweed extract, known as Irish Moss, to dehydrated fish swim bladder, known as isinglass. Gelatin, the powder that gives jello its jiggle, primarily extracted from boiling down animal bones, ligaments, and tendons, is another product used to clump particles together to make them easier to remove. While Irish moss is still commonly used along with other more modern chemicals, isinglass and gelatin have been seeing a downward trend for a litany of reasons.
Technically the impact of vegan ingredients in beer is fairly minimal. The processing of beer ingredients from around the world and shipping it to Milwaukee via the modern global infrastructure has a much higher impact than the small amount of isinglass or gelatin we don’t use. Our food menu is all vegan and because of that the culture of massive factory farms and food waste that we avoid also has some impact.
However, we like to view veganism as the cornerstone of our environmental outlook. The partnerships we have with the Milwaukee Riverkeepers, our use of eco-friendly biodegradable chemicals, the water redirection from our permeable pavement parking lot, and even our smart lighting system all have a bigger impact on our environmental sustainability than those couple of beer ingredients. However, they are much less shiny and thought-provoking than telling you we’re a vegan brewery while you plow through the five pound pile that is our fully loaded nachos.
So while being vegan does have an impact on our environmental friendliness, it's not the only thing we do to help out our planet.
Environmentally breweries check most of the boxes in terms of industrial usage. Breweries use huge amounts of power and water. 85-97% of the product we produce is water, and we use even more water to make that mostly water product. Breweries create many things in addition to beer. Packaging, spent grain, residual yeast and hot/cold break, spent chemicals, and left over ingredient containers all come out of a brewery in addition to beer. In fact if you were to weigh what comes out of a typical small brewery, you’d find beer is probably not first on the list.
Finding sustainable ways to deal with these waste streams is a job unto itself. Classically spent grain, the other main product breweries produce, is fed to cattle. While in the land of beer and cheese this leads to many wonderful synergies, it doesn’t work everywhere. Alaska Brewing Company took a look around and didn’t see too many cows in the frozen landscape around them. They knew there were plenty several hundred miles south in California so they started shipping it there to keep it from piling up. This led to them installing a grain dryer to lighten the load and shipping cost in removing it. After that it made sense to install a spent grain burning furnace to power a generator on site which then powered the brewery. Perfectly closed loop there. Great Lakes Brewing grows mushrooms on their spent grain, New Belgian has their famous fish pond, many places make dog treats, or use it in pizza crust or bread. This kind of thinking is just the tip of the iceberg.
Several years ago I was working at a small brewery in Madison, home of the Forest Products Lab near the UW-Madison campus. They reached out to us looking for spent grain for a unique project. They were putting spent grain in an industrial steam press and putting tens of thousands of pounds of pressure on it fusing it into boards. Because the grain particles were very small they could press curves and shapes into the boards. They eventually wound up making corrugated building walls that were insulated with an eco-friendly product.
Chemical and yeast runoff can drastically affect local water treatment facilities. Reduction in chemical usage or using enzymatic cleaners can lessen the impact. New Glarus Brewing has an on-site water treatment plant and prides themselves on sending better water into the city than they receive in, by stripping wastewater of contaminants as it leaves the facility. Ozonated water has been implemented in dozens of breweries to replace environmentally harsher chemicals.
Packaging has also seen a dramatic shift in recent years. Aluminum cans are some of the most recyclable products on the planet. Brown glass, the other most common packaging in craft brewing, is at most 80% recyclable and can be much harder to process than aluminum. Shying away from plastic shrink wrap or plastic-based labels makes packaging even more eco friendly. We print most of our labels in house, and while it's not the most viable option for larger breweries, it works for us. Using a biodegradable, high-performance paper product with eco-friendly inks allows our cans to be easily recycled. Biodegradable six-pack rings made from spent grain are also available in certain markets.
Small breweries have it the easiest, especially those that are just starting. Implementing green infrastructure early on is the best way to make your brewery more sustainable. If you can install all LED lights, use electric power as much as possible over gas, and cut down on plastic in the kitchen, bar, and service areas all these will help make a business more sustainable.
Breweries are known water hogs. Most large breweries can tell you their water ratio, that is how much water they use to produce a certain amount of beer. Seven to one is a not uncommon ratio to see across the industry. That means for every pint or gallon or barrel of beer they produce, they use seven times that amount to make it. This is unavoidable in some cases, tanks must be rinsed and CIP’d, sanitizers must be diluted. Floors are commonly referred to as the hardest working piece of equipment in a brewery and must be kept as clean as possible. All of this is water intense. Any place you can cut back or use less, or in our case offset the usage, is a win. Dropping water rations from 7:1 to 6:1 could be hundreds or thousands of gallons a year not going down the drain. World-Class water usage from some of the most eco-friendly breweries in the state are under 3.5:1.
Timing can mean everything as well. While brewing must be done at a certain time, other steps can be timed to be more eco-friendly. We heat our hot liquor tank up over night for several hours, with it coming to temperature just before we need it in the morning. This reduces the strain on the electrical grid and puts what could be peak power consumption at a time where things are less in demand. This also means our electricity is cheaper at that time.
Vegan beer needs to be devoid of animal-derived ingredients and products, none can be used in its creation either.
Surprisingly most beers are vegan, especially on the smaller scale. If you have questions on if a beer is or isn’t vegan, barnivore.com is a great place to start looking. They have an extensive catalog of beers, wines, and liquors. Unfortunately this database is primarily aimed at larger scale manufacturers. Most brewers will happily talk about their process and can provide detailed information on what fining agents and ingredients are used in their brews and process.
However lots of the craft beer industry is centered around using unique ingredients, lactose (milk sugar), bacon, oysters, honey, and bull testicles have all made appearances in beer. The ingredients obviously make a beer non vegan.
Vegan beer is made exactly like any other beer! We do the exact same steps and processes that any other brewery does.
Some, but not all.
Coors = vegan except for Coors Light in the UK (isinglass) and a few of the Molson labels
Bud Light = Budweiser and Bud Light are all vegan
Miller Light = vegan
Leinenkugel = Some, the shandy and weiss lines contain honey which is not considered vegan
Blue Moon = Blue moon is a total crap shoot. Any of it in the UK is not vegan (isinglass) the honey wheat and honey summer ale are not vegan in the US, regular Blue Moon Belgian White is vegan
Michelob = vegan except for the honey wheat beers
Rolling Rock = vegan
Pabst Blue Ribbon = Pabst, Schlitz, and Old Style are all vegan
Busch Light = Busch, Busch Light, Busch N/A and Busch Ice are all vegan
Sam Adams = Sam Adams line except for Cherry Wheat and Honey Porter are not
Guinness/New Castle = Vegan now, however, in 2016 people were having allergic reactions to the levels of fish in the packaged beer
Healthwise, vegan beer has similar effects to non vegan beer, moderation is key.
All over! Again, MOST beers are vegan. There are a few standouts that are not, mostly traditionally brewed English beers brewed in England.
Honey is technically not vegan. Given the issues with pollinator reduction and hive collapse, we are seeing world wide sustainable practices and colony growth are super important. Personally if I know the honey is sustainably collected and the apiary is focused on producing more pollinating bees I will happily support them. This usually means purchasing locally produced honey from reputable growers.
Beer is considered vegetarian as long as it does not contain animal products like isinglass, oysters, bacon, or other non vegetarian products.
Wine and cider both have similar uses of fining agents. Gelatin is still a top used product in wine making. You see less use of milk sugars, and meat products in wine and cider.
Several. Many large domestic N/A beers are vegan. We are also working on our own non-alcoholic beer.
Nick Kocis is owner and brewmaster of Dead Bird Brewing Company in Milwaukee. He has over a decade in the craft beer industry. He studied biochemistry and molecular biology at the University of Wisconsin at Platteville. He lives in Milwaukee and is a Wisconsinite from birth.
]]>There’s just something inherently cool about being able to pour your own beer at home from a tap just like you see at your favorite bar or pub. For us and many others, it’s a novelty that hasn’t worn off - but aside from the fun-factor there are plenty of other benefits to be reaped by packaging your finished homebrew into a keg rather than bottles. Faster and reduced cleaning and sanitation time, as well as oxygen-free pressure transfers are just a couple of the many benefits that spring to mind.
Undoubtedly the concept of starting a kegging operation can be daunting and perhaps a little intimidating for the uninitiated. Even the term “pressure transfers” sounds complicated and confusing enough - but like most things, once they’re explained and better understood they become much easier to face. You do need a few bits of equipment to get a kegging setup underway which we’ll cover in this article, but in our opinion it’s definitely a worthwhile investment, and there are a number of options that can help try and keep the costs down.
So strap in and pour yourself a cold one - we’re diving down the beer kegging rabbit-hole to get you up to speed on kegging - what it is, why you should be doing it, and what you’ll need to get started.
First things first - what exactly is a beer keg? There are several different varieties of kegs available for homebrewers to use, though the basic concept is the same for all of them. They’re single, large volume vessels designed to hold beverages under pressure to allow for carbonation and dispensing. They feature a mechanism for attaching gas and beer lines so you can carbonate and of course, serve from them. These mechanisms vary slightly between types of kegs which we’ll cover in more detail below.
Most people have probably seen these types of kegs stacked outside bars, pubs and restaurants. These are the “full size” kegs typically used by the commercial brewing industry for distributing their beverages to licensed venues. They’re made of stainless steel, have a large volume (up to 15.5 Gallons) and require an A-type or D-type coupler to allow gas and beer lines to be connected to them. Their size, weight and volume means they’re not often used by homebrewers, though you do sometimes see them with the tops cut off and converted into homebrew boil kettles that sit on propane gas burners, commonly referred to as “keggles” - a cross between a keg and kettle.
Corny kegs are named after Cornelius Inc - the company that originally designed and manufactured them for use by the soft drink/soda industry. They are also referred to as cornelius kegs, soda kegs or homebrew kegs.
They are made primarily of stainless steel, and feature three openings on the top - a large, centered opening for cleaning and filling, as well as smaller openings on either side of the large one for pressurizing and dispensing. These smaller openings are typically fitted with ball lock posts, although pin lock posts can also be used but aren’t as common.
These kegs are by far the most popular for homebrewers - being made of stainless steel they’re incredibly robust and with a 19 litre/5 gallon capacity they’re the perfect volume for homebrewers. Their relatively narrow footprint also means that several can be snuck into a fridge so you can have multiple kegs and taps hooked up at the same time.
Plastic kegs are relatively new on the market, and as the name suggests are constructed of PET plastic. Being made of plastic they do have a limited life-span, but can then be recycled and present a more cost effective option to other keg types made of stainless steel like the aforementioned corny keg - especially when getting started. The technology behind plastic kegs can be quite advanced with features like oxygen protective barriers to all but eliminate oxygen ingress through the plastic walls too. They’re available in just about all sizes from 20 litre/5.2 gallons all the way down to 8 litre/2.1 gallons.
Different connection types are available for plastic kegs, but the most popular are ball lock posts - the same as what is featured on corny kegs, so you can essentially think of these as cheaper, plastic corny kegs.
With the explosive rise in popularity of craft beer and home brew kegging/draft systems, don’t be surprised to see commercial craft breweries start to offer pre-filled small plastic kegs as a takeaway option in addition to traditional cans and bottles.
Think of mini kegs as miniature versions of the corny keg. They’re made of stainless steel and typically feature special heads to allow ball lock disconnects to be attached for pressurizing and dispensing. You typically use mini kegs with mini sources of carbon dioxide gas as a portable kegging solution for taking to parties etc.
They come in various shapes and sizes, and volumes range from 2L up to 9.5L - with the latter being a half-sized corny keg.
Regardless of what kind of keg you’re working with, the basic premise of how it functions remains the same. The keg is filled with beer (more on this later), and then whatever space is left within the keg (referred to as “headspace”) is filled with gas. Carbon dioxide gas is most commonly used, though some beer styles like Guinness use a mixture of nitrogen and carbon dioxide.
The gas applied to the headspace is absorbed into the beer which carbonates it and makes it fizzy. The level that is absorbed depends on several factors - such as how much gas pressure is applied into the headspace and the temperature of the beer. Colder beer absorbs more gas more readily, and eventually the beer will reach a point where it stops absorbing gas from the headspace and reaches equilibrium. Carbonation is measured in “volumes”, and you can use a carbonation chart as a guide to know how much pressure to apply to reach a desired level of carbonation at a particular temperature. Carbonation levels vary between different beer styles, but somewhere between 2.4 and 2.6 volumes is a good starting point for most beers.
The keg will feature a tube/line of some sort to allow the beer out - on most kegs this will be a stainless steel tube (called a “dip tube”) that reaches to just above the bottom of the keg which is where the beer is drawn from. Some kegs (like mini or plastic kegs) will feature a vinyl or plastic dip tube that is attached to a ball float (known as a floating dip tube) that draws beer from just underneath the surface of the beer. The dip tube (floating or not) connects to a coupler or ball/pin lock post, then on the other side of this post/coupler a line of plastic or vinyl tubing is connected. The other end of this line is then hooked up to a faucet, tap or beer gun, that when opened allows the beer to flow out of the keg. Since the keg is kept under pressure (from the gas in the headspace), this pressure forces the beer out of the keg via the path of least resistance - which when opened is the beer tap/faucet.
For those visual learners like us, here’s a high quality cross-section diagram outlining the key elements of the most common and popular keg type, the corny keg.
Just like almost every aspect of brewing and brewing equipment, quality is important, and keg quality is no exception. High quality kegs will give trouble free operation by ensuring they don’t leak the two critical things they’re designed to hold - liquid (beer) and gas. The problem with a keg that leaks beer is fairly obvious and will quickly lead to a pool of precious amber liquid at the bottom of your fridge or kegerator. Thankfully these leaks are easily identified since you can see any beer escaping from somewhere it shouldn’t be.
Gas leaks on the other hand are not as easy to identify since carbon dioxide gas is invisible, odorless, and if dealing with a slow leak won’t make any noise. Gas leaks can cause a multitude of problems. Firstly, they’ll mean that you can’t maintain the required amount of pressure in the headspace of the keg to reach your desired carbonation level, thereby resulting in flat beer. In addition to this, if the keg allows gas to escape, it can also let other gas (like oxygen) into the keg which is a guaranteed way to cause beer spoilage to rapidly occur through the effects of oxidation. Finally, there is of course the the financial impact of losing a tank of carbon dioxide gas from a pesky leak.
Nothing beats the convenience of having a draft beer setup at home and pulling your own meticulously brewed beer from a nice shiny tap. Only fancy a half-glass? No problem, that’s all you need to pour out - a luxury you don’t have after opening a bottle or can which will go flat and more than likely oxidize if left opened in the fridge overnight.
In addition to this there’s probably the biggest single benefit of kegs and that is cleaning - specifically the reduced amount of cleaning involved. Most of us when we get into brewing set out with a starter kit and a heap of bottles but quickly realize how painfully laborious it is to clean and sanitize dozens of bottles in preparation for every batch of beer. Add to this the fear of infection and potential bottle-bombs from getting a little lazy with even just one bottle and it’s enough of a worry and hassle for some to give brewing away as a hobby all together.
Cleaning a single keg is such a quick and painless task - especially if you get (or build) a keg cleaning kit - something we’d strongly recommend as the top opening of a corny keg is just a bit too small for an adult arm to fit in for scrubbing. Such a kit typically features a bucket and submersible pump with an attached arm that reaches into the keg. Gas and liquid post connectors can also be included so when the pump is switched on, cleaning solution from the bucket is pumped and shot out through the arm and gas/liquid posts. Simply sit the inverted keg on the cleaning arm, plug it in and away you go - cleaning has never been so easy! And since we’re usually dealing with stainless steel kegs, you can use warm or hot water which often helps to break down any particularly stubborn build up in the keg. Leave it running whilst attending to other tasks in the brewery, or simply sit back with a tasty homebrew and reminisce about the not-so-good old days of scrubbing bottles for an hour or two.
Getting started with kegging can be a relatively cost effective method of packaging your beer. Many of the parts you need to get setup can be found on second hand market places - like corny kegs and fridges for example. No more needing to buy additional bottles after the ones you gave to your friend(s) never came back. No more buying bottle caps, or carbonation drops.
When starting out you also have the option to go with cheaper PET plastic based corny kegs to help reduce the initial financial outlay in getting setup. This is a good way to get going without breaking the bank.
If you’re able to go for stainless kegs though, these will last a lifetime if looked after, with the only consumable parts being a few rubber seals that cost a few dollars to replace and should last at least a couple of years before needing to be swapped out.
Freshness is of paramount importance when talking about craft beer. One of the biggest challenges with maintaining freshness of beer is preventing the effects of oxidation which will negatively impact a beer’s color and cause off flavors often likened to that of wet cardboard or sherry. Combating oxidation is one of the biggest challenges when bottling, and is especially prevalent with the ever-popular hop-forward styles like IPA’s which are much more prone to the effects of oxidation.
With kegs you’re able to leverage the benefit of oxygen-free pressure transfers to get your beer from fermenter to keg which means you can essentially eliminate any contact with oxygen during transfer which keeps your beer fresher for longer. This in-turn will help to improve the quality, shelf life and stability of your beer as well after it has been packaged.
Kegs are very versatile, with some brewers opting to use them as fermentation vessels - also known as “kegmenters”. Many of the benefits of kegs for serving also apply when being used as fermenters. Stainless steel is the optimal material for fermenters because of its light weight, durability, strength, and impermeability to light and oxygen which is ideal for yeast health and preventing oxygen ingress. When fermenting in a corny keg, some slight modification by trimming the steel dip tube so it doesn’t reach as far to the bottom of the keg is recommended in order to prevent too much trub pickup when transferring after fermentation (or simply use a floating pickup tube instead). After accounting for losses from said trub you’ll inevitably end up with a finished volume a little less than the full 19 litre/5 gallon capacity, but it still presents a worthwhile, viable, convenient and cost effective option for many homebrewers, especially when compared to the cost of a brand new pressure capable stainless steel fermenter.
Kegs can also be filled with more than beer - just about any carbonated beverage can be stored and dispensed from a kegging setup. Cider, kombucha, seltzers, soda and hard spirit mixes, or even just sparkling water are all great alternatives to have on-tap and serve from a keg.
There are plenty of different sized kegs available too, meaning if you’re restricted for fridge space you can start off with smaller size kegs, or mix and match kegs of different sizes to utilize as much space as possible within your fridge. You can even set up a “daisy chain” by connecting mini kegs to full size kegs so you always have a mini keg full and ready to take on the go with you at a moment's notice!
Here we have the three most popular storage vessels for beer, so let’s break them down to see what the differences are, and the pros and cons for each. We’ve already covered a lot about kegs, so let’s start with bottles.
No doubt everyone is familiar with beer bottles, but it’s worth noting that not all beer bottles are created equal. Bottles are typically made of glass, and the color of the glass that is used is important. Lighter coloured glass such as clear or green are ineffective at blocking the ultraviolet (UV) light rays that are responsible for beer spoilage that is commonly referred to as “light struck” or “skunking”. Brown bottles are the most effective at preventing this by blocking more of these UV rays.
Beer bottles can present a good packaging option for homebrewers as they’re readily available, and if made of glass are quite robust, being capable of holding a fair amount of pressure, and can be cleaned with hot water and more abrasive/harsh chemicals than plastic bottles. Bottles can be sealed with a capping device, which are easy to find, cheap, and simple to use. Bottles can also be re-used multiple times, but you do need new caps each time you wish to use and seal them.
The problem with bottle caps is that they are known to leak relatively small amounts of air over time, so are not recommended for longer term storage as the effects of oxidation are likely to come into play due to the inevitable oxygen ingress via the lid. You can get special “oxygen scavenging” bottle caps that help with this but opinions on the effectiveness of these are varied.
There are also PET plastic bottles - which are typically brown in colour. As we mentioned above, brown is better at preventing UV light penetrating through to the beer inside. Being made of plastic these bottles are cheap, but they aren’t completely impermeable to air and oxygen so they aren’t well suited to anything longer than short term storage. They’re also harder to clean since you can’t use hot water, harsh cleaners or abrasive brushes on them as it may damage the plastic that can lead to flavor contamination, leaks or deep scratches where nasty bacteria can hide and cause in-bottle infections.
Regardless of whether you’re using plastic or glass bottles, another big issue when packaging into bottles is preventing oxidation when filling. Since an empty bottle is inevitably filled with air from the atmosphere, it’s nearly impossible to prevent oxygen contact when bottling using a simple bottling wand. The solution to this is to purge the bottle with carbon dioxide gas before filling and then using a counter pressure bottle filler or beer gun, but you do need a source of carbon dioxide gas to be able to do this.
Moving on to cans, and you’ve probably noticed a rapid rise in the popularity of cans for the distribution of craft beer in recent years. This is largely due to the fact that unlike bottles, cans are completely impermeable to light and oxygen, making them perfect for storing beer, particularly craft beer that is often heavily hopped and is more susceptible to spoilage from oxidation.
Cans are very much like really small kegs in this way, but unlike kegs are not designed for multiple uses. Being single use means that new cans and lids have to be purchased and used for each batch. A special can seaming machine is also required to seal them after being filled and these start at several hundred dollars for a basic/manual unit - a significant cost especially when compared to the humble bottle capper. Cans are definitely superior to bottles in terms of maintaining freshness for longer periods of time, but it comes at a cost. As with bottling it’s also advisable to purge cans with carbon dioxide gas prior to filling in order to prevent oxidation from occurring after packaging.
Kegs as we’ve been discussing are versatile and an excellent option for storing beer. Like cans they are immune to the damaging effects of light and oxygen when sealed, however some additional equipment is required to get a keg setup and able to be served from. They’re relatively large volume is typically a benefit, but it means some extra work is required if you want to be able to share your beer or repackage it into bottles or cans. A beer gun or counter pressure bottle filler is a worthwhile investment in order to be able to package from your keg into bottles.
In our opinion, the ideal setup is to have your beer packaged into a keg for medium-long term storage, and then use a counter pressure bottle filler to fill some bottles when required for sharing, taking to parties or entering into competitions. Counter pressure bottle fillers are reasonably affordable, and since you’ll have a carbon dioxide gas bottle as part of your keg setup that can be used with your counter pressure bottle filler, you won’t need anything else besides some beer and gas line to connect it all together.
So you’ve finished fermenting your latest batch of beer, and have your shiny new keg ready to go, so how do you go about getting your beer into the keg? There are a number of different options you can use to do this - the quick and easy way, but we’d strongly recommend utilizing one of the more advanced methods outlined below. We’re going to focus on corny kegs since they’re the most popular/common option for homebrewers.
Spike Closed Pressure Transfer Kit
The instructions above are a little brief so don’t be put off if you don’t fully understand it. There are loads of YouTube videos and tutorials that cover these steps in more detail. It’s definitely worthwhile utilizing option 2 or 3 above to all but eliminate oxygen pickup to help your beer stay super fresh for as long as possible.
Now that we’ve sold you on the benefits of kegging, you’ll be wanting to know exactly what you need to get your kegging setup underway. Let’s break it down now with all the basic equipment required to get going.
One of the most important things you’ll need is something to store your kegs in to keep them cold. You can opt for a purpose built “kegerator” - a small fridge custom designed for holding kegs and with built-in provisioning holes for a font to be attached that your beer taps are affixed to. These kegerators can be a little expensive though, so alternatively you can make your own “kegerator” or “keezer” using a new or second hand fridge or freezer.
Second hand marketplaces often have used fridges or freezers at really affordable prices and are well worth considering when starting out. Some care needs to be taken when drilling holes in fridges to feed lines and install taps to ensure you don’t hit any refrigerant lines or other components hidden within the fridge walls or body. If using a chest freezer a timber collar is often built and fitted between the freezer body and the lid. The collar serves as a place to mount your taps and also raises the lid height to ensure a full size corny keg will fit inside with the lid down. There’s loads of guides and info on building either of these, and as a bonus, a fridge or freezer for kegging can also be used as a fermentation chamber to allow for temperature control during active fermentation - win-win.
Beer taps are fairly self explanatory and are relatively cheap. There’s plenty of different colors and styles available, but we’d recommend sticking to popular and well known brands as a dodgy or leaking tap could have rather dire consequences!
Shanks are what allow you to connect a beer line to your tap, and help hold your tap in place or mounted to a surface. If you’re mounting your tap to a fridge door, you’ll need a relatively long shank (they can be as long as 5 inches) which features a flange, coupling nut to connect to the tap, and a locking nut on the other end to hold the shank in place. If mounting to a purpose built font or tower, a small form factor shank can be used.
Another option if you don’t want to build a freezer collar or drill holes in a fridge to mount your taps to is to use a beer gun (sometimes called a pluto gun), or a picnic tap and leave it connected and sitting on top of the keg inside your kegerator/keezer.
Obviously you’re going to need at least one of these, but be warned, you’ll almost definitely end up buying more. We’d recommend going for corny kegs and if your budget allows go for the stainless option straight away. Otherwise, if money is tight or you’re just dipping your toes in the water to see if kegging is for you, a plastic based PET corny keg may be a better option to start with. Make sure you get ball lock posts as they’re much more common than the old pin lock style. Second hand market places are also a good place to pick up stainless corny kegs at bargain prices - old and damaged seals can be quickly and easily replaced for only a couple of bucks, but be wary of any other significant damage, particularly to the lid opening that may prevent it from sealing properly when closed.
You’ll need a source for carbon dioxide gas for carbonating and dispensing from your keg. They come in a number of different sizes and what size you should get will largely depend on where you’re going to store it. Purpose built kegerators often have brackets on the back that can neatly hide a smaller CO2 bottle. Larger bottles are more cost effective but are taller so use more vertical space, though you won’t have to get them refilled as often. For small party keg setups you can use small soda stream style CO2 cylinders as well.
CO2 bottles hold loads of carbon dioxide gas at a much higher pressure than what we need for using in a keg system. For this reason, a CO2 gas regulator is required to control and reduce (regulate) the large pressure from the CO2 gas bottle to a much smaller pressure for use in our keg(s). Regulators are gas type specific so make sure you get one designed for use with CO2 gas/cylinders. Most CO2 cylinders use a Type 30 connection. If you’re going for a smaller variety of cylinder like a soda stream you’ll need to make sure you get a regulator with a suitable connection type to match.
These are small little devices that connect your gas and liquid lines to the gas and liquid posts on your keg. Ball lock disconnects are the most common, so go for these assuming you’ve also got ball lock posts on your keg(s). For each keg you’ll need one gas disconnect and one liquid disconnect. You’ll also need to decide on whether to use a disconnect with a barbed fitting to attach your beer/gas line to, or use push in fittings - more on these shortly.
You’ll need beer and gas lines which are plastic or vinyl lengths of hollow tubing that the beer or gas will travel through. You can use the same type of line for both beer and gas, and they’re typically measured by internal diameter (ID) and outer diameter (OD). The gas line connects from the output valve of your CO2 regulator to the gas disconnect fitted to your keg. The beer line connects from the liquid out post on your keg to the shank with the tap/faucet that you’re dispensing your beer from.
In order to connect your liquid/gas line to your liquid/gas disconnect, you have a couple of options. The first is to use a disconnect with a barbed connection with which you slide the beer or gas line over the barb and secure it in place with a clamp. The alternative is to use push-in fittings that require no clamps or special tools, and feature special locking mechanisms that create a leak-proof seal when the liquid/gas line is inserted into the fitting. We’ve always used push in fittings with good results, but others experience endless issues with leaks and swear by the reliability of barbs and clamps. Go with whatever you’re more comfortable with or are able to get more easily.
So there you have it, a crash course in all things kegging. There is quite a bit of information to unpack, but it’s well worth investing the time if you’re interested in setting up your own draft beer system at home.
As we’ve covered above, the benefits of kegging are plentiful - reduced cleaning time and effort is just one major advantage, but with the versatility you can leverage from a keg setup like having a keg to use as a smaller stainless fermenter, plus a dedicated beer fridge you can use for temperature controlling fermentation, there’s loads of reasons why you should look at starting to package your beer into kegs.
If money is an issue then consider slowly building up your inventory of all the little bits and pieces you need to get going rather than trying to purchase everything all at once - it’s also worth considering the cheaper option of plastic kegs to help keep costs down as well as scouring used marketplaces for second hand items at bargain prices.
Your local homebrew store will more than likely have everything you need to get going too, and can give further advice on your own particular setup if you need help.
Since beer stored in a keg is in a completely sealed and sanitary environment - free from the damaging effects of oxygen, light and any other contaminants, the length of time it can be stored is quite high. Assuming the keg has been completely purged of any oxygen prior to filling you can expect at least several months but results will vary depending on many factors like storage temperature and even the type of beer you have. Heavily hopped beer styles like IPA’s are best when consumed fresh, usually within a couple of months.
Other styles may benefit from a longer aging period before they hit their prime, so aging beers in a keg is not an uncommon practice. Chances are you’ll finish drinking whatever you have in your keg long before it goes bad!
A keg that has run dry is often referred to as being “kicked” or “blown”.. and you’ll have no doubt when it happens as you’ll start to get small amounts of foam and loads of noisy gas coming out of the tap upon opening it. It’s a bittersweet experience as it’s always sad to have run out of beer in a keg, but it presents an opportunity to clean it and fill it again with more beer (or something else)!
Absolutely! And this is one of the great things about kegs - they are designed to be refilled and used over and over again.
Kegs are capable of holding much more than just beer. Any carbonated beverage can be stored and served from a keg - cider, kombucha, pre mix spirits like bourbon and cola mixtures, seltzers, or plain old sparkling/soda water are all great options, and are often used as bargaining chips with partners to get a kegging operation underway.
Peter is a homebrewer from Sydney, Australia. Like many others before him, Peter got started in homebrewing after being gifted a homebrewing starter kit from his wife way back in 2015. A simple hobby soon grew into a borderline obsession, and Peter has been documenting his brewing journey in recent years with recipes, guides, brew days, equipment reviews, and other insights through his website Birallee Brewing - named after the street where it all began. Peter loves researching and finding ways to improve his beers, as well as trying different beer styles and brewing techniques.
My name is Ethan Keller, owner and cidermaker at Cache Cider in Milwaukee, WI. Today we’ll chat about a winemaker’s approach to producing small batch, low intervention hard cider.
I made my first hard cider in 2011, and enrolled in wine school starting in 2019. I’m a musician by trade, but built the city’s first licensed winemaking facility during the 2020 pandemic.
There are still a lot of misconceptions about hard cider. Let’s answer some frequently asked questions people have about small batch cider making, so let’s start with the basics…
Cider is an alcoholic beverage that is typically made from fermented apple juice. It has a long history and is enjoyed in various forms in different parts of the world. The production process involves crushing apples to extract the juice, which is then fermented using yeast. This fermentation process converts the sugars in the juice into alcohol, resulting in a flavorful and slightly carbonated beverage.
Ciders can range in taste and sweetness depending on the type of apples used and the fermentation process. Some ciders are dry and crisp, while others may be sweeter and more fruity. They can also vary in color, ranging from pale yellow to deep amber.
Hard cider refers to a specific type of cider that contains alcohol. It is made through the fermentation of apple juice, just like traditional cider, but with the addition of yeast to convert the sugars in the juice into alcohol. The fermentation process can take anywhere from a few weeks to several months, depending on the desired flavor profile.
Hard cider typically has an alcohol content ranging from 4% to 8% ABV (alcohol by volume), although some ciders can have higher alcohol content. The taste and characteristics of hard cider can vary widely depending on factors such as the variety of apples used, the fermentation process, and any additional ingredients or flavors added during production.
In recent years, hard cider has gained popularity as a refreshing alternative to beer and wine. It is available in various styles, ranging from dry and crisp to sweet and fruity. Some ciders may also be infused with additional flavors, such as berries, spices, or hops, to create unique taste profiles.
There are many kinds of ciders. Sweet. Dry. Carbonated. Still. Germany has apfelwein. Spain has cidre. French cider regulations determine how cider in Normandy is made. Countries like the US and Australia have strong cider traditions like European countries do.
“Apple cider” is non-alcoholic apple cider. “Hard cider” is apple cider that has been fermented, and contains alcohol.
The taste difference between apple cider and hard cider will vary depending on the cider-making technique. Generally, hard cider is less sweet than apple cider, as the yeast has metabolized many to all of the sugars in the beverage.
People’s tastes are different and that should be celebrated. Some individuals love dry ciders, some people prefer sweeter ones. Some like more acidity, some people don’t. Some like more astringency, some do not enjoy much mouthfeel. Some enjoy funkiness, complexity, and aftertaste, and some people appreciate a more clean and simple beverage. Sometimes folks are in different moods for different things and different times. All of that is all good and great.
With all that being said, it's often easier for people to begin talking about winemaking more in the context of faults, or what is undesirable, than what is desirable. It’s any winemaker’s prerogative to lean into the flavors they love, and avoid tastes they don’t particularly enjoy. They can still approach the winemaking process in much the same way, as one of “mitigating risk” and avoiding errors. Ultimately, it’s quite subjective, so there’s no real reason to shame what someone enjoys drinking.
Yes. The U.S. Government allows cider makers to display it on their label by default.
ALL APPLES ARE CIDER APPLES! It also depends where you are and what you like. Some places are planting Dabinett, others are tearing those trees out for something else. Golden Russet is high in sugar and used often. Redfield is used in many cidermakers’ “Rose blends” lately. Newtown Pippin is a popular apple among cidermakers, and is sometimes seen as a single-varietal hard cider.
I personally prefer red-fleshed apples like Pink Pearl, Mountain Rose, and a rare one called Winter Redflesh.
Because my winery still makes small batches, I’m able to stick to a simple, low-intervention process: Acquire apples. Grind apples in a fruit hopper. Press apples. Inoculate apple must with yeast. Ferment three to seven days average (depending on containers, conditions). Add potassium sorbate and crash (cold stabilize). Rack and serve. Some natural and forced carbonation occurs, depending on the serving containers, but that’s basically it. Rarely do I back sweeten, or add sulfites (except to maintain color of a red-fleshed apple cider).
A container as small as a one-gallon glass jug can be suitable for fermenting a hard cider. Some kind of sanitation Technically, yeast isn’t necessary.
While both cider and beer are fermented beverages, there are several key differences in the process of making cider compared to making beer. Here are some of the main distinctions:
To make cider at home, you will need a few essential pieces of equipment. Here are the basic items you'll need:
It's important to note that the equipment needed may vary depending on the scale and complexity of your cider-making process. Starting with basic equipment is sufficient for small-scale home cider production.
Ultimately, it depends on the cidermaker’s prerogative. Although “cider” (or perry) as a specific alcohol TAX CLASS can only reach up to 6.9% ABV, the ingredients that make an alcohol a “cider” (or perry) can still become a beverage that exceeds that ABV. In other words, one can still call a beverage whose ABV is 7% or above a “cider” (or perry), if it uses apples (or pears), but it has legally entered the “wine” tax class.
Yes. Although fresh pressed ciders can sometimes cause some people minor abdominal discomfort or indigestion. Pay close attention to the labels on apple cider from local orchards. Occasionally, these local apple ciders may be untreated, thus carrying a miniscule risk, as opposed to store-bought apple ciders with added preservatives.
Cider is wine; legally and literally. It’s fruit wine. With that being said, there are all kinds of minutiae and crossover, especially in today’s day. Laws also vary from state to state. Some facilities are actually breweries that sell “ciders” and they get away with it by using small amounts of grains and malts, and not using the word cider on their labels. Interestingly enough, sake is often referred to as ”rice wine” but a U.S. winery can’t legally produce it because it’s actually a brewing process; the sugars are extracted from the starch in grains. The ultimate goal is not to deceive the consumer, but an alcohol producer also must stay within their own legal boundaries.
You can put almost anything in a cider. Other fruits and juices are often added. Honey is commonly used. Spices or hops can be a pleasant addition. Some cidermakers flavor ciders with hot peppers. Some blend their ciders with caffeinated teas. One could also add spirit liquor to cider, making a fortified wine. Nowadays, some ciders are getting infused with cannabinoids as well.
Ethan Keller is a singer-songwriter from southeastern Wisconsin, and owner of Milwaukee's first cidery, Cache Cider (est. 2020). Ethan has been making ciders and wines since 2011, and received his winemaking certificate from Texas Tech University in 2023
]]>Lately non-alcoholic beer is all the rave, so we decided to jump on that train and take a closer look at brews without the buzz.
Non-alcoholic beer is, as the name suggests, beer that contains little to no alcohol. Sounds simple, right? But there's more to this tasty concoction than meets the eye.
ABV stands for Alcohol By Volume, and it's the standard measurement of how much alcohol is present in a beverage. It's typically expressed as a percentage, and it's what separates your average beer from its non-alcoholic cousin.
Your regular beer usually has an ABV between 4-6%, but it can vary depending on the style. For example, a hearty stout might clock in at 8% ABV, while a light pilsner might only have 3.5%.
Non-alcoholic beer typically has an ABV of less than 0.5%, which is a significant reduction compared to its boozy counterparts. How do they do it? The magic lies in the brewing process, which we'll explore in just a moment.
Alcohol-free beer is the strictest category of non-alcoholic beer, containing absolutely no alcohol. These brews are perfect for those who want to enjoy the taste of beer without any of the effects of alcohol.
Low-alcohol beer contains only a small amount of alcohol, usually between 0.5-1.2% ABV. These beers are great for folks who want a little buzz without going overboard.
The process of making non-alcoholic beer is surprisingly similar to regular beer production, with one key difference: the removal or prevention of alcohol formation. This can be done through a variety of methods, including vacuum distillation, reverse osmosis, and arrested fermentation. Each method has its pros and cons, but the end goal is the same: a delicious beer with little to no alcohol content.
Vacuum distillation is a process that involves heating the beer under a vacuum to lower the boiling point of alcohol. This allows the alcohol to evaporate at a lower temperature, which helps preserve the beer's flavor and aroma. Once the alcohol is removed, the beer is cooled and carbonated, resulting in a non-alcoholic brew that retains much of its original taste.
Pros:
Cons:
Reverse osmosis is a filtration method that involves forcing the beer through a semipermeable membrane to separate the alcohol and water from the rest of the beer's components. The alcohol and water mixture are then evaporated, leaving behind a concentrated beer flavor. This concentrated beer is then mixed with water to achieve the desired alcohol content or lack thereof.
Pros:
Cons:
Arrested fermentation is a method that involves stopping the fermentation process before the yeast has a chance to convert all the sugar into alcohol. This is typically done by cooling the beer quickly, which slows down the yeast's activity and effectively halts the production of alcohol. The result is a beer with a lower alcohol content and a slightly sweeter taste.
Pros:
Cons:
Each of these methods offers a unique approach to creating non-alcoholic beer, with their own set of advantages and drawbacks. Brewers often choose a method based on the desired flavor profile, available resources, and their own personal preferences. The end result, regardless of the method, is a tasty non-alcoholic brew that can be enjoyed by anyone, from the designated driver to the beer aficionado looking for a lighter option.
In many ways, yes! Brewing non-alcoholic beer can be a bit more complex than regular beer, requiring additional steps and specialized equipment to remove or prevent alcohol formation. But the extra effort is worth it when you're sipping on a refreshing, guilt-free beverage.
Non-alcoholic beer offers several benefits, such as being a lower-calorie option, promoting better hydration, and allowing you to enjoy social events without the negative effects of alcohol. Plus, it's a great way to expand your palate and discover new flavors.
Just like regular beer, non-alcoholic beer comes in a variety of styles, from hoppy IPAs to rich stouts. When choosing a non-alcoholic beer, consider your personal taste preferences and what you enjoy in a traditional beer. Don't be afraid to try different styles – you might be surprised at how much you enjoy a new flavor!
Non-alcoholic beer is a fantastic alternative for those who want to enjoy the taste and social aspects of beer without the alcohol content. With a rich history, a variety of styles, and numerous benefits, it's no wonder that non-alcoholic beer is gaining popularity among beer lovers. So, next time you're craving a brew, why not give non-alcoholic beer a try? You just might find your new favorite beverage.
While "healthy" can be subjective, non-alcoholic beer does offer some benefits, such as fewer calories and better hydration compared to regular beer. As with any beverage, moderation is key—it's always wise to maintain a balanced diet and lifestyle.
Although non-alcoholic beer has a very low alcohol content, it's best to consult your doctor before consuming any amount of alcohol during pregnancy. They can provide personalized advice based on your individual circumstances and needs.
Non-alcoholic beer contains little to no alcohol, so it shouldn't impair your driving abilities. However, laws regarding alcohol consumption and driving may vary by location. Always check local regulations and use common sense to ensure your safety and that of others on the road.
Nope! Non-alcoholic beer typically contains less than 0.5% ABV, which is not enough to give you a buzz or cause intoxication. You can enjoy the taste of beer without the alcohol-related effects.
Laws regarding the consumption of non-alcoholic beer by minors may vary depending on your location. It's best to check your local regulations before enjoying a non-alcoholic beer if you're under the legal drinking age.
Want to learn more about non-alcoholic beer or give it a try? Check out Go Brewing by visiting them in the taproom or ordering online!
Josh Lindquist is the Continuous Improvement Manager at Spike Brewing. When he’s not immersed in his work (which he absolutely loves by the way) he can be found rock climbing, playing sand volleyball or researching the hottest trends on the newest tech gadgets.
Unleashing a cascade of bubbles, a shimmering amber allure, and a symphony of flavors - that's the magic of beer. But what if I told you, the joy isn't just in sipping that perfectly crafted pint, but also in brewing it?
Hi, I’m Josh from Spike, and we’re going to chat about the best hobby in the world! Whether you're a craft beer aficionado or a newcomer to the world of ales and lagers, homebrewing can offer a rewarding, hands-on experience that takes your love for beer to the next level.
So, grab a pint, sit back, and let's explore why homebrewing might just be your next passion project. It's time to dive into the brew-tiful journey that awaits!
Homebrewing, much like my experiences with rock climbing, is an exercise in fun, exploration, and constant discovery. Each batch is an opportunity to try something new, like crafting a unique IPA with fruity undertones, or maybe a rich stout that’s as dark as a moonless night. There's always a new summit to conquer, a new recipe to perfect.
Without a doubt! While your initial outlay on brewing equipment may feel significant, in the long run, you'll discover that crafting your own beer can be much more economical than regularly purchasing six-packs or growlers from your local brewery. It's a bit like dining at home versus eating out; the initial cost of kitchenware and ingredients might be high, but the savings accumulate over time. Brewing your own beer offers a similar advantage – with every batch, you'll notice more pennies staying in your pocket.
Much like composing a melody on a guitar, brewing is an art. It's a chance to get those creative juices fermenting, from designing unique recipes, combining unusual flavors, to even crafting your own beer labels. The sky (or should I say, the brew kettle) is the limit.
This hobby can teach you a ton about science, history, and culture. Understanding the fermentation process, the origin of different beer styles, and even the cultural significance of beer in various societies can make you feel like a beer archaeologist. It's like decoding hieroglyphs on a cave wall, but the artifact is a pint of beer!
Brewing your own beer will deepen your understanding and respect for the craft. Each sip of a commercially available beer becomes a learning experience, as you'll start to discern the flavors and techniques used in its creation. It's the difference between viewing a mountain from afar and intimately knowing its crags from numerous climbs.
Sharing a bottle of your homemade brew is a wonderful ice-breaker. Joining a local homebrew club or attending beer tasting events can open up a whole new social scene. Plus, who doesn't love a good brew-and-banter session?
In this fast-paced world, brewing your own beer can provide much-needed mindfulness and relaxation. The methodical, deliberate steps of brewing are like the calm, focused stance of an archer - the world fades away, leaving only you and your craft.
By brewing your own beer, you have control over your environmental impact. You can choose organic ingredients, minimize packaging waste, and even compost spent grains. It’s one more step toward being a more conscious, eco-friendly beer drinker.
Many professional brewers started as homebrewers. If you find that you have a real knack and passion for brewing, it could open doors to a new career or side hustle. Remember, the steepest mountain trails often lead to the most exhilarating views.
Just like nailing that difficult rock climbing route, successfully brewing your first batch of beer is a massive confidence boost. Each small victory in your brewing journey can help you to believe in your ability to learn, grow, and conquer new challenges.
And there we have it! A roundup of ten irresistible reasons to dive headfirst into homebrewing. Whether you're already captivated by the world of craft beers, a DIY devotee looking for the next exciting project, or a curious explorer hunting for a fresh, creative outlet, homebrewing presents a perfect blend of challenge, creativity, and profound gratification.
So, let's raise a glass to the brewing adventures that lie ahead. After all, every great journey begins with a single sip!
Starting costs can vary based on the scale of your brewing setup. At Spike we offer products for the complete beginner to the Nano Brewery scale. Check out our quizzes on our site and reach out to our Customer Service team so we can help find the right equipment for you!
In most places, yes, but it's essential to check your local laws and regulations regarding homebrewing.
From brew day to sipping your homemade beer, it typically takes about 4-6 weeks depending on the beer style. The brew day takes approximately 4-6 hours, with different beer styles taking several weeks to ferment.
Most jurisdictions have specific laws governing the sale of homemade alcohol. In many places, it's illegal without the proper licenses and permits.
The main difference comes down to the type of yeast and fermentation temperatures. Ales use top-fermenting yeast and ferment at warmer temperatures, while lagers use bottom-fermenting yeast and ferment at cooler temperatures. Each offers a unique flavor profile and characteristics.
Every beer recipe differs, but the four fundamental ingredients remain the same: water, malted grain (usually barley), hops, and yeast. The balance and varieties of these ingredients are what create the diverse world of beer flavors we enjoy. Check out Spike’s recipe section on our website! We have curated fantastic catalog of brews from expert brewers.
For beginners, a basic homebrewing kit is recommended. This usually includes a kettle with a heating source, fermenter, thermometer, and cleaning supplies. As you advance, you can invest in more specialized equipment.
Absolutely! Part of the joy of homebrewing is the experimentation. You can alter existing recipes or create entirely new ones. Remember, the best beers often come from a brewer's unique creativity.
Yes, it's safe as long as you follow some basic rules. Cleanliness is crucial to preventing bacterial contamination, and careful handling of equipment. Always use caution when working with boiling water and any pressure during fermentation.
Definitely! While the process and ingredients differ, the principles of fermentation are the same. Many homebrewers expand into making cider, wine, or even mead.
Hops play multiple roles in beer making. They add bitterness to balance the sweetness from malt, contribute to the beer's aroma, and have antiseptic properties that can prolong the beer's shelf life.
While the consumption of the final product is reserved for those of legal drinking age, the brewing process itself can definitely be a family affair. There's plenty of opportunity to teach kids about the science behind brewing, and they can help with tasks like bottle cleaning and label designing.
The key to improvement is simple - practice! As with any craft, the more you do it, the better you'll get. Take notes on each batch, including what worked and what didn't, and don't be afraid to seek advice from fellow homebrewers or online communities.
After the beer is bottled and capped or kegged, it should be stored upright in a cool, dark place. Once refrigerated let it remain at that temperature. Proper storage will help the beer age correctly and maintain its flavor.
Josh Lindquist is the Continuous Improvement Manager at Spike Brewing. When he’s not immersed in his work (which he absolutely loves by the way) he can be found rock climbing, playing sand volleyball or researching the hottest trends on the newest tech gadgets.
]]>
Hops are flowers, or cones, that typically grow on a vine of the female hop plant. Hops are used for bittering, flavor, aroma, and also help preserve beer. They are what makes beer-beer. Some experts say that if beer doesn’t include hops that it’s not beer. Traditionally, it was thought hops only added bitterness to beer. However, over time we’ve come to use hops differently and now they lend themselves to flavors of citrus, resinous pine, earthiness, and more. Not only do they offer these flavors and aromas but hops have been thought to lend themselves to stability. Most people probably know the story of the British sending their beer to India in the 1700s. They added more hops to lengthen the shelf life of the beer for its long voyage across the world. Of course, this is how you now get the name India Pale Ale (IPA). Hops have long played an important role in many aspects of brewing.
Before hops, brewers would add a few different herbs to balance the sweetness of beer. While it was common practice to use these herbs, someone somewhere did a homebrewing experiment that has lasted centuries. They added hops to their wort! These early varieties were probably one of the noble varieties we now rely on (more on noble hops later). Early Europeans knew that hops added a great flavor to their beer, and eventually realized it had properties to help lengthen the shelf life too.
Hops potentially originated in Asia and have been grown for a very long time on Earth. Some scientists suggest hops originated over one million years ago. Beer is roughly 9,000 years old, if not older, and although hops are old, they’re relatively new to brewing. The Smithsonian credits monks in Germany for being the first individuals to use hops between 700 and 800 CE. That’s only thirteen hundred years of beer with hops in it! While it sounds like a long time, it’s not in the grand scheme of history. Prior to hops, brewers used herbs to balance the sweetness in their malt beverages. They called this beverage Gruit.
Following the turn of century in the year 1000 CE, hops became more common and by 1516 they were law in Germany. Reinheitsgebot, the beer purity law, said beer could only be made of water, malt, and hops. Yeast of course was not known at this time so it wasn’t included in the original law. This law put hops on the map for good. From there forward, you couldn’t get a beer without it in that part of the world, which grew in popularity.
Hops were in very high demand in much of Europe throughout the 1600s and 1700s. This was due to the increased demand in beer and the fact that they needed to preserve it. The demand for beer continued to increase as the water was unsafe to drink in much of the world. It needed to be boiled and unbeknownst to them, boiling the wort killed bacteria in the water. As 1870 approached and Louis Pastur developed the process of Pasteurization, the demand for hops decreased.
In the late 1800s, scientists came to understand alpha acids and their link to be the main bittering agent in hops. After 1900, scientists and growers started to find a way to increase alpha acids in hops as you could increase your yield without growing more hops. Following this discovery, many growers began to experiment with varieties and cross pollination.
Hop yards in New York were booming in 1850 and around this time, hop fields were being established in Oregon and Washington. Bringing science and geography together meant developing mold resistant, higher alpha varieties, in optimal growing locations such as Yakima Valley in Washington and the Willamette Valley of Oregon. Throughout the 20th century, many brewers relied on varieties like cluster, Fuggle, and hallertau as their go-to varieties. It wasn’t until the 1970s and Sierra Nevada Pale Ale that we saw varieties such as cascade come along and become popular.
Today brewers are concerned with varieties that lend themselves to high flavor and aromatics. Citra, Mosaic, Simcoe, and Galaxy all come to mind. These are newer varieties. They all took a decade or longer to come to the market as breeders work hard on finding varieties that meet alpha acid requirements, offer natural deterrence to mildews, and are flavorful and aromatic. Maybe the next great variety is just being planted as you read this!
Hops come in over 150 varieties, each of which has its own characteristics. There are different sub species of hops across the globe. Hop growers and scientists have broken down these sub species into even more specific characteristics such as; aroma hops, flavor hops, bittering hops, dual purpose hops, noble hops, and high-alpha varieties. These categories become a little easier to navigate once you use hops more and familiarize yourself with their uses. I’m not an expert by any means on this subject, but it provides a brief overview of how so many hops can be used in various ways to help make you a better brewer.
Ales and lager hops can vary. When you think of lager beer, you think of clean, crisp, and light beer. Nothing in these beers is generally over-the-top. Lagers are traditionally brewed with Noble Varieties of hops. These include Hallertau Mittelfruh, Saaz, Tettnanger, and Spalt. These varieties are traditional to European brewing and were some of the first to be used in beer. They offer subtle flavors that can be earthy, grassy, add spice, and mild citrus flavors. Lager hops are great to use throughout the boil at any point and occasionally dry hop. They’re often lower alpha acids, meaning their oil contents are lower than hops that may be used in ales.
When you think of ale, a more flavorful, fuller bodied beer comes to mind. Whether it’s a pale ale, IPA, or stout. They’re more bold and flavorful than most lagers. Some varieties of ale hops originated in the U.K. These UK varieties serve as a parent to many of the main hops used in American Brewing today. Fuggle or Golding hops are at the forefront of lineage for varieties like Citra, Centennial, Chinook, Cascade, and Nelson Sauvin. Today, the hops used in many ales brewed in the United States are often grown in the Pacific Northwest of The United States, Australia, and New Zealand. These hops are usually much higher in alpha acid than noble varieties. Usually 8-20% alpha acids can be found in varieties such as; Citra, Mosaic, Simcoe, Cascade, Columbus, Galaxy, Nelson Sauvin. These hops all offer flavors that can range from fresh fruit, dank pine, bright earthiness, and white grape.
These newer American, Australian, and New Zealand Varieties are usually used for later additions in beer, whether it be late boil additions, whirlpooling, or dry hopping. These are all wonderful ways to utilize these varieties. Don’t let these traditional uses hold you back from using a new world variety of hop in a lager or a noble hop in an ale!
Hops have a plethora of flavors and aromas. Pine, fresh fruits such as pineapple, melon, berry, and orange come to mind. There are earthier hops such as Nugget that offer great bittering qualities and late addition characteristics. Since hops are grown in different locations you may get a variety like Simcoe that can be fruity, piney or just downright dank. Citra is always a go-to for citrus flavors. Recently, Mosaic has been very blueberry and slightly dank. These varieties are widely used in brewing and change year-to-year due to weather, sunlight, oil content, and terroir of the regions they’re grown.
As discussed before, flavors and aromas are driven by hop additions after the 30 minute mark. Today's brewing world is really driven by IPAs. Whether it be west coast IPAs or hazy IPAs, they probably include late additions if not whirlpool additions and dry hop additions. Those hops contain oils, each of which has its own flavors and aromas and are imparted at different temperatures. Scott Janish has done tons of research on this and if you’re really interested in it, I’d recommend reading his book, The New IPA: A Scientific Guide to Hop Aroma and Flavor and check out his website.
As a general rule, if I’m really looking to drive flavors and aromas in my IPAs, I whirlpool for 30 minutes with 1.2-1.5 ounces of hops per gallon. This imparts a little bitterness but overall drives the fruity flavors you want. I then dry hop one or two times depending on the beer.
I’d say standard operating procedure here is to add at least one dry hop right as fermentation is ending. Studies have shown that “hop creep” can occur if added post fermentation. This is where your beer starts to re-ferment due to enzymes in the hops reacting with unfermented carbohydrates and while yeast is still in suspension in the beer. In order to avoid this, you can just lower the temperature of your beer to below that of fermentation temp of your yeast. Make sure you have positive pressure on your fermenter when lowering the temperature of the beer as it will suck in any sanitizer you have in an airlock. Next, you’ll want to release that pressure and purge your fermenter with CO2 so you don’t pick up any oxygen. Finally, toss in your hops, add pressure back to your tank and leave the beer at your desired temp until you want to cold crash. The temperature you choose to dry hop can be 60°F, if it’s an ale, or lower. I have slightly experimented with this. I’ve done it at 60°F and as low as 40°F. The results will yield different flavors depending on hop variety. Experiment with your favorite varieties and see what you come up with!
Fresh hops are exactly that. Fresh, right off the vine. Also called wet hops. They deliver a unique flavor to beer that can only be found in using freshly picked hops. They’re bright and saturated with the oils that you want in your beer, but you may not know the alpha acids of fresh hops. Once these hops are harvested, they must be used immediately to get the fullest potential in flavors and aromas out of them. More than a few days' time could really impact the quality of the hops.
Pelletized hops have gone through the drying and pelletizing process and if stored properly will last more than a year in your freezer. These hops are consistent in alpha acids in a harvest year so you can store them and rely on their bitterness/flavors. Pellets often come in every variety possible, whereas fresh hops are limited in available variety.
Homebrewers should jump at the opportunity to use fresh hops if they get the chance. My advice to you is to create a hop-back in your mash tun or use a muslin bag to steep your fresh hops in your hot wort before you transfer to your fermentation vessel. Also, I’d recommend using 5-6 times the amount of fresh hops as you would pellets.
Just like milk, eggs, and cheese, hops are perishable. They must be stored in ideal conditions in order to remain fresh. You are trying to preserve the potency of your hops. Alpha-acids degrade over time and you want to make sure you are using your hops in a timely manner or storing them properly. There are a few different ways you can help preserve your hops and protect your hops against spoilage.
Hop companies today are shipping their hops in nitrogen purged, vacuum sealed, light resistant, resealable containers. They are also stored in a freezer. There are a couple takeaways that you can learn from just from this quick analyzation of packaging. I’m sure you can’t purge your containers with nitrogen, but you could purge them with CO2. Next you should invest in a vacuum sealer. This will help remove oxygen from the bag you’re storing your hops in. If you don’t own a vacuum sealer, just make sure to squeeze as much air out of the bag as you can. Hopefully your hop grower or company you buy your hops from sends them in a resealable bag or container for this method to be effective. Secondly, store them in a freezer! Unopened hops can be stored for up to five years. Once you open your hops you could increase the storage from 6 months to 1-2 years if you’re properly re-packaging your hops!
Matt Dailey lives in Titusville, Pennsylvania and is a high school emotional support teacher. He has a bachelor's degree in history from Southern Illinois University and a Masters in Special Education from Slippery Rock University. He and his wife have 2 boys, ages 4 and 1. If he’s not spending time with his family or brewing and the weather allows, you can find him on the golf course.
]]>
As brewing enthusiasts we are all aware of the importance of malt in beer, it provides flavors, color, body, and is the main food source for the yeasts. My name is Dan Bies, I’ve been a Pilot Brewer and Technical Representative at Briess for 15 years, and this is my perspective on all things Malt.
All-grain and extract brewing differ in how the wort is prepared. Extract, also known as Concentrated Brewers Wort, is made the same way most brewers make wort, by mashing grains in hot water, separating the sweet liquid from the solid grain remnants in a lauter tun, and then boiling the liquid wort. Brewers will add hops to the wort at this point, but most extract manufacturers do not, instead the boiled wort is sent through a vacuum-evaporator which utilizes low-pressure low-temperature boiling to gently remove most of the water making a stable syrup, in doing so they concentrate the liquid 5-7 times the strength of normal wort.
All-grain brewing is brewing without malt extracts. However, a significant proportion of people that consider themselves all-grain brewers will use malt extracts to increase their fermentable sugars in high alcohol brewing.
Extract brewing is brewing where extract is used to obtain a significant portion of the dissolved sugars in the brewing process. Beer can be made with just malt extract and no grains, but many of the recipes and brewing kits available to homebrewers contain both.
I think the better question is, “who should start with all-grain brewing?” Are you curious about brewing but don’t know how much time and money you want to invest into this hobby… then extract. Do you obsess over details and value full control… then you may want to jump into all-grain. If you start with extract brewing your investments in equipment will still be valuable if you decide to move to all-grain. All-grain allows more flavor options from malt, but even in extract brewing there are a wide variety of flavors from yeasts, hops, and spices that allow a wide creative range.
All-grain brewing gives the brewer the ability to use the full range of malts and grains available. It also allows for adjustments to the mashing process, the brewer has the ability to affect fermentability and body by changing mash parameters, or develop unique flavors though decoction mashing. All-grain brewing places the wort preparation in the brewer’s hands and allows for the freshest malt character possible.
The standard all-grain brewing system allows for good heat retention during mashing and easy separation of the wort from the grain, a basic version would be an insulated container with a spigot and a false bottom to hold the grain particles back when collecting the liquid. Whether extract or all-grain, all brewing requires a heated kettle for boiling, gear to chill the boiled wort, and a container that can be fitted with an airlock for fermentation.
Most of the grains used in brewing are from malted barley but there is also a wide range of different malted and sprouted grains available to brewers, as well as raw and flaked grains. Other types of grain used for malt are wheat, rye and, oats.
Yes. Grains should be milled prior to mashing to get the full benefit from them. Malt is best milled in a roller mill designed to crush the kernels in a manner that exposes the starchy interior but preserves the husk’s shape and allows for easy channeling of the liquid from the grains when it comes time to separate the wort.
NEW Spike Mill Launching Winter 2023
Malt is any grain that has been 1) steeped in water to “wake up” the seed and initiate growth, 2) allowed to grow in a moist room until the center of the seed is softened, and 3) dried to create a flavorful low moisture kernel that can be stored without spoiling.
Malt types are most generally differentiated by the raw material and method of drying. The most common malts are made from barley and are typically dried on a kiln or roaster. Kilned malts are further differentiated by the intensity of kilning and will determine if a malt is a Pilsen, Pale Ale, Munich, etc., and frequently by barley variety (Synergy, Maris Otter, Golden Promise, etc.) Roasted malts can be further differentiated by the condition of the malt going into the roaster. Malts that have been germinated but not kilned will become caramel malt, while kilned malts that are roasted become dry roasted malts, these vary in color from red to dark-black hues and their flavor varies from toasty-nutty to coffee-chocolate flavors.
Base malts are generally referred to as the enzymatic malts that make up most of the grist bill, they will provide the bulk of fermentable sugars in most beer styles.
Specialty malts are malts that are typically used in smaller quantities for their flavor, color, or functional benefits to beer.
Caramel malts that are produced on a kiln have a crystalized interior. These malts are made with grains that are actively germinating (growing), often called green malt. This green malt is heated in a roaster to a temperature where the kernel’s enzymes will break the starch down to simple sugars. Once a large amount of sugar is formed the roaster temperature is increased causing the sugars to caramelize resulting in red color tones, and cooked sugar and candy flavors.
These products start with kilned malts, which contain very little moisture, and are therefore termed dry roasting malts. Lightly dry roasted malt will exhibit red-hues and a toasted-nutty character, as more intense heat is applied the color tones become brown and the flavors are expressive of cocoa and coffee.
Other notable malt types are smoked malts, acidulated malts, and dextrin malts. Each of these are made similarly to the methods described above but with various processing tweaks, such as drying with wood smoke, promoting lactic acid formation in germination, or changing process conditions to increase dextrin content. Dextrin malts also produce foam in beer.
Flaked grains or grain-based syrups are the most common grain adjuncts used in brewing. Flaking is a process that makes starches accessible to malt enzymes. Flaked grains can be mashed as a portion of the grist and will contribute fermentable sugars and grainy flavor. Syrups have the benefit of not having to be mashed, many commercially available grain-based syrups are clarified to be absent of color and flavor. Adjuncts are mainly used to boost alcohol content and lighten the body.
A 5.0% ABV beer will require about 1.4-2.0 pounds of grain per gallon of beer.
The large variety of malt and grains can be intimidating at first but if you are willing to experiment you will quickly develop a feel for how they are used and what flavors are available. More than 15 years since I first started brewing, I’m still benefiting from what I learned in my early failures; keeping me humble and making me appreciate great beer even more.
At Briess, Dan is responsible for brewing and R&D projects, including new product development and process improvement. Dan manages the pilot brewing and pilot plant operations and commercialization of new products in the extract plant. He regularly helps formulate recipes for home and craft brewers and has published articles, posters and given presentations in support of the craft brewing industry.
By Matthew Bush
Crafting the perfect hoppy beer requires a lot of attention to detail, from selecting the right ingredients to carefully controlling the fermentation process. Oxygen is an important piece to that process (for more on this, check out the Spike Oxygenation Kit), but what about oxygen after fermentation?
The cold side of brewing, including packaging, carbonation, and conditioning, can have a significant impact on the final product. In particular, the amount of oxygen that beer is exposed to during these stages can have a significant impact on its flavor, aroma, and shelf life. In this post, we'll explore the concept of cold side low oxygen practices and why they are crucial for crafting high-quality hoppy beers. We'll cover the importance of minimizing oxygen exposure, the various techniques that brewers can use to achieve this goal, and some specific best practices for hoppy beers. Whether you're a homebrewer or a professional brewer, understanding and implementing cold side low oxygen practices can help take your hoppy beers to the next level.
Hoppy beers are known for their bold hop aroma and flavor, which can be easily degraded by exposure to oxygen. Oxidation can cause the beer to develop off-flavors, such as cardboard or sherry-like notes, and can also diminish the beer's hop character. Ultimately, if you're brewing hoppy beers, you want to showcase the aroma and flavor of the hops as much as possible, and minimizing oxygen exposure is one of the most critical steps to achieving that goal.
The cold side of brewing, including packaging, carbonation, and conditioning, presents several opportunities for oxygen to enter the beer. As a result, brewers need to be mindful of these stages and implement specific techniques to reduce oxygen exposure. By implementing cold side low oxygen practices, brewers can ensure that their hoppy beers taste as fresh and flavorful as possible, while also improving the beer's stability and shelf life.
One of the most foundational ways to reduce oxygen exposure throughout fermentation is making sure your fermentation vessel is sealed and oxygen free. One of my favorite ways to achieve this is to ferment under a slight amount of pressure during primary fermentation. This ensures that there is always CO2 displacing oxygen without putting too much stress on the yeast.
The All-In-One PRV makes it super easy to dial in a low setting early on in fermentation, then build or add pressure later without needing to add or remove any fittings. Allowing the pressure to build a bit towards the end of fermentation has the added benefits of blowing off fewer volatile hop compounds (keeping more of that wonderful aroma in the beer), as well as getting a jump start on a pressurized cold crash or carbonation.
Hoppy beers are characterized by the flavors and aromas only achievable through dry hopping. This presents a major challenge when trying to mitigate oxygen exposure, as you have to open the vessel to add hops.
My solution to this is to use a purgeable “dry hopper” that attaches to a tri-clamp port on the lid. The sight glass and funnel are attached to a butterfly valve which is kept open until I’m ready to use it, allowing it to fill up with CO2. When it’s time to dry hop, the valve can be closed, and the pressure released. After adding hops, I add CO2 using the gas in post on the lid, then purge by pulling the pressure relief valve and repeating a few times before dropping into the fermenter.
Using the 3 Port Lid allows me to keep this connected at all times, not having to swap out attachments and risk further oxygen exposure.
When it comes time to cold crash, an oxygen related issue brewers often run into is the vacuum that’s created when dropping temperature. This can lead the vessel to draw in oxygen if mitigation techniques aren’t put in place. The easiest way around this is to ensure you have a fermentation vessel capable of handling pressure.
All Spike’s fermentation tanks can handle up to 15PSI, so there is no problem adding enough positive pressure before cold crashing to ensure the beer can reach equilibrium as the temperatures drop. This is another chance for the All-In-One PRV to shine — with the included gas post you can simply adjust the knob and add CO2 to your desired pressure before cold crashing.
When it comes to packaging, most homebrewers opt for kegging as the easiest, fastest way to transfer their beers without risking oxygen exposure — but there are still many opportunities for this to go wrong. The biggest thing to consider when transferring is to make sure that the transfer is closed, meaning both the fermenter and keg are sealed, with no beer being exposed to oxygen. This is typically done by connecting a line from the racking port on your fermenter, directly to the “beverage out” post on your keg, allowing the keg to fill from bottom to top. The Closed Pressure Transfer Kit contains everything you need to get started.
Although this will mitigate most oxygen exposure, there are still opportunities for oxygen ingress lurking in the keg and transfer lines. It is important to purge both the transfer lines and keg of oxygen prior to starting the transfer. I do this by pressurizing my lines (more on this in a moment) as well as the keg, then attaching a spunding valve to the gas in post on the keg. This allows the keg to displace CO2 with beer as it’s pushed in from the pressurized fermenter, ensuring there is nothing but CO2 and beer in the keg.
Transferring super hoppy beers can present its own challenges outside of the topic at hand. Heavy dry hopping can lead to sluggish transferring, and sometimes clogs. Fixing an issue like this in the middle of transferring opens the beer up to oxygen, so many look for ways to filter at some point in the transfer line. I do this by attaching a tri-clamp filter to a tee fitting that has a gas-in post. Before starting my transfer, I pressurize the entire setup and line, then push into the keg to purge all of it in one go. If the filter happens to clog while transferring, I can close everything up, clean the filter, then pressurize and purge the line again if needed.
We’ve learned about the toll oxygen exposure during the brewing process can have on flavor, aroma, and shelf life. As we’ve seen, there are various points during fermentation, dry hopping, cold crashing, and packaging that can put the beer we’ve worked so hard for at risk — but we’ve also seen that there are some relatively low effort ways to combat these issues, many of them are achievable with just a few slight gear and process tweaks. If you haven’t already, I encourage you to give some of these ideas a try on your next hoppy brew — I think you’ll be surprised at just how easy it is to keep those beers bright, aromatic, and delicious until the last drop.
Hi, I'm Matt. I've been brewing as Flat Roof Brewing for the last decade, and currently live in Grand Rapids, MI. I make beer that embodies the rich tapestry of people, places, and experiences that inspire me in the Great Lakes region — brewed on a slight slant from the Furniture City.
How to Cold Crash Process Guide
]]>
They’ve been put through the grind and smashed around, they’ve been pushed to their absolute boiling point at times, they’re absolutely drained and thoroughly used up, they’re exhausted,washed out and some might even go so far as to say they’re absolutely spent. But does this have to be the end? Or is there life after lauter for precious spent beer grain?
Spent beer grain is leftover grains/malt after sugar extraction within the mashing and lautering steps of the brewing process. This by-product of the beer making process is often needlessly discarded following completion of the brewing process, leading to the dreaded Grain Guilt.
Grain Guilt: we’ve all felt it as beer brewers; you’ve just finished your lauter and look down at your basket of hard-working freshly steeped grain, only to find it proudly gazing back up at you after it just gave you it’s absolute best— it’s exhausted and absolutely spent. Suddenly, your brewer face changes from thankful to sullen as you realize that your dedicated little spent grains are doomed to die a single-use death in the compost alongside the empty promises of last week’s celery. Our spent grain deserves more than a rotten celery-death, so Grain Guilt-be-gone, because we’re about to get crafty with alternative uses for those little spent grains that could, and still can!
Spent grain has high concentrations of dietary fiber, protein, and phenolic compounds that all offer various health benefits. In human foods, spent beer grain is nutrient-dense, with far more fibre and protein than traditional bread-grains, which will minimize caloric intake of foods such as breads, cakes, muffins, crackers, and quick-grab snacks. Studies have also shown that animal diets rich in spent grain facilitates increased milk yields, higher fat contents in milk, and provide essential amino acids. Moo-yeah!
Integrating spent grain into your food may increase fiber and protein intake within your diet. Since the brewing process removes most of the starch present in barley, spent beer grain has a much higher concentration of protein and fibre than pre-brewed barley and other grains in-general. Composed of an impressive 20% protein and 70% fibre, consuming spent beer grain as part of a balanced diet can support weight loss and possibly improve digestion.
Finally, spent beer grain has substantial levels of the essential amino acid, lysine, which is not produced within our bodies and must therefore be consumed within our diets. Lysine aids in the body’s calcium absorption and boosts collagen-production, which supports healthy bones, connective tissues, tendons, cartilage, hair, skin, and nails, and even slows visual aging and heals skin wounds faster.
But as always please, check with your licensed medical professional before consuming copious amounts of spent grain please and thank you!
Since it’s rich in minerals and water-soluble vitamins such as folic acid, thiamine, niacin, riboflavin, calcium, magnesium, phosphorus, and sodium, you can put that $8 mineral water back on the shelf and instead hawk a spoon full of your spent beer grain to increase your micronutrient intake.
Spent beer grain has phenolic acids and concentrated hydroxycinnamic acids, which have many biofunctions, such as antioxidant, anticarcinogenic, antiatherogenic and anti-inflammatory activities.
Eat it, bake it, sauté it—they're all good! But the first step is to convert the spent grain into flour before we bake or cook with it. Here’s how:
1) Time to get out those giant brewing muscles you’ve been training! You’ll need to start straining your spent grain of as much liquid as humanly possible by hand as soon as it has cooled enough from the lauter to handle. I like using a strong layered cheese cloth or dish cloth for this task and really get in there to wring-out the spent grain.
2) Throw thoroughly strained beer grain into food-safe plastic bags and place in the refrigerator (or freezer) until you’re ready to dehydrate it.
*Spent beer grain will keep in the refrigerator for no more than 3 days, and will keep in the freezer for 2-3 months.
1) Preheat oven to lowest possible temperature
2) Line baking sheet(s) with parchment paper
3) Place strained/thawed spent grain in even single layers on baking sheet(s)
4) Roast spent grains for 7-8 hours, removing from oven and stirring grain to redistribute around baking sheet(s) every couple of hours
*Your grain is finished drying when you can feel absolutely no moisture
5) Remove grain from oven and set aside to cool to room temperature
6) Once at room temperature, store in pantry as whole grain for later processing, or immediately pulverize with food processor, blender, etc. to flour consistency and store for later usage
From spent grain granola clusters, to pizza and pie crusts, to bread, pancakes, cookies, and everything in between, Homebrew Academy is my go-to for tried and true spent beer grain recipes.
A friendly note that spent grain flour is typically used in conjunction with other flours and does not comprise 100% of flour within most recipes. So, if you’re going to use spent grain flour in one of your own traditional recipes, stick with replacing only up to ¼ cup of spent grain flour per 1 cup of conventional flour and add ¼ additional baking soda/powder.
One of the most common uses for spent beer grain is livestock feed; many brewers donate spent beer grain to local farmers and gladly accept high-grade meat cuts as thank-yous in return. Since beer grain contains high levels of protein, fibre, and other nutrients, you know you’ll be getting a top-notch steak, pork chop, or chicken breast from a spent grain-fed animal.
Domestic pets also benefit from the nutrient-dense grain via homemade animal treats using spent beer grain. If you like to spoil your pup, we’ve got a great recipe you can reference on our Instagram account: @BeerBrewnettes
PSA: Spent grain pet treats also make amazing gifts for holidays and celebrations!
As always please, check with your local veterinarian before letting your four legged friend consume copious amounts of spent grain please and thank you!
Spent grain is rich in nitrogen, which is essential for plant growth. If you add spent grain to your compost or use it as garden mulch, your soil health will be greatly improved, and you’ll also be supporting sustainable agriculture.
Ethanol, used as a renewable fuel source for vehicles, is created via a process that ferments carbohydrates. Spent beer grain has been used to sustainably produce this biofuel, reducing reliance on fossil fuels. Giddyup!
Spent beer grain is high in protein and cellulose, making it an appealing growing substrate for fungi because fungi feeds on cellulose. While it can be tricky to use spent grain in this way, mushroom farms have even reported that the rooting structure of mushrooms (mycelia) roots 3 times as quickly with certain fungi when utilizing spent beer grain as compared to traditional means. And, bonus, once the spent grain has finished being used for a second time, it can then be composted as a third usage!
Spent beer grain offers bountiful opportunities to be used again and again and all you have to do is grab a dish towel and make a little freezer space before your next Brew Day. So, sip on spent grain potential for a while and then take a big gulp when Brew Day happens. Your little grains will thank you. Prost!
An avid homebrewer, Maria resides in Nova Scotia, Canada, where she thoughtfully creates beer from her little green backyard brew barn. Co-founder of the @BeerBrewnettes social media platforms, Maria helps to create and publish daily content on all things beer-related: for homebrewers and beer-lovers alike, you can join the adventures of the two Beer Brewnettes on YouTube, Instagram, and Facebook via https://linktr.ee/BeerBrewnettes
References:
Food Science
Composition and Nutrient Value Proposition of Brewers Spent Grain
https://ift.onlinelibrary.wiley.com/doi/10.1111/1750-3841.13794
Plant Chicago
Spent Grains in Mushroom Growing
https://www.plantchicago.org/post/spent-grains-in-mushroom-growing
]]>Hops! One of the four main ingredients in beer. It’s the “spice” that balances the sweetness of the malt. It’s not only a balance of bitterness in your beer, but hops can be used to be the flavor and aroma of your beer. Depending on the style or intentions of the brewer, hops can affect the beer dramatically. There are hundreds of varieties and several purposes of hops in brewing.
When it comes to hops, there is so much to talk about (and believe me, in time we’ll get to a lot of it!) but this blog will go into detail on the science behind hops and how that plays a role in using hop extracts. Let’s get into it…
I like to compare coming up with hop combinations to cooking. You want your flavors to work together, not against each other. There are a lot of hops that have similar descriptors that I may shy away from pairing together. Many hop companies include hop descriptors on their website or packaging. One of my favorite Hop combos right now is Mosaic and Nelson Sauvin. The dank blueberry Mosaic pairs really well with the white grape and gooseberry you get from Nelson.
What I like to do is do ratios of hops. 2:1, 3:2, etc This means for every 2 oz of one hop I use 1 oz of another. So on and so forth. Typically, I do this in both the whirlpool and dry hop.
Pairing any hop with hops like Citra, Mosaic, and Simcoe are usually a success. There is no set-in-stone method here to pair hops. Beyond pairing descriptors and oil aromas it’s fairly experimental. It’s how breweries like Treehouse, Hill Farmstead, and Sapwood Cellars started. They found their favorite varieties and started pairing them with others. It’s worked for them and it’ll likely work for you, too.
Each hop contains alpha and beta acids as well as the following oils; Myrcene, Linalool, Caryphylle, Fornesene, Humulene, Co-Humulene, Geraniol, and B-Pinene.
Each one of those oils have distinct flavors and aromas when used at less than boiling temperatures. Boiling hops drive off these aromatic compounds so they’re best used under boiling temperatures keeping the oils in your wort or beer.
This following data was collected from Scott Janish.com (© Scott Janish 2014)
When you take this information and apply it to a whirlpool temperature schedule you’ll draw out a bouquet of flavors and aromas. From 185°-200°F you have a high end of whirlpool temps. You’ll still get bitterness here from oils and some flavors/aromas. Next is 160-170°F. In this range oils will mostly stay in solution and will not be lost to vaporization. This is where a lot of homebrewers do their whirlpooling. Final range is 150-160°F. In this range you won’t lose any hop oils at all but in order to make this viable you’ll need to increase your whirlpool times.
One interesting thing Janish mentions is that Beta-Acids can contribute to more oxidation and some bitterness. Oxidation is not a quality you want in beer so keeping beta-acids low can be beneficial. Alpha-acids are commonly advertised because they equate to IBUs but beta-acid levels will be available from hop suppliers too. The information above is available either on most suppliers websites or by request. It can be beneficial if you’re trying to target a specific flavor/aroma in beer. This information, along with hop descriptors, and a little bit of research could turn out to be beneficial when you’re planning your next beer.
Choosing the right hops to your beer style requires a little research, unless you’re going to create a recipe of your own off the cuff. When I’m going to write a recipe, I research the style, history of the beer, and along the way find suggestions to use. Generally I’m a traditionalist when it comes to brewing old world beers. I enjoy the flavors and experience of them. Once in a great while I’ll create a beer, like an English mild, and put an American twist on it. English milds are traditionally made with English varieties so I’ll search for a hop that is nearly equivalent in alpha-acids to an East Kent Goldings or a Fuggle and I’ll substitute it.
If you’re like me and you’re a stickler for tradition, search a BJCP guideline on your chosen style. Look up some information of the hops that originate from that style's country of origin and go from there. You’ll find this to really help you understand different varieties and get a real feel for alpha-acids, characteristics, and flavors you get from your end result.
Balancing all of your ingredients can be tricky! But it doesn’t have to be. Once again, if you’re really struggling on putting together a recipe, a great starting point is reading the BJCP guidelines. Good brewing software will have this incorporated into it so you can easily refer to it. That guideline will describe malt, hops, and yeast characteristics. What I really shoot for here is bitterness levels, color, and proper malt selection. I try to create my own recipe but again using traditional ingredients. If you stay within the realm of the guidelines you’ll make a great drinkable beer. There is also a possibility if you vary from the guidelines you might just create the next great beer trend.
Depending on the style you’re brewing, you’re going to want to take a few things into consideration. Bittering? Flavor? Aroma? "There used to be thoughts in the brewing world that adding hops at the start of the boil (60 minutes left) and at 30 minutes in (30 minutes left) would impact just bittering. Around 30 minutes is flavor additions and anything between that point and the end of the boil would be aromatic additions.
First, will you be adding a bittering addition? For most beers this is a yes. In order to be effective here, you’re going to want to choose a solid bittering hop. Lets just say you already have a lager recipe that calls for 1.25oz of Hallertau Mittelfruh at 60 minutes. This addition, according to beersmith, is 18IBUs of 4.5% Alpha Acid(AA) Hallertau Mittelfruh. Now, this is where there will be disagreements…
Traditionalist lager brewers like myself would never substitute a new world hop for a noble hop like Hallertau, but it can be done. For example, you could add .38 ounces of 15%AA Warrior hops at 60 minutes to get the same 18IBU. Some people say you can taste the difference too. Nonetheless, you’ve got the same bittering level with the warrior as you did the Hallertau and you used way less hops. Brewers should utilize a brewing software to get the real understanding and feel of hop utilization.
As I mentioned before, in order to gain more flavor in beer you’ll want to add hops around the 30 minute mark. In order to achieve better aromas in your beer you’ll want to consider hops toward the end of the boil. It's always good to have some hops in any recipe at the end of the boil. It just accentuates the already added hops in the beer and really helps impart good aromatics and flavor to work alongside your malts. Remember, malts add sweetness. Hops do still add bitterness even at later stages in the boil, but not nearly as much as earlier additions.
There must be a balancing act. Typically when brewing an IPA, I want to taste the hops. The malt and the yeast play supporting roles, but as the name suggests, an IPA should have great hop character.
You’ll often see hop substitutions listed if you’re looking at some recipes and even at times you’ll find a substitution chart. These substitutions are generally based on parental lineage of the hop variety you’re looking at. If not, they offer similar characteristics. One thing I generally look at is characteristics. If you’re wanting to substitute Czech Saaz in a Pilsner and happen to have Kazbek, you’re in luck. While that’s an obscure substitution, they offer incredibly similar spicy character. Really, substitutions are important if you’re trying to stay in a particular beer style. If you’re making a Czech Lager, you’re not going to use American Cascade. Although it’d be good, it wouldn’t be to style.
Now what you can do is pair it based on IBUs. I do this a lot when I am looking to change up a recipe when it comes to hop varieties. I know the style of Czech Pilsner has about 40IBUs in hop additions so I’ll manipulate my hop schedule to match 40IBUs with whatever hop I’m looking to swap out.
Calculating IBUs isn’t a common practice anymore as brewing software does it for us. It can be done easily, but oftentimes brewers today will just plug the data in. I will explain more on this calculation shortly.
Calculating this bitterness comes with the understanding of alpha-acids in hops. Alpha-acids indicate a potential bitterness of hops that will come out when boiled.
The Role of Alpha Acids in Hop BitternessAs discussed previously, alpha-acids retain bitterness and when boiled they isomerize in your beer. They become iso-alpha acids. This means the longer they boil, the more bitterness you draw out of them. Beers that have higher alpha-acids have more potential to be bitter. These iso-alpha acids translate to IBUs or International Bitterness Units. If you’re wondering if adding hops to your beer during whirlpool adds bitterness, it does. It adds some but not as much as a vigorous boil. Mostly because when you whirlpool, you’re doing it at much lower temps than a boil. You’re drawing out different oils, contributing great fruit flavors and aromatics to your beer!
Calculating IBUs is not something most people don’t calculate by hand anymore. Break out your abacus, because you’re gonna learn today! Take your total alpha-acids in the hops you’re adding to a beer. Let’s say you’re adding 85 alpha-acids total (add up alpha-acids in each hop addition) in all your boil additions. Multiply that by 5/7 and you get 60IBUs. In order to get the actual IBU of a beer you need fancy scientific equipment. This measurement only gives you approximate IBUs and is more than sufficient for homebrewing.
Hopefully it’s easy to understand now. If not, don’t worry. Most homebrewers rely on brewing software like BeerSmith or Brewfather to calculate it for us. Plug in your additions and you’re good to go! I highly recommend either of these softwares for use as they’re available on mobile and desktop so it’s handy to pull up on Brew Day.
In today's brewing world, alternative hop products are becoming increasingly popular. There are extracts, some of which have been used for quite a while in brewing. There are powders such as hop hash and while it isn’t a hop product, phantasm powder. Lastly, there are hop oils added that can be added to beer post fermentation.
So why is there a need for alternative hop products? It is no surprise that hops soak up precious wort and beer any time they’re added. More beer post fermentation means more beer for a brewery to sell. Even 10 years ago brewers started using extracts to bitter with. While this wasn’t exactly to yield more beer in the end it became about consistency. Brewers couldn’t always rely on their hops having the same alpha-acid or even flavors year after year. They turned to extracts. CO2 extracted hops were then added to the beer to make sure it tasted the same time after time. One advantage to extracts is that they don’t oxidize so their alpha-acids do not diminish over time like pellets or whole cone. Today hop growers and suppliers are revisiting the world of extracts but instead of a primary use in bittering they’re adding them to the dry hop.
Hop hash is a by-product of hop pelletization. What falls to the ground and off the pelletizing machine is harvested and according to some can be the best and most potent hop available today. It comes in chunks that are essentially stuck together hop debris and it’s wonderful in the dry hop! I recommend using it if you haven’t already. It’s usually only available for a short time following harvest season, so you may have to wait until fall to score some at this point.
Lupomax, Cryo Hop, and Lupulin Pellets are all pelletized hops but they have a higher concentration of lupulin to green matter. Typical pellets are 90% green matter and 10% lupulin. These concentrated pellets offer a different ratio of green to lupulin. While each brand varies their percentages one thing is constant. More oil overall in each pellet. Some touting 55% green matter and 45% oil content. This means more hoppy goodness in your beer. Typically these products are reserved for late additions, whirlpool, and dry hop. They’re offered in a myriad of varieties. I highly recommend them. I rarely use late additions, whirlpool, or dry hop of anything but concentrated pellets these days.
Another product that has become quite popular isn’t hops at all but dried sauvignon blanc grape skin powder. It’s called Phantasm and it drives a hop oil called thiol. Thiol is a compound that doesn’t even make up 1% of oil in hops but really offers intense fruit flavors. Phantasm is added during whirlpool or as a dry hop. When paired with a thiolized yeast strain and certain hops in the mash (yes you read that right, mash hops), like saaz or cascade, can bring out intense fruit flavors and aromas of white grape. This practice of using these two varieties in the mash brings out thiol precursors that carry over into the final product.
Much like hop extracts, hop oils have become popular because they increase brewing yields in the keg. They also add the same flavors and aromas as pellets so it’s not detrimental to your beer. They’re added during dry hop and can even biotransform if you’re looking to try something different in your hazy ipas. The process that creates these oils does so in a way that leaves you with organic hop oils and that don’t have any additives, so you’re getting all the flavors without vegetal matter.
The world of alternatives to traditional hop pellets has really been on the move in recent years. I recommend you check them out and experiment with your beers to see what works best.
We’ve come a long way in studying acid and oil content in hops. These acids and oils offer different flavors and aromas to beer when added at particular times in the brewing process.
Calculating bitterness and pairing your hops with the right malt and yeast are important in creating a drinkable beer too. Software is helpful and style guidelines are available , if you wish to follow them. A lot of brewers are buying in bulk and if they’re not using them immediately, they must be stored properly in a freezer. Whole cone hops and pellets are not the only options for brewers anymore. Extracts, oils, and powders are available to choose from and they can enhance our beer and even yield more beer in your keg.
Brewing beer may sound really difficult but I promise, it’s like anything else you do. The more you practice it, the better you’ll get.
There are many varieties of hops. Over 150 to be exact. Depending on where you want to use hops in your brewing process you’ll want to research whether they’re best for bittering,
Hallertau Mittelfruh, Saaz, Tettnanger, and Spalt are the four Noble Hops. They’re traditional European grown hops.
The hops found in beer are all female hops. Scientifically known as Humulus Lupulus. They produce lupulin that contains oils that give hops their flavor and bitterness.
There are lots of bittering varieties out there. Research some for yourself. Personally, I would find a good bittering variety and keep it on hand. I choose Columbus mostly because it’s a great bittering hop but also can be used late in the boil.
Hop pricing can vary greatly. You may find a great deal on Citra for well under $1/ounce, but you may find Galaxy for $2/ounce. Citra is harvested in the U.S. while Galaxy is grown in Australia. The distance traveled to your supplier matters.
Also, alternative hop products are more expensive than their pelletized counterparts. This is due to the process and resources required to get them to their current state. You can expect to pay $1/gram or more on these alternative oils and extracts.
Matt Dailey lives in Titusville, Pennsylvania and is a high school emotional support teacher. He has a bachelor's degree in history from Southern Illinois University and a Masters in Special Education from Slippery Rock University. He and his wife have 2 boys, ages 4 and 1. If he’s not spending time with his family or brewing and the weather allows, you can find him on the golf course.
]]>Hey there! I'm Josh. I've been part of the Spike family for five fantastic years, and I'm truly passionate about our company and the brewing community we serve. As the Continuous Improvement Manager, my goal is actually pretty simple—to constantly improve our processes so we can get the best equipment out on the market and into customer’s expecting and excited hands.
If you’re reading this, you probably love the art (and it truly is an art form) of brewing. From concocting the ideal beer, sipping on a bubbling selzer or brewing an exquisite cup of coffee, this captivating craft keeps evolving. Lately, electric brewing has gained traction, presenting a modern alternative to traditional propane brewing—or what homebrewers commonly refer to as “The Stove Top Method.”
In this article, we'll take a three dimensional look at electric and propane brewing. By the end, you’ll be able to determine which method aligns best with your brewing style…we guarantee it.
We’ll start with propane brewing. This method uses a propane burner to heat the brew kettle. Let’s take a closer look:
Propane brewing heats up faster than its electric counterpart, which is especially handy when brewing outdoors in chilly temperatures.
High Heat OutputPropane burners can generate a higher heat output than electric heating elements, which is beneficial for brewing large batches or boiling water rapidly. If you’re brewing a sizable batch, a propane burner can get the job done more quickly.
Lower Initial CostGenerally speaking, propane brewing is more budget-friendly than electric brewing. But while it may be a lower cost up front, the cost of propane can accumulate over time—especially for frequent brewers.
Electric brewing harnesses the power of electricity to heat up the brewing vessel using a heating element. Here's why it’s gained popularity over propane brewing:
Convenience at Your Fingertips
Electric brewing takes the cake for convenience. All you need to start brewing is a simple electrical outlet. Electric brewing is the perfect choice for those who want to avoid the hassle of refilling propane tanks, or for indoor brewing (apartments or smaller spaces) where outdoor brewing isn't an option.
Consistency is KeyWith electric brewing, you'll enjoy consistent heat throughout the brewing process, allowing for greater control over temperature and a more uniform brew. This is crucial when brewing delicate beer styles, such as lagers, which demand precise temperature control.
Long-term SavingsWhile electric brewing may have a higher initial cost, it can prove to be more cost-effective in the long run. You won't have to worry about purchasing and constantly refilling propane tanks, and electric heating elements are energy-efficient, potentially saving you money on utility bills. Additionally, electric brewing systems often have a longer lifespan compared to propane burners, resulting in lower maintenance and replacement expenses over time.
So, which method should you choose? Ultimately, the choice between electric and propane brewing hinges on personal preference, requirements and of course, where you’re physically brewing. Here are some factors to consider:
Convenience
If you value convenience and the ability to brew indoors, electric brewing is your best bet. There's no need to worry about procuring propane tanks or burners, and you can brew in the comfort of your own home. However, if you prefer outdoor brewing or require a portable option, propane brewing might be more suitable.
ConsistencyFor those brewing delicate beer styles that demand precise temperature control, electric brewing is the champion. It delivers consistent heat throughout the brewing process, leading to a scientifically precise brew. Propane brewing can be more challenging to control, potentially resulting in a true “homebrew” taste.
SpeedIf you're after a method that heats up swiftly, propane brewing is the way to go. Propane burners can heat the brewing vessel quickly, a boon when time is scarce. Electric brewing, on the other hand, may take longer to heat up.
Heat OutputIf you're brewing large batches or need to boil water rapidly, propane brewing comes out on top. Propane burners can produce a higher heat output than electric heating elements, making them more suitable for large batches or quick boiling. For smaller batches, electric may be more effective.
Cost-effectivenessWhile electric brewing may require more money up front, at Spike we like to think of it as the “buy once, cry once” approach. Electric heating elements are energy-efficient, saving you money on electricity bills compared to propane. Also, electric brewing systems usually have a longer lifespan than propane burners, translating to lower maintenance and replacement costs. All this depends on how often you brew of course.
Taste
Ahh, taste. Arguably the most important factor in all of this. Some brewers argue that electric brewing produces a cleaner taste compared to propane brewing, which can leave a slight aftertaste. However, this is subjective, and some brewers might not notice any difference. Ultimately, it boils (get it?) down to personal preference.
Whatever you choose, Spike has the best kettle options to help you get started.
Anyone can learn how to brew! Whether your method is propane or electric, this short video will teach you the basics so you’ll be downing some homemade brews in no time!
Everyone has to start somewhere! If you're leaning towards propane brewing and want a top-notch flat-bottom kettle, the Spike OG Kettle is your perfect companion.
The OG Kettle is made of 304 stainless steel, has welded fittings and a tri-clad bottom, which is ideal for even heat distribution and preventing scorching during propane brewing. And with its 20% thicker design compared to other kettles, you can trust that it's built to withstand the test of time.
If you're a fan of electric brewing and looking to level up, the Spike Tank is literally the last kettle you’ll ever need to purchase. It’s built like an absolute tank…just like its namesake.
This innovative bottom-draining kettle is not only easy to clean but also enhances the brewing process. Keep in mind, the Tank is exclusively designed for electric brewing, so if you decide electric is the way to go, you're in for a treat with the best kettle on the market.
The Tank's durable design and welded fittings ensure stability, while four sturdy legs provide ample room to work underneath. Just like the OG, the Tank is 20% thicker than other kettles on the market.
Its standout feature is the domed bottom with a 1.5" tri-clamp drain port, which makes post-brew day cleanup a breeze. Just rinse out the solids, attach a CIP (Clean in Place) ball, and power wash for five minutes. Your Tank will be sparkling clean and ready for your next brew.
Choosing the bottom drain Tank means enjoying all the advantages of electric brewing with an extra touch of convenience and efficiency. Say hello to easier cleanups and more time savoring your homebrewed masterpieces!
Both electric and propane brewing have their merits and drawbacks. When choosing between the two methods, it's essential to weigh factors such as convenience, consistency, safety, portability, speed, heat output and taste. Regardless of the method you select, always remember to enjoy the process. Cheers!
Electric brewing offers convenience, consistent heat and temperature control, and cost-effectiveness over time, making it a popular choice among homebrewers.
Electric brewing only requires an electrical outlet and can be done indoors, whereas propane brewing needs a propane tank, burner, and is better suited for outdoor brewing.
Electric brewing uses a heating element that maintains a stable temperature throughout the brewing process, providing greater control and resulting in a more uniform brew.
Although electric brewing may have a higher initial cost, it can save money over time due to energy-efficient heating elements and longer-lasting equipment.
The Spike Tank features a bottom-draining design for easy cleaning and improved brewing, making it an ideal choice for electric brewers seeking an innovative and efficient kettle.
Propane brewing provides faster heating, higher heat output for large batches, and lower initial costs compared to electric brewing.
Propane brewing heats up faster than electric brewing, making it the quicker option for getting your brew up to temperature.
Propane burners can produce higher heat output than electric heating elements, making them more suitable for large batches or rapid boiling.
Yes, propane brewing typically has a lower initial cost, as propane burners and tanks are generally less expensive than electric brewing equipment.
The Spike OG Kettle features welded fittings, a tri-clad bottom for even heat distribution, and a 20% thicker design, making it a durable and reliable option for propane brewers.
Consider factors such as convenience, consistency, speed, heat output, cost-effectiveness, and taste when deciding between electric and propane brewing methods. Your brewing environment and personal preferences will play a significant role in your choice.
Josh Lindquist is the Continuous Improvement Manager at Spike Brewing. When he’s not immersed in his work (which he absolutely loves by the way) he can be found rock climbing, playing sand volleyball or researching the hottest trends on the newest tech gadgets.
]]>
As a homebrewer for 10 years (before I started Gathering Place Brewing Company) there were a few purchases that really helped elevate my game. A corny keg cut down on the time I spent waiting for bottles to condition and carbonate, and a kitchen scale really helped me dial in hop additions and bitterness levels. But the best piece of equipment I bought was a yeast starter.
Direct pitch yeast, in a vial or slap bag, was a huge leap forward for the homebrewing community and helped usher in a brewing renaissance. However, it’s important to get the freshest yeast possible. As yeast ages the cell count drops, meaning the actual number of cells are often much less than advertised on the packaging. Underpitching yeast can lead to a host of problems, from slow fermentation to the production of off flavors.
A yeast starter kit is a relatively inexpensive purchase that will help your beer ferment more quickly and completely while reducing the production of off flavors that will negatively affect your beer.
You’ve spent a lot of time researching which grains to use for your recipe and tracked down the newest, sexiest (most expensive?) hops to make your beer perfect. Why risk all that hard work by underpitching your beer?
A yeast starter is an easy and inexpensive way to ensure that your beer gets the healthy yeast it needs. A starter kit will include an Erlenmeyer flask, foam stopper, and some dried malt extract (DME). I recommend using a 1 liter flask for 5 gallon batches and a 2 liter flask for larger batches. A common rule is to use 100 g DME per liter water for your starter.
High gravity beers and lagers require higher yeast cell counts, so you can repeat the process to ensure the starter is full of healthy yeast.
A yeast starter kit is a relatively inexpensive purchase that will help your beer ferment more quickly and completely while reducing the production of off flavors that will negatively affect your beer. The result will be better tasting, more consistent beer.
Absolutely! By making a starter, you can buy half the amount of yeast you would need if you did not make one. Depending on your batch size, this could save you $10-$30. Making a yeast starter also wakes up the dormant yeast. So your yeast will start fermentation faster than if you just add yeast straight from the packet to the fermenter. Happy yeast will result in better beer.
Yes! Dry and liquid yeasts can be used to make starters. Dry yeast packets usually have more yeast cells than liquid packets though. It's always good to check the recommended batch size on the packet. If you are making a 5 gallon batch, one dry yeast packet may suffice. If you need more, you can certainly make a starter with the dry yeast.
Ideally you should make a yeast starter 24-48 hours before you plan to pitch it into your fermenter. If needed, you can refrigerate the starter for one week.
Joe Yeado is an example of a homebrewer turned pro brewer. He’s the Founder and President at Gathering Place Brewing Company in Milwaukee, WI.
Gathering Place Brewing Company
An award winning, community focused craft brewery located in Milwaukee's Riverwest neighborhood, with a new second location in Wauwatosa. Opened in 2017, Gathering Place makes European inspired styles with modern American twists.]]>Whether you’re a beginner or a seasoned home brewer, finding the right brew kettle for your needs is essential for creating delicious beer. In this guide, we’ll cover everything you need to know about choosing the right brew kettle, from the basics of what a brew kettle is to considerations when selecting one and our picks for the best brewing kettles. We’ll also answer some of the most frequently asked questions about brew kettles.
By the end of this guide, you’ll better understand what to look for in a brew kettle and be able to make an informed decision on the best one for your needs. So, let’s dive in because life's too short to drink bad beer or use a crappy kettle.
Click here to check out Spike and start brewing better beer.
A brew kettle is an essential piece of equipment for any homebrewer. It is used to heat water and dissolve malt extract, hops, and other ingredients to create wort, which is the basis of all beer. Brew kettles come in various sizes, shapes, and materials and can be used for all-grain and extract brewing.
The most basic type of brew kettle is a simple pot with a lid and a single spigot. This type of kettle is often used for extract brewing and is great for beginners. It is usually made of stainless steel, aluminum, or copper and is relatively inexpensive.
More advanced types of brew kettles can include features such as internal thermometers, false bottoms, and valves. These features are more important for all-grain brewing as they allow for more precise control over the process.
A high-grade brew kettle can mean the difference between a good beer and a great beer. It's not just about boiling the wort, it's about creating the perfect environment for the brewing process.
A high-grade brew kettle is important for several reasons. First, it’s made from a higher-quality material that is designed to withstand the intense heat of boiling wort. This ensures that the kettle will last longer and will not warp or corrode over time. It also helps to ensure that the flavor of the beer is not affected by any impurities in the kettle.
Second, a high-grade brew kettle is designed to provide the best results when boiling wort. It will have a larger surface area, which allows for more efficient heat transfer and faster boiling times.
With so many options out there, how do you choose the perfect one? Here are a few important considerations to keep in mind:
The size of the kettle you need depends on the size of your brewing setup, the type of beer you plan to brew, and the amount of beer you plan to produce.
For most home brewers, a 10-gallon kettle is a good starting point. This size is large enough to brew 5-gallon batches of beer and can typically fit on most kitchen stoves. If you plan to brew large batches of beer, you may need a larger kettle. Kettles come in sizes ranging from 5 gallons to 50 gallons, so you can find one that will fit your needs.
The material used to make the kettle will affect its durability, efficiency, and ease of cleaning. Stainless steel is the most popular material used for brewing kettles due to its durability and resistance to corrosion. It is also easy to clean and maintain and is considered to be one of the most sanitary options. Spike always uses 304 stainless steel on all pieces of equipment. It’s the Spike standard.
Aluminum is another popular material used for brewing kettles, as it is lightweight, durable, and relatively inexpensive. It is also a good conductor of heat, meaning it will heat the wort quickly and efficiently. The downside of aluminum is that it is prone to oxidation and is more difficult to clean than stainless steel.
The spigot is the outlet used to transfer the liquid from the kettle to another vessel, such as a fermenter. The type of spigot you choose will depend on your needs and the size and shape of your brew kettle.
There are two main types of spigots:
Welded spigots are welded to the kettle via a threaded fitting and require you to add a valve. Weldless spigots are attached to the kettle using a compression fitting. Both types of spigots are available in different sizes and styles, so you can choose the one that best suits your needs.
Welded spigots are generally more reliable than weldless spigots, as they will never leak. Weldless spigots are less expensive but more likely to leak and may require more frequent maintenance.
Handles are an important part of the brew kettle, as they provide stability and portability when transferring the kettle from one place to another. It is essential to select a brew kettle with handles that can support the weight of the kettle and any liquid inside it. It is also important to consider the type of handles available.
Some brew kettles come with plastic handles that are easy to clean and may be more comfortable to grip than metal handles.
However, plastic handles can also be more prone to breaking, so selecting a kettle with strong, durable handles is important. Metal handles are usually more durable but may be less comfortable to grip and harder to clean.
Choosing between the OG kettle (flat bottom) and the Spike Tank (bottom drain) is like taking your beer from "great" to "oh yeah."
The type of bottom you choose will depend on the kind of brewing process you’re using.
OG: The most common type of bottom is a flat bottom. This style of the bottom is ideal for direct-fire brewing. It distributes heat evenly and is great for boiling wort. This style of the bottom is also ideal for mashing because it allows for more precise temperature control over your mash.
Tank: New to the homebrewing scene, is the bottom drain brew kettle. Bottom drain kettles are a must for pro brewing, and now you can bring this pro level kettle to your home brewery! This robust kettle design was engineered to make post-Brew Day clean up a breeze! It’s called the Tank for a reason. It's as structurally sound as you'll ever find, features complete U.S. welded fittings, is bottom draining and has four sturdy splayed legs to keep it balanced and gives you room to work underneath. You simply won't find this kind of innovation with any other homebrewing product on the market.
The type of valve you choose is based on the fittings of your brew kettle (NPT or TC) and will affect the flow rate and pressure of your brew.
The lid should fit securely and tightly on the kettle.
Having a lid that can be easily removed is also important. This allows for easy access to the contents of the kettle, as well as for quick and easy cleaning. Depending on the type of lid, it may also provide some insulation, which can help maintain a consistent temperature inside the kettle. The lid should also be made of a durable material that can withstand high temperatures.
For a quicker clean up, switch out a standard lid with a CIP lid to completely clean your brew kettle from the inside out.
Cleaning and sanitizing your brew kettle is essential for producing quality beer and avoiding contamination. A brew kettle that is difficult to clean can lead to time-consuming and frustrating clean-up sessions.
A 304 stainless steel brew kettle is often the best option for cleaning. Stainless steel is non-porous, which means it won’t absorb bacteria or odors and is also highly resistant to corrosion. The fewer nooks and crannies on your brew kettle, the easier to clean.
A high-grade brew kettle should be able to withstand the rigors of brewing and last for years to come. Additionally, the kettle should be designed to maximize efficiency and make the most of your brewing ingredients.
When it comes to durability, stainless steel is the best material for a brew kettle. It’s strong, corrosion-resistant, and easy to clean. It also has excellent heat retention, allowing you to maintain consistent temperatures during the brewing process, or as we like to say, “Your Liver Will Fail Before Our Equipment Does.”
To help you find the best brew kettle for your needs, we’ve put together a list of our top picks for the best brewing kettles.
This stainless-steel monster features welded ports for the bottom drain, racking port, whirlpool, heating element, and temp probe.
Having doubts or a hard time with how to go about it? Please, contact us now or email us at info@spikebrewing.com.
Here are some steps to follow:
When it comes to choosing the right brew kettle for your home brewery, there are many factors to consider. Selecting a kettle that meets your needs and budget is important. Ultimately, the best brew kettle for you is the one that allows you to make the best beer possible.
If you are just starting out, a smaller, more affordable kettle may be the best option. However, as you become more experienced and your brewing skills improve, investing in a high-quality kettle with more advanced features may be worthwhile.
Now that you have a better understanding of what to look for, go ahead and find the perfect kettle for your brewing needs! If you have any further questions or need additional guidance, don't hesitate to reach out to us.
Whether you're a new brewer just starting out or an experienced pro looking for advanced equipment, Spike has you covered. They offer products and packages for all levels of brewers, from new brewers to advanced brewers and even professional brewers.
To shop for the perfect equipment for your brewing needs, check out our New Brewer, Advanced Brewer, and Pro Brewer packages.
Yes, you can mash in a brew kettle. This is a process where the grains are mixed with hot water, allowing the enzymes to break down the starches and convert them into fermentable sugars.
This is an important step in the beer brewing process, and a brew kettle is a perfect vessel for this.
Electric kettles are a great option for those who want to save time and energy. They are more efficient than traditional kettles, as they are able to heat the water faster. This means that you can get your beer brewing quicker, and with less effort.
They are also more convenient, as you can set the temperature and walk away, leaving the kettle to do all the work.
Yes, technically you can.
However, It is not recommended to ferment in a brew kettle, as a brew kettle is primarily designed for boiling wort and not for fermenting beer. Normally you want a vessel that can fully seal, which a kettle does not, in order to prevent contamination. The high temperature during the boiling process can sanitize the kettle, but it can also damage the yeast cells and prevent them from fermenting properly.
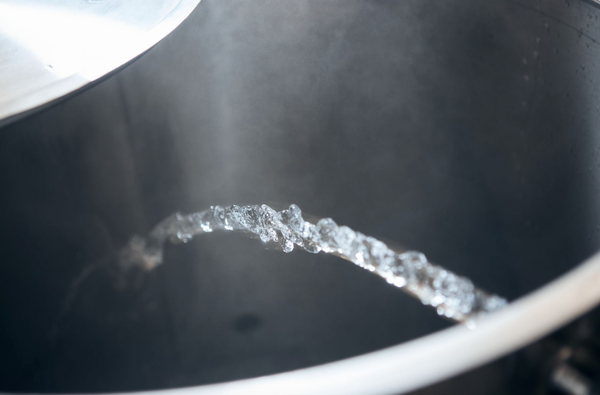
]]>When it comes to making beer, the largest single ingredient is water - making up 90-95% of all the ingredients used. Being such a significant ingredient, it’s a little ironic that it’s often overlooked by homebrewers and is sometimes the last thing they turn their attention to in order to improve the quality of their brews.
At every step in the brewing process water is utilized in some way, so it’s important it gets the attention it deserves to ensure you’re getting the most out of it. Even some minor tweaks and adjustments to some of the elements that make up your water profile can yield massive results and improvements in the end beer that is produced.
Thankfully with the vast array of (free) brewing software available, you don’t need to be a science major to understand and work out how to adjust your water for brewing beer. This means that water chemistry adjustments are well within reach of homebrewers of all skill levels, and is a critical step to getting your homebrewed beer to taste akin to commercially available craft beer.
In this article, we’re going to dive into the world of water chemistry. We’ll try to keep the sciencey stuff to a minimum and focus on how different elements of water impact your beers and how you can leverage the power of brewing software to help determine what adjustments you should make to your water to improve it and make it suitable for the style of beer you’re making.
Water chemistry in brewing is the process of adjusting some of the salts, minerals, and pH in the water that is used in the brewing process - namely in the mashing and sparging stages. When we talk about water chemistry in brewing, we’re looking at and adjusting the following elements within our water;
As previously mentioned, up to 95% of beer's composition is water, so tweaking and adjusting the water used in the brewing process can have a significant impact on not just how it tastes, but also how it feels on the palate - also known as mouthfeel. Different styles of beer will call for different water profiles to help accentuate particular elements of the beer.
For example, IPA’s will generally have elevated levels of sulfates and reduced chloride levels to help emphasize the hop flavors that are key to the style. For more malty beers, the chloride and sulfate levels are closer together to help balance hop and malt flavors against one another.
Ever wondered how New England IPA’s or Hazy IPA’s get that soft, pillowy mouthfeel? Sure, the grist that is used plays a part, but more importantly, it’s a chloride-to-sulfate ratio in the brewing water that is heavily stacked with chloride that makes this happen and gives a thick, full mouthfeel.
Making adjustments correctly can help turn a good beer into a great beer and is often the missing piece of the puzzle for many homebrewers who strive to make beer of a similar caliber to the commercially available stuff that we all love - and probably inspired us to start brewing our own beer in the first place. The freshest ingredients, loads of hops, and the best processes will only get you so far on the road to Flavortown or a hop-induced euphoria - you really need to be tweaking your water to make it all the way!
A failure to adjust water chemistry appropriately will likely create a beer that feels somewhat lacking - with flavors often seeming dull, muted, and just kind of blended together in a muddled mess with nothing really standing out. It’s kind of hard to explain but if you’ve been brewing for a while you’ll probably know what I’m talking about - it can be especially evident if you taste one of your (non-water-treated) homebrews head-to-head against a commercially made craft beer of a similar style. Sticking with our IPA example, you’ll notice how much brighter the commercial one tastes, with the hops really shining and bursting with flavour. That is what water chemistry, and in particular, sulfates will do. Let’s make yours like that, shall we?
As a brewer, there are a number of different options available to you for sourcing water. There are pros and cons to each so it’s ultimately a personal decision based on what you have available and potentially your brewing budget as well.
What is key though is knowing the mineral content of whatever water you are using so you can understand what adjustments need to be made to get to your desired water profile.
Spring Water is a readily available water source for most brewers and can be purchased at loads of places like supermarkets. The cost can add up fairly quickly though when you need several liters or gallons, and if the mineral content isn’t printed on the packaging you may need to contact the manufacturer to find out exactly what’s in it.
City or town water is cheap and accessible to most brewers, with almost 75% of the world's population having access to a safely managed water source. However, these managed water sources often contain chlorine and/or other potentially unwanted additives and contaminants that mean some additional treatment may be required before it’s suitable for brewing.
Chlorine can easily be removed by adding a campden tablet to the water, and many other undesirable compounds can be removed by using simple household water filters.
As a general rule, if your water tastes good to drink straight out of the tap, it’s going to be a good starting point for making beer. If it tastes or smells a bit funky, you may need to invest a little time and effort into treating it to get the best results in your finished beer.
Many water providers will make water quality reports available that include the mineral content which can be used as the basis for building your brewing water profile. If a water report isn’t available then you may need to test it yourself or pay for a test to be completed, as knowing what is in your water is critical to knowing what to adjust and by how much.
Distilled or Reverse Osmosis water is arguably the best type of water to use if you can get it, or don’t mind spending the money to get it. Both of these water types have undergone treatment (either distillation or multiple levels of filtration) to remove all of the minerals and salts within them.
Using these water types allows brewers to start with a “clean slate” with all the key minerals being at 0 (or at least negligible levels) which makes building a water profile a little easier as you’re essentially starting from scratch.
Like with spring water, buying distilled or reverse osmosis water is going to be more expensive than using town/city water but may be worthwhile in some circumstances.
If you’re serious about water treatment you can even buy your own reverse osmosis system and hook it up to treat your city/town water from a tap or faucet in your house/apartment, though they are known to be slow and somewhat inefficient by generating a fair amount of waste water as part of the filtration process.
A city water report is a great way to find out what’s currently contained in your water. Many municipal water providers will post water quality reports online (typically quarterly), however, if you can’t find it yourself it’s definitely worth reaching out to your provider and asking if they can send you one.
Here’s an example of a water report posted online from our local water provider that is actually tailored specifically to homebrewers (thanks Sydney Water!);
In this report we’ve got all the key metrics that we need to adjust our brewing water. Where a number range has been provided, we simply take the average value of the two numbers, since brewing software requires specific numeric values, not ranges. For example, magnesium has a range of 3.36 - 4.29 mg/L which has an average of 3.83 so this is the value we’d enter into our brewing software for magnesium.
It’s also worth pointing out that some reports will give values in mg/L (like above), and others will state ppm (parts per million). Thankfully, both mean the same thing so the values are interchangeable.
If you’re not able to obtain a city water report, then an at-home testing kit is another option to help you determine the composition of your brewing water.
There are plenty of options out there, but a popular one is the “Lamotte BrewLab Basic Water Test Kit” which was developed in conjunction with well-known homebrewing author, John Palmer, and gives you 7 important water test factors you need for brewing (chloride, sulfate, alkalinity, total hardness, calcium hardness, magnesium hardness, and sodium).
It’s worth purchasing a pH meter as well as a fast and reliable way to quickly determine the pH of your water (if your testing kit doesn’t include one). pH is a critical element during the mashing process, so a pH meter really is a must-have to ensure your mash is within the correct range. More on that below.
The term “pH” stands for potential hydrogen and is a measurement of how acidic or basic (non-acidic) a solution is. It is measured using a numerical scale from 1-14 with 1 being very acidic, 7 being neutral, and 14 being very basic.
To give some context to this, solutions like lemon juice or vinegar will have a pH of 2 (very acidic). Soapy water is on the other end of the scale with a pH of around 12 (very basic) and pure water will have a pH of 7 (neutral).
In terms of brewing, the pH is most critical at the mashing stage, where a slightly acidic pH of between 5.2 and 5.6 is considered the sweet spot for most beer types. Getting the pH within this range is important for many reasons. It ensures enzymes can effectively convert the starches from your malted grains into sugars, improves yeast health, wort clarification as well as the overall flavor profile of the final beer.
A pH that is too high will extract undesirable tannins from the grains which can cause an unpleasant flavor or sensation, often likened to sucking on a wet tea bag. A pH that is too low will result in muted flavors and reduced body in the finished beer as it will be too acidic.
Thankfully pH meters (instruments used to measure pH) are very affordable and are definitely a worthwhile investment for any homebrewer. They work by submerging the pH meter’s electrode into a solution which then displays a pH reading on its screen within a matter of seconds. The meters are sensitive and require constant calibration to remain accurate, but if well looked after are a vital tool in a brewer's arsenal. Just make sure you get one with a replaceable electrode since they’re a consumable part that will eventually wear out. Automatic Temperature Compensation (ATC) is another great feature to look for so you can measure the pH at temperatures other than the meter's calibrated temperature (typically 20°C/68°F).
pH can also be measured using paper test strips. These strips are submerged in a solution, then change color according to the pH and are compared against a color chart to give an approximate pH value, however, the results will not be as accurate as when using a pH meter.
An ion is a charged atom or molecule that has either a positive or negative charge depending on whether the number of electrons is greater or less than the number of protons. Ions with a positive charge are called “cations”, and in brewing water, these are calcium, magnesium, and sodium. Ions with a negative charge are called “anions” and in brewing water, these are bicarbonate, sulfate, and chloride.
Increased sulfate levels in a beer can enhance its dryness, and can also promote bitterness, hop character, and crispness. A lack of sulfate can leave a beer seeming too full or malty, perhaps with a sweet or cloying-like finish.
A minimum sulfate level of 40 ppm is suggested to help beers dry out adequately in the finish. Hoppy beers can have levels up to 300 ppm for sulfates to really make the hops shine.
Not to be confused with chlorine, chloride helps to accentuate a fullness or roundness of the flavor in beer - in particular, it can enhance malt sweetness.
Concentrations in the higher range up to 200ppm can give a full malty taste and can help to enhance mouth feel
Chlorides and sulfates tend to directly impact one another as they have opposing effects on beer - they are often directly compared using a chloride-to-sulfate ratio and are arguably the two most important minerals within your brewing water.
A chloride-to-sulfate ratio of 1:2 (or higher) will give a drier, hoppier flavor profile. The inverse ratio of 2:1 will have a more rounded, less bitter, and maltier balance of flavors.
Calcium can help to lower (acidify) the pH of the mash and the amount of calcium present (along with magnesium) determines the hardness of the water. It also improves the flavor, clarity, and stability of the finished beer.
Small amounts (less than 50 ppm) will lead to a soft finish - ideal for lighter styles like an American Lager.
Moderate levels (50-100 ppm) will generally lead to a well-rounded finish.
High levels (100-150 ppm) will give a firm finish and are often used in some dark beers and IPA’s with higher alcohol content. Be careful if using elevated levels of calcium though as it can block yeast access to magnesium which can impact yeast health and fermentation performance.
Magnesium is a critical component of water for sufficient yeast health and along with calcium contributes to water hardness.
Slightly increasing the magnesium level can help to enhance the perceived bitterness within a beer as well as promote hop flavor/character.
Sufficient levels of magnesium will typically be in the wort from the addition of brewing malts. The commonly recommended upper limit for magnesium is 40 ppm - staying below this limit should prevent any impact on the beer flavor, so make sure you’re aware of how much magnesium is in your base water and how much will potentially be added by your grist before making further adjustments.
Sodium has no chemical effect in brewing. It can be used to adjust the perceived flavor of the beer by enhancing its sweetness. Very few beer styles will call for increased sodium levels (though some styles like a Gose do call for increased levels of up to 250 ppm). Most beer target water profiles will call for no more than 20 ppm so if your source water profile contains less than this then you shouldn’t need to worry about adjusting it.
Alkalinity refers to the ability of a solution to resist or buffer a change in its pH level when acid is added. It is measured by the amount of carbonate and bicarbonate contained within the solution.
The higher the alkalinity level, the more it will resist or neutralize acids being added - so more acid will need to be added to get the desired pH level when compared to a solution with a lower alkalinity level.
Now we know what the key components of your brewing water are and how they can influence the profile of your beer, the next thing to look at is what minerals and acids you should have in your brewing inventory for making water adjustments.
Thankfully, most adjustments can be made with just a handful of ingredients that are relatively cheap and easy to come by. Most are non hazardous too (with the exception of acid, where basic protective equipment like gloves and glasses should be worn when handling). Let’s go through them all below;
Campden Tablets
Campden tablets are made of potassium metabisulfite and are used to remove chlorine or chloramine in your water. A little bit goes a long way with a single tablet being able to treat up to 10 gallons of water.
We typically split a tablet in half with one half going in the mash/strike water and the other half going in the sparge water for a typical 5 gallon/19 litre batch. They’re cheap and readily available from most homebrew shops and are a must have if you’re using town/city water that almost certainly contains some level of chlorine.
Gypsum
Gypsum is also known as calcium sulfate, and as you would expect from this, it contains calcium and sulfate. Adding gypsum will cause an increase in both of these minerals and will slightly lower (acidify) the mash pH as well.
Calcium Chloride
Adding calcium chloride will increase the levels of calcium and chloride within your water. It will also slightly lower (acidify) mash pH.
Epsom Salts
Also known as magnesium sulfate, epsom salts will increase the levels of magnesium and sulfates within your water. There are different varieties of epsom salts available so make sure you’re getting the food grade version to ensure it’s fit for use in your water.
Lactic or Phosphoric Acid
Either lactic or phosphoric acid can be used to lower (acidify) the pH of your water. Some brewers prefer phosphoric to lactic as they believe lactic can lead to some unwanted changes in flavor, particularly if you need to add large amounts.
The five items listed above are the key ones to have for the majority of brewers who will need to reduce the pH of their brewing water to make it more acidic.
If you have an acidic water source with a low pH that needs to be raised, then you may need to use the following;
Baking Soda
Baking soda is the common name for sodium bicarbonate, and adding it to your water will increase the alkalinity along with the pH. It will also slightly increase the sodium level.
Calcium Carbonate
Calcium Carbonate, also known as chalk, will increase the alkalinity and the mash pH and will also add a small amount of calcium to your water. Baking soda is often preferred to use instead of calcium carbonate to increase alkalinity as it is more easily dissolved in water.
When it comes to measuring out your brewing minerals and salts, you’ll often be dealing in grams/ounces and tenths of grams/ounces, so a precision scale is a worthwhile investment to make this possible. Most homebrew shops will sell them, but there are plenty of options online on sites like eBay, Amazon, etc.
When measuring the alkalinity of a solution, we typically use CaCO3 (Calcium Carbonate) or HCO3 (Bicarbonate) - this is also referred to as “temporary hardness” in water. If you have a high level of alkalinity, it may be preferable to treat it prior to mashing to help lower the alkalinity level. Here are some methods you can use to do so;
Boiling water causes the bicarbonate ion to become a carbonate ion which then binds with calcium and precipitates from the water - thereby reducing the calcium and carbonate content. You can typically get to around 30-40ppm by boiling which makes the water much more receptive to acid additions for further adjusting pH levels.
Adding acid to water converts the bicarbonate alkalinity into carbonic acid (by adding hydrogen to it), which in turn lowers the alkalinity and pH values of the water. Phosphoric and lactic acid are common varieties used for adjusting the pH of your water.
Water that is treated via reverse osmosis system will typically have a finishing pH of around 6 - 6.5. Since the reverse osmosis treatment will typically remove up to 98% of all minerals and contaminants within water, the alkalinity and bicarbonate content of reverse osmosis treated water is very low and therefore easily adjusted with acids.
You can dilute your source water with reverse osmosis water too to help soften it if it’s particularly hard or alkaline.
In some cases, your water source may be significantly lacking in alkalinity which means the water doesn’t have the ability to effectively neutralize any acids that are added, which could lead to pH levels falling to unexpectedly low (acidic) levels. There are a couple of ways to add alkalinity back into your water if you need to;
Alkalinity can be increased by adding baking soda (sodium bicarbonate) or chalk (calcium carbonate) to your water.
Generally speaking, malts that are used in brewing are acidic and they will generally lower the pH of the mash water after being doughed in. Darker malts tend to be more acidic than lighter ones so keep this in mind when building your recipe and thinking about how it will impact your water profile.
Brewing water and chemistry is complex, and you don’t necessarily need to fully understand every aspect of brewing water chemistry to adjust it. Most popular brewing software applications will have a feature that will do all the calculations for you and provide you with a specific list of what you should be adding to your water and exactly how much.
We like to use Brewfather - it’s free (with some restrictions, but importantly the free version does give you access to the water profile functionality), and it is cloud-based so you can use it on a PC/Mac or a mobile device and any changes you make on one platform will automatically sync and be visible on the others. There are other software options available too like Bru’n Water and Beer Smith - use whatever you like best, the concept will be the same across all of them, but for the purpose of this article we’ll look at Brewfather.
To get going with Brewfather, you need to enter the values for what is currently in your water as a “Source Profile”. Next, select an appropriate “Target Profile” within your Brewfather recipe which is what you want the mineral content of your water to be. Some example profiles would be “Pale Ale”, “Balanced”, “Lager” or “Hoppy” - these are just some of the default target profiles available in Brewfather, and you can of course add your own profile if you wish as some recipes may specify a particular water profile to use.
In the example below you can see how we’ve set up our source and target water profiles. Our target is a “Balanced” profile for a Cream Ale recipe we’ve been working on.
There is an “Auto” button and once pressed, our recipe is updated with a list of what we need to add to the mash and sparge water to get as close as possible to our desired water profile.
It really is pretty simple and you can adjust the settings to select what ingredients you have available for water adjustments (so the software doesn’t tell you to use things you don’t have available).
So even if I forget the role that gypsum plays in my beer, I know that I need to add 1.45g of it to my mash water for this recipe to get as close to my target profile as possible.
Put your faith in the software and give it a try and see for yourself what a difference water adjustments can make to the flavor profile of your homebrew. We’ll never forget that first brew we made after adjusting water chemistry - it was such a night and day difference and our only regret is not looking into making water chemistry adjustments sooner!
You can use a pH meter to measure the pH of your water. Measure your source water prior to adding any grains or other minerals to it in order to accurately determine its pH. Enter the details of your water, recipe, and what acid you have available into brewing software like Brewfather and it will tell you how much acid needs to be added to reach your target pH - typically between 5.2 and 5.6.
After doughing in your mash, leave the grain bed to settle for 10-15 minutes before taking a pH reading and then make further adjustments if necessary to get into the 5.2 - 5.6 range. The mash pH is a moving target as it will change and evolve throughout the mash, but if you hit the right number at the start it will generally take care of itself throughout the rest of the process.
Don’t forget to treat your sparge water as well - it’s generally considered OK to have your sparge water pH at less than 6, but we like to stick within the 5.2 - 5.6 range for sparge water as well.
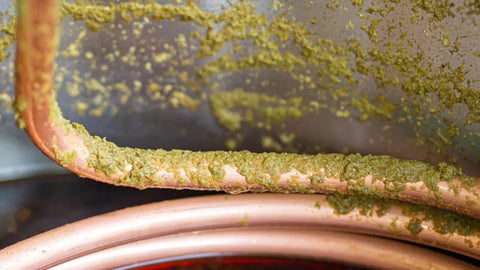
Water hardness refers to the amount of dissolved calcium and magnesium within the water. Higher levels of these minerals will make hard water, and lower levels make soft water. Good brewing water should be moderately hard as it will contain sufficient levels of calcium for most beer styles. Hard water is also known to enhance yeast flocculation, hot break and can also prevent the buildup of beer stone.
Higher water temperatures will have a higher rate of chemical and metabolic reactions, and can also skew pH readings. It’s therefore important that when measuring your mash pH, the reading is taken at as close to room temperature (20°C/68°F) as possible so samples should be cooled by putting them in a small ice bath or briefly in the fridge/freezer to drop the temperature as rapidly as possible.
It’s also a good idea to cover the sample with foil or cling wrap to try and prevent evaporation which can lead to inaccurate readings from your sample. Some pH meters have Automatic Temperature Compensation (ATC) to allow for readings to be taken at varying temperatures, but putting the sensitive electrode into hot solutions such as wort will likely reduce its lifespan.
I’m Adam Thomas, Director of Barrel Operations at MobCraft Beer and have been professionally producing beer for ten years. I started my beer adventure homebrewing in 2011 but soon found a job washing kegs for a brewery out west called Tahoe Mountain Brewing Co. They specialized in oak fermentation and aging mixed culture and sour beers. Over the course of three years, I moved up to head brewer before moving to Milwaukee to help MobCraft brew as well as establish their Wild and Sour Program.
Traditionally, a sour can be described as light, crisp, acidic, and of course, sour. Fruit can be added to balance out the acidity (like strawberry, raspberry, or even peach) and can range in color to bright and vibrant or your more “traditional” beer color.
This all depends on the style and can range from very low ABV to imperial status. For example, MobCraft makes sour beers that are 4.5, 6.2, 7.1, and 10% ABV.
Again it will depend on the style and how you’re producing the beer. Typical American-style sours focus on lactic acid-producing bacteria. Many breweries these days tend to kettle sour their beers to achieve a specific acid level before pasteurizing it and fermenting it with their house strain. Breweries typically do this for two reasons:
Traditionally made sour beers still depend on acidity for that “sour” taste, but can be achieved with many more acid producers and a mixed culture fermentation which, in my opinion, creates more complexity and adds depth to a sour beer.
You’ll use the same ingredients you would on a “clean” beer. Barley, hops, water, yeast (and bacteria). It all depends on the style and what you're trying to accomplish, flavor-wise, in your finished product.
There are many different ways to make a sour beer. Like I mentioned above, the kettle sour method has come into popularity in the last ten years, but traditional methods require some extra steps. The wort is produced the same as any clean beer with a few exceptions for certain styles.
Keep in mind that most lactic-producing bacteria are sensitive to hops. More hops = less acid. We use aged hops in many of our sour beers with different dosing rates depending on the flavor we’re trying to achieve. Once your wort is produced there are a few options to take. Here are a few that we use at MobCraft.
Yes! These days homebrewers have a wide variety of yeast suppliers that pre-blend mixed cultures and souring bacteria. Try pitching some to a saison or lager recipe you’ve brewed before and see what happens.
Spicy foods or foods that are rich in flavor.
A Tulip Glass is the traditional glassware for sour/wild ales.
In general, sour beers should be stored in a cool, dark space. Refrigeration is often the method of choice.
Sour beer uses yeast with the bacteria, Lactobacillus, whereas an IPA does not have that particular strain of yeast.
Spike + MobCraft Brew Day
Adam Thomas is the Director of Barrel Operations at MobCraft. He has eight years of wild/sour production with 3 Great American Beer Festival medals and a Festival of Wood and Barrel-Aged Beer Gold.
About MobCraft Beer
MobCraft Beer was founded in 2013 by Henry Schwartz and Andrew Gierczak. It is the world’s first crowdsourced brewery. MobCraft’s locations are 505 S. 5th Street in the Walker’s Point neighborhood of Milwaukee, WI and 2403 Champa Street in the Curtis Park neighborhood of Denver, CO. Throughout the year the crowd submits and votes on beer ideas. At the end of the vote, the winning beer is brewed and available for all to enjoy. These crowdsourced beers are served in the taproom with MobCraft flagships, beers from their Wild & Sour Program, and more.]]>
Hi all, my name is Josh Rechek and I am the Head Brewer/ Production Maintenance Lead at MobCraft Beer Inc. in Milwaukee WI. I have been brewing with MobCraft Beer since 2015 and have over 10 years experience in the beverage industry. Before all of that, I worked in a homebrewing shop for a few years and have had a lot of fun in my own homebrewing adventures!
The topic of discussion is cleaning and sanitation; which is absolutely essential in every part of the brewing process. Improper cleaning and sanitation can lead to cross contamination of chemicals, flavors, or allergens. It can also lead to infections by unwanted organisms that negatively impact the flavor or shelf stability of the beer.
Left unchecked infections can become systemic throughout the brewery and become nearly impossible to get rid of. Luckily, in the brewing industry, the presence of alcohol in the finished product makes the risk of foodborne illness and pathogens very low. It’s highly unlikely you will ever make anyone sick with your beer, but without cleaning and sanitation, it might end up tasting downright awful.
Cleaning and sanitation isn’t exactly the most fun topic in the world and there is going to be a lot of dense information in this post. Just remember brewing should be fun; take it one step at a time, use common sense, and remember it's all for the pursuit of a tasty beer! Speaking of brewing, before we get started, check out this Spike Brew Day video at MobCraft!
Now let's get into the discussion...
Cleaning is the removal of soils from the surface of what is being cleaned. Soils can be any debris that is found on a surface including dust, food particulates, residual chemicals, water scale, or beer stone.
Sanitation is treating the cleaned surface to effectively kill any microbiological contaminants. A surface cannot be sanitized unless it is first cleaned. Soils can harbor microorganisms in places that the sanitizer cannot effectively reach, leading to ineffective sanitation.
Cleaning and sanitizing prevents the carryover of unwanted flavors, microorganisms, chemicals, and particulates. Essentially, the removal of anything that is not an intended ingredient in the finished product. Failure to properly clean and sanitize can lead to off flavors, reduced shelf stability, or even result in bodily harm to the consumer.
Every single part of the brewery should have a well laid out cleaning regimen. Whether you have some homebrew kettles in your kitchen or basement or run a large production brewer, it is worth taking the time to address every aspect of your brewing space. It should be evident that equipment like fermentation vessels, hoses, and fittings that touch beer must be clean and sanitized, but what about the environment around them?
Environmental sanitation is one of my biggest pet peeves. Is the floor clean? Is there dried beer caked to the wall from that carboy that blew off the airlock? What about that giant spot of black mold underneath where the hose always drips? If you take the time to address things like these, the rest of the process will be much easier for you and the people consuming your beer will taste the difference!
I also want to stress that cleaning and sanitation alone are not enough to ensure the production of quality beer. Proper preventative maintenance is also essential and oftentimes overlooked. Regularly inspect everything that is a food contact surface and replace any equipment that does not meet standards. Most equipment in the brewery will be either stainless steel or some sort of rubber good. Stainless steel is robust, but can have issues such as pitting, welds can get stressed and develop cracks or fissures, and it can even rust if brought into contact with a ferrous metal like mild steel. If properly cared for, stainless steel can last indefinitely.
Conversely, all rubber goods have a limited lifespan and will require periodic replacement. Common rubber goods in the brewery are manway gaskets, valve seats, tri-clamp gaskets, and pump seals. When rubber goods degrade they can no longer be cleaned and sanitized effectively, and become a nice home for all the little microbes you want to keep out. Over time rubber goods may become brittle, and begin leaving a residue, crack or tear. If you notice any of these signs it is time to replace them!
Physical contaminants are any physical particulates that end up in the beer. They can be just about anything including prior food residue, dust, oak barrel char, shards of pallet wood, hair, machinery hardware, etc. Physical contaminants are mitigated by detergent cleaning as well as good manufacturing practices such as wearing gloves, hair nets and keeping vessels closed whenever possible.
This is almost exclusively related to residual cleaning chemicals. Once something is cleaned it is imperative that it is rinsed of all residual chemicals. If you want to validate a proper rinse the easiest way is by verifying the neutral pH of the spent rinse water.
Biological refers to any viable microorganisms that are not intended to be in the beer. Biological contaminants are mitigated by sanitation. Common biological contaminants in beer are Lactobacillus, Pediococcus, Brettanomyces type yeast, Acetobactor, and any brewers yeast that is not the intended strain for that product. Wild and sour beers are an exception to some of the aforementioned contaminants.
It also may seem silly to mention unintended brewers yeast, but cross contamination of yeast strains can have incredibly detrimental effects on a beer flavor and shelf stability. If you are curious about a specific example, do a little side research on diastaticus positive yeast.
An effective, but less aggressive, alkali detergent cleaner typically containing weak bases such as Sodium percarbonate, sodium carbonate, and sodium metasilicate. It should also contain some sort of surfactant which breaks the surface tension of the water leading to a more effective clean.
Commercial examples are PBW cleaner, and Oxiclean (yeah the same stuff you might use for laundry). This is the primary cleaning chemical for homebrewers and for hand cleaning parts in commercial breweries because it is safer to handle than caustic soda.
There are many commercially available disinfectants that use an oxidation reaction to kill microorganisms. These are typically very aggressive and must be handled with care. Care must also be taken to make sure these sanitizers are approved for use on stainless steel as some may cause surface degradation.
Some common oxygen releasing sanitizers include peracetic acid (PAA), several other variations of peroxy acids, and ozone. These sanitizers are not typically available to homebrewers due to their hazardous nature.
There several types of non-oxidizing disinfectants. Typically these are less aggressive and therefore more available to homebrewers. The two most common types used in brewing are acid based disinfectants like Star San or iodine based disinfectants like Iodophor. Isopropyl alcohol also makes a great disinfectant; though I do not recommend it to homebrewers as it is highly flammable.
Caustic Soda is simply Sodium Hydroxide. It is a strong base and therefore very aggressive. Caustic Soda is the industry standard for an alkali based detergent cleaner. It is typically not available to homebrewers. Caustic soda may be sold as dry beads or liquid solutions.
An effective caustic detergent should also contain a surfactant such as polyphosphate or EDTA to break the surface tension of the water for a more effective clean.
Common acid products are Phosphoric acid, nitric acid, citric acid, or a proprietary blend of these. Acid based cleaning products are used to remove mineral deposits such as water scale or beer stone (calcium oxalate).
Acids can also be used to passivate stainless steel. Passivation is the formation of a thin layer of chromium oxide on the surface of stainless steel, which is what gives this material its resistance to corrosion. If using an acid for passivation purposes, allow the stainless to completely dry exposed to air after the cleaning cycle is complete.
This one is pretty straight forward, grab a bucket of powdered brewery cleaner solution (not caustic soda) and a brush and start scrubbing. Manual cleaning is used for environmental applications such as the exterior of tanks and for cleaning small parts such as sample valves and tri-clamp gaskets.
CIP means clean in place and refers to cleaning something without disassembly. CIP often uses a pump and a spray ball to recirculate a cleaning solution from the bottom of the vessel, through the spray ball mounted at the top of the vessel, and effectively reach every surface that beer will come in contact with. Please note that almost every vessel has some blind spots the spray ball can’t reach such as sample valve ports, racking arm ports, or manways. Even when performing a CIP procedure some hand scrubbing
of these hard to reach areas may be necessary. When performing CIP processes make sure to use cleaning and sanitizing products that are low or no foaming as excessive foaming can cause the pump to cavitate (lose prime).
COP means clean out of place. This refers to cleaning of parts that must be removed to get a proper clean. On a commercial scale this involves a COP tank, which is a basin filled with cleaning solution where loose parts are placed and a pump provides agitation. In most instances homebrewers and even small scale breweries will use manual cleaning practices instead of a dedicated COP tank.
Foam cleaning involves spraying a detergent solution that is injected with air inline to create a foaming action. The cleaner is sprayed on the equipment as a foam, allowed to sit, and then rinsed off with a hose. Foaming cleaners are well suited to clean the exterior of brewing vessels, packaging lines, walls, floors, and drains. This type of cleaning can be just as effective as manual cleaning with a brush, but requires far less labor.
Pasteurization- heat! If implemented properly, this can be an effective form of sanitation for both equipment and the beer itself. Boiling wort is one example of this, it effectively kills microbial contaminants found in raw ingredients such as malt and hops. Larger breweries may also use pasteurization at the end of the brewing process either immediately before or after the beer is put into its final packaging (can, bottle, or keg). The absolute minimum guidelines for pasteurization is achieving 163F for 7 seconds. Heat is also effective for equipment such as the brewhouse vessels. Because of this, there is really no reason to ever use a chemical sanitizer on a mash/ lauter tun, boil kettle, or whirlpool vessel. For these vessels the boiling of the wort constitutes the sanitation step.
I want to focus on one piece of equipment in particular, the plate heat exchanger used for cooling the wort from the brewhouse on its way to the fermenter. This is the first piece of equipment on the ‘cold side’ of the beer making process and making sure it is sanitized is absolutely critical! Plate heat exchangers are notoriously hard to CIP due to the large amount of surface area and small pathways that the beer flows through. It is not feasible to disassemble and inspect between each use meaning there is no way to validate a proper clean on this type of equipment. If a piece of equipment isn’t clean, it can’t be sanitized with a chemical surface sanitizer. In this instance, the only way to ensure sanitation is heat, since it has the ability to penetrate through soils. At MobCraft Beer we recirculate hot water through our heat exchanger to sanitize and must maintain a temperature of 180F for 30 minutes prior to introducing the wort.
Step 1: Rinse. Thoroughly rinse the surface to be cleaned to remove as much soil as possible prior to introducing chemical cleaning agents. Hot water at high pressure is best!
Step 2: Alkali Detergent cleaning- clean the surface with an alkali based detergent cleaner at the proper concentration. There are 4 variables to cleaning; time, temperature, concentration, and force applied.
All of these variables work together for an effective clean. A well laid out cleaning regimen will set standards for all of these variables. For example, a CIP regimen might look like this; recirculate caustic soda solution at a strength of 1% by titration at a temperature of 160 F through a spray ball for 30 minutes at a minimum pressure of 15 psi. A manual cleaning process might look like this; soak parts in a powdered detergent solution of 3 oz/gal at a temperature of 140F for 10 minutes. Remove parts and scrub with a brush.
Validating Chemical Concentrations: Always read the instructions carefully for your specific cleaning chemical and mix at the appropriate ratio. In a commercial setting, there are a few ways the concentration can be validated. A TDS meter is often used for measuring cleaning detergents in automated systems.
This gives you a good read of the concentration of cleaning chemicals but may be skewed by anything else dissolved in the cleaning solution.The best way to validate a cleaning chemical is by titration.
Alkali detergent is a basic solution and we can measure the concentration by using an indicator dye such as phenolphthalein and adding an acid such as HCl until the indicator dye causes a visible color change. The amount of acid required to cause the change in color directly correlates to the chemical concentration.
Step 3: Rinse Again; all residual cleaning chemicals must be removed. Alkali detergent cleaner will be slippery to the touch, rinse until the spent rinse water is no longer slippery or validate the spent rinse water has a neutral pH of approximately the same pH of the incoming water supply.
Step 4: Inspection; Visually inspect all surfaces and verify that they are visibly clean and free of soil. Use a flashlight if necessary and make sure to check all the hard to reach areas like ports, valves, and manways.
In a production brewery, the effectiveness of the clean may also be validated by an ATP meter (luminometer). A sample of the cleaned surface is taken with a sterile swab and inserted into the ATP meter. The meter exposes the sample to a bioluminescent chemical (the same chemicals that make fireflies light up) and the meter records how much light is produced. The amount of light produced directly correlates to the amount of organic matter on the swabbed surface.
Step 5: Acid Wash; Acid washing is not a necessary step every time you clean. It is recommended to perform an acid wash periodically, likely every 6 months, to remove mineral scale and beer stone buildup. If you have very hard water you may need to do this more frequently. The brewhouse vessels, especially the boil kettle, will likely require more frequent acid washing as well. Always read the instructions specific to the chemical you are using and follow the same guidelines as alkali detergent washing with regards to time, temperature, concentration, and force.
Step 6: Sanitize; Mix up a sanitizer solution per the recommended dosing rate and thoroughly coat the surface to be sanitized in the solution. Any approved sanitizer should effectively disinfect the surface within 30 seconds of contact time. It is always advised to exceed this time, especially in CIP applications, to be absolutely certain that all surfaces have been thoroughly coated in sanitizer solution. If possible, validate the concentration of your sanitizer. Sanitizers vary widely and therefore have different methods of validation, in most instances, it will be a color indicating test strip. Ask your chemical supplier (or homebrew shop) and they should be able to advise you.
Cleaning doesn’t always have to be a drag. Check out these guides and products below to make post Brew Day cleanup a breeze!
Looking at purchasing a system, Tank or OG kettle? Switch out a standard lid for a CIP lid for only $40!
Absolutely NOT! While a highly effective sanitizer, bleach is aggressive and pits stainless steel. Over time pits in stainless steel will harbor microbes and make soils and residual cleaning chemicals more difficult to remove. In short, bleach makes anything made of stainless steel impossible to clean and sanitize. Bleach must also be rinsed so as not to impart any cross contamination and residual flavor into the finished beer. Whatever brewing sanitizer you choose, make sure it is suitable for a no rinse application.
All sorts of microbial infections can happen if you don’t sanitize. These infections can lead to off flavors and poor shelf stability in beer. Once an infection is established it is incredibly difficult to eradicate.
All brewing equipment must be sanitized immediately before each use. Beer should never come in contact with an unsanitized surface until it is in the consumers mouth.
Absolutely! Equipment may have residual chemicals or oils as well as dust and debris from the manufacturing process. Even if the manufacturer is thoroughly cleaning equipment before shipping, it often gets dirty in the shipping and handling process. At MobCraft Beer any new equipment must be cleaned with an alkali detergent, an acid, and sanitized prior to it being put into service.
This post has covered all the essentials of cleaning and sanitation. I hope that it has shed some light on which cleaning chemicals you need, how to use them successfully, and even how these processes may differ from a homebrew setup to a full scale production brewery. Just remember, you don't need every piece of fancy equipment to produce good quality beer. The best tools in your arsenal are common sense, a lot of patience, and occasionally some elbow grease. Any professional brewer will tell you they spend exceedingly more time cleaning than actually producing beer. At the end of the day we are just overqualified janitors that occasionally make (and drink) some beer.
Starting in a homebrew shop Josh Rechek found his love for beer and turned it into a career. With over a decade of experience and thousands of batches under his belt he is still enjoying the creativity, community, and downright amazing beer that this industry offers. For those who want to taste for themselves, come on down to MobCraft Beer and enjoy a cold one. Cheers everybody!
About MobCraft Beer
MobCraft Beer was founded in 2013 by Henry Schwartz and Andrew Gierczak. It is the world’s first crowdsourced brewery. MobCraft’s locations are 505 S. 5th Street in the Walker’s Point neighborhood of Milwaukee, WI and 2403 Champa Street in the Curtis Park neighborhood of Denver, CO. Throughout the year the crowd submits and votes on beer ideas. At the end of the vote, the winning beer is brewed and available for all to enjoy. These crowdsourced beers are served in the taproom with MobCraft flagships, beers from their Wild & Sour Program, and more.]]>Ahhhhhh the cold, crisp, clean sensation of a freshly homebrewed lager tickling your throat all the way down; few experiences are as gratifying. My name is Maria and, like you, I love all things beer: researching it, brewing it, drinking it, and learning about it alongside like-minded individuals. So, pitter patter, let’s get atter; from one passionate homebrewer to another, here’s how to make a damn good lager.
Brewing a lager is not as forgiving as brewing many Ales, simply because you can’t easily mask off-flavours through the use of Hops. For this reason, a great lager, to me, is a lager that is balanced in its taste-profile because that indicates a properly brewed and conditioned lager and is an impressive feat marking an accomplished brewer.
More specifically, the difference between a good lager and an exceptional lager can often be differentiated by the water profiles used and the regions in which the agers originate.
Luckily for homebrewers, and brewers alike, we can closely replicate water profiles through the usage of filtered water and added minerals. That being said, until the day I die, I’ll swear that the Stella Artois I drank in downtown Brussels would put any other Stella in the world to shame; was it the authentic water profile freshly brewed in its birth country, or the fresh Belgian chocolates that accompanied my beer?
Beats me, all I know is gimmie more.
On the most simplistic of levels, lagering is a chemical process that conditions your homebrew utilizing bottom-feeding yeast, low temperatures, and time. The lagering process occurs sequentially after your brew’s fermentation and before its bottling/consumption, with a duration lasting anywhere from four weeks to several months depending on your specific brew.
In my own head, I equate lagering to Cinderella after she met her fairy godmother; here we have a tale of a lovely young girl that just needed a little dusting-off and TLC to become her shiniest self in order to nab her prince charming.
Lagering your beer is the same; it removes unwanted off-flavour-producing compounds (her fireplace cinders) while also carbonating (the dress), clarifying (the glass slipper), and transforming your beer into its most crisp and clean self (the crown).
Even though it’s just a fairy-tale analogy, I’m pretty sure making your own kick-ass Lager won’t hurt your chances of meeting Princess/Prince charming – although it might blur them.
One of the many benefits of some Spike fermenters is that you can ferment under pressure, ultimately saving time in your overall brewing schedule by reducing fermentation time, reducing the need for forced CO2 through natural carbonization and thus reducing overall cost (as if we’re into this hobby to save money, haha), minimizing undesirable esters created by high fermentation temperatures, and freeing-up your brew gear earlier to start your next brew.
When talking pressurized fermentation, it’s yeast’s world and we’re just livin’ in it. Lagers generally pressurize in the 18PSI range (between 15-20PSI), depending on your yeast packet specifications (high-end liquid yeasts typically denote optimal yeast pressures on-packet for each of their specific lager yeasts).
Overall, lager yeasts react well under pressure and ferment at high temperatures while simultaneously decreasing fermentation duration. In sum, if you ferment under pressure, you’ll produce clean and clear lagers much more quickly than the alternative.
Depends, bro – what kind of lager turns your crank? Assuming you want the picture-perfect light, crisp, traditional lager, then mash on the low temperature side around 148° F (65°C). If you plan to conduct a 2-Step-Mash, mash a little lower at around 144° F (62°C) before you put another log on the fire and increase to 156° F (69°C) for mashout.
3 hours of planning, 6 hours of brewing, 3 weeks of fermenting, 2 months of aging, 9 maids a’ milking, 7 swans a’ swimming, and a partridge in a pear tree. Listen: I, of all people, get it —lagering is a long process, but if you’ve managed to have enough patience and perseverance to convince your significant other that a homebrewing setup is an absolute essential and a new dishwasher is not, then I’m confident you’ve got the grit and dedication required to make a damn good Lager.
As with most things worth obtaining in life, patience is key; this is especially true of brewing a mouth-watering lager. Since lager yeast thrives at lower temperatures than ale yeast, lagers take longer to ferment than ales. Where most ales can be brewed and savoured inside of three weeks, lagers take anywhere from four weeks to several months from brew to beard. It is for this reason that many industrial brewers favour production of non-lager beer, as these brews require less fermentation time, less overall equipment usage, and have a quicker turnaround time for consumption and sale.
The notion of throwing back a crisp, smooth, refreshing, and perfectly-carbed homebrewed lager will undoubtedly tantalize even the most patient homebrewer’s tastebuds, but it’s important to understand that, by rushing any part of the lagering process, a brewer will significantly increase the risk of creating off-flavoured beer and wasting the fruits of their labour. My general rule of thumb: if you’re at all unsure if your lagering process is complete, then it’s not complete. When in doubt, wait a few more days and, I promise, it will taste that much better!
Lagers require specific lager yeasts and, as a living organism, different types of yeasts require different temperatures to both survive and perform most optimally; most specifically, lager yeasts typically thrive between 60° F (15°C) to as low as 38° F (3°C) – much cooler than ale yeasts.
If you’re brewing with some sexy, shiny fermenters, you can likely set and forget your fermentation temperature. Alternatively, if you’re brewing with bad-ass classic gear like a 5-gallon fermenting bucket that lacks built-in temperature control, you may have to get creative with temperature control solutions to ensure your yeast thrives at a consistent temperature.
Whether storing in a naturally cool place like a basement or garage, using a Rubbermaid container to make a controlled ice bath for your fermenter, brewing lagers in seasons with historical temperatures in the appropriate range, or fashioning a good ol’ swamp bath (google it), there are many ways to create low-cost lager fermentation temperature controls. Heck, if you’re handy, or know a handyperson who will work for beer, you can even rewire that old refrigerator in the basement where the vegetables go to die.
Whichever solution you choose, be sure to monitor the temperature from the inside of your bucket with a bi-metal thermometer, or from the outside of your bucket with something as simple as a stick-on thermometer; Spike’s got a great one for a great price!
In short, channel your inner ‘Dad’ as the self-proclaimed keeper of the thermostat and house temperature—except with your fermenter.
If you’re a homebrewer like me who is in this game just to get funky and create, then you aren’t motivated by making the picture-perfect lager. But if you’re in it to win it, you’ll want to be precise with your recipe and remember to select ingredients that offer a clean, light, and crisp finish classic of a lager; AKA steer clear of hops and malts that offer heavier ale characteristics robust in flavour and aroma and stick to classic lager hops like hallertau and saaz and use a malt such as pilsner.
Lastly, remember that there are plenty of different kinds of lagers to get creative with; in fact, the first German lager was actually dark in colour.
Using a specific type of lager yeast for your desired homebrew will enhance the outcome of your beer. When I’m spending upwards of 2 months anticipating savouring my homebrewed lager, I always opt for a high-quality liquid yeast strain because it contains live yeast strains suspended in nutrient-rich broth which, in my experience, produce a cleaner and more interesting flavour profile.
Additionally, many liquid yeast companies, such as White Labs, offer data sheets with incredibly specific fermentation temperatures for achieving an optimal brew.
My advice? Skip your morning coffee run and instead opt for the fancy yeast; trust me, your tastebuds will thank you later.
Since lager yeast ferments at lower temperatures, the yeast reproduces at a slower rate and consequently risks fermentation spoilage from invading microbes. Yeast starters, however, contain significantly higher quantity (and more active) yeast cells and thus act as a counterbalance to the lower and slower fermentation nature of lager yeasts.
A starter is a great way of making sure that there are enough yeast cells for your beer to completely ferment – this is especially true of lagers, which can need up to double the amount of yeast compared to an ale.
Nothing kills a party quicker than premature fluids – ammiright?! Premature wort fermentation is no exception. Using a wort chiller will facilitate a low enough temperature transfer of wort to fermenter and prevent premature fermentation and lager off-flavours caused by high wort transfer temperature to your fermenter. The risk of brew oxidation is heightened as it cools from its initial hot temperature, so the objective is to lower the wort’s temperature as swiftly as possible.
A rapid chill, which is facilitated by a wort chiller, also creates what is known as a ‘cold break’ in your finished beer. A cold break will not occur with a slow chill, only a rapid chill, and if a cold break does not occur, your finished beer will have a ‘chill haze’ – this is simply an unclear/hazy appearance in the beer due to the presence of proteins that are eliminated from the beer with rapid chilling, but not with gradual chilling. It’s worth noting, too, that unclear/hazy beer has less of a shelf-life than clear/un-hazy beer; but this isn’t a problem for most homebrewers, since we are typically as passionate about guzzling our beer as we are brewing it and usually don’t have to worry about it lasting months and months.
A two-stage method of fermentation is essentially transferring your fermented wort into a secondary fermenter after fermentation has completed and before your long-haul lager conditioning for several weeks begins. In essence, if you don’t have a yeast-dump in your brew gear, yeast (or yeast cakes) will have collected in the bottom of the fermenter you initially used and, conditioning for a couple months in that same primary fermenter may cause the caked yeast to produce off-flavours.
Primarily, though, transferring to a secondary container (keg, carboy, etc.), will avail your current fermenter so that you aren’t a sitting duck (or brewer) for the next few months while your lager conditions. Finally, practicing secondary fermentation will also result in a more clarified beer and, as you know, brewers and beer connoisseurs alike love raising that crystal clear glass of lager upward to the sunlight before we throw er’ back and gulp with pride.
If you live in a humid climate like I do on Cape Breton Island in Nova Scotia, choosing to condition a lager within a fermenter will cause excessive condensation on the exterior of your fermenter – meaning towels or the like to catch the runoff if your brew space doesn’t have built-in drainage. For this, and a few other reasons, my personal preference is to condition my lagers in kegs, within the homemade Kegerator (rewired deep-freeze), under consistent temperature control.
P.S. Just in case the thought crosses your mind, ensure you don’t pitch a second batch of yeast after transferring to a secondary vessel; there’s still ample viable yeast cells from your primary fermentation floating within your homebrew to support the conditioning process.
All cold fermentations, such as lager fermentations, naturally discourage the elimination of diacetyls due to low fermentation temperatures. Since the presence of excess diacetyls often creates off-flavours in your lager, consider conducting a diacetyl rest in your fermenter toward the end of your primary fermentation.
Over 5-6 days, simply increase the temperature of your fermentation by a degree each day (up to 62°F/16.5°C); this simple/slight warming of the wort will aid the yeast in diacetyl minimization, encourage the yeast to consume the sugar more completely, and will keep your lager tasting nothing but delicious indeed!
Many moons ago, at the start of my beer-loving journey, I remember asking a connoisseur friend which specific beer glass I should use for which specific beer type – to which, he simply replied, “whichever glass makes you happiest.”
I’ve brought this sentiment forward as I learned to brew beer and then gradually developed into a more serious beer brewer. In summary, if it feels good – do it. Or, more accurately, if it feels good—brew it.
We aren’t in the game of homebrewing to sell beer, we’re in this game to create, improve, and delight in the journey as much as that carbonated, delicious destination.
To that end, please let me know in the comments if you have any additional hot tips for making a kick-ass lager; I’d love to make your acquaintance and see inside your brain!
An avid homebrewer, Maria resides in Nova Scotia, Canada, where she thoughtfully creates beer from her little green backyard brew barn. Co-founder of the @BeerBrewnettes social media platforms, Maria helps to create and publish daily content on all things beer-related: for homebrewers and beer-lovers alike, you can join the adventures of the two Beer Brewnettes on YouTube, Instagram, and Facebook via https://linktr.ee/BeerBrewnettes
]]>My name is Greg Wegiel, and I have been a homebrewer since 2011. During this time I have learned a lot about the brewing process and came to the conclusion that a key component of this process is the drive to improve each time I brew.
To date, I have over 170 batches under my belt starting from a boil kettle on the stove and working on up. In 2018, I made the switch from a BrewInABag system in the garage to a complete electric 20G Spike Trio System. Since then I have added in two CF15 with a glycol chiller to complete the package. In 2022 I joined the Master Homebrewer Program and brought home 30 medals for the year. Brewing is a passion to me and I aim to improve my process each time I brew and am always willing to help out anyone who may need it. So let’s get into it!
Bottling is one of the most common ways for a homebrewer to package their creations. Many ask, what are the proper tools needed, and what is the proper process to bottle beer? Not following the proper process or procedure can lead to poor tasting or infected beer. In this blog, we will be discussing the key points behind bottling your beer. The main keys to success are as follows:
You know when your beer is ready for bottling after the fermentation cycle has completed (no activity in the airlock and verified by taking a gravity reading) and you have completed any personal pre-bottling rituals that you may have. These include secondary fermentations, clarifying, etc.
With general bottling these will not be necessary as the goal is to keep some yeast in suspension to activate with the priming sugars to recreate fermentation and carbonate the beer.
No, bottling before fermentation completes is a risky procedure. The beer will continue to ferment in the bottle uncontrollably. This can increase pressure inside of the bottle, possibly to a level that the bottle cannot hold causing the bottle to explode. We will discuss bottle conditioning later, which is a form of this, but in a controlled manner.
Yes! There are multiple ways to bottle from the fermenter depending on the complexity of your setup.
At the very minimum, you’ll need: bottling bucket, bottling wand, sanitizer, bottles, caps and a capping tool. You can also add a counter pressure bottling wand as well.
No matter where I get bottles, or what the status of the bottles are, the prep for them is all the same.
First, all bottles get a good rinse at the sink, any labels removed and loaded into a dishwasher capable of sanitizing and run them through a cycle. After this cycle is complete, they are ready for bottling. During bottling they are run through a quick rinse with Star San solution to further sanitize them and prevent any possible contamination.
Most homebrewers gather bottles from other brewers by sharing or reusing commercial bottles.
If your brew buddies are also out of bottles, you may need to purchase some at a local home-brew shop.
There are eight steps to bottling beer. Below we’ll go into more detail on each step, so you can get to bottling your delicious brews in no time!
Everything that the beer is to come into contact with should be washed and sanitized properly. Personally I make a 5-gallon bucket of sanitizer solution that every piece of tubing, filters, wands, etc. sit in until they are needed. That’s just working smarter—not harder.
There are multiple ways to prime your beer for bottling from tablets to using table sugar, dextrose, DME, and more. The most common types are tablets and dextrose otherwise known as corn sugar.
The rule of thumb for dextrose would be ¾ cup for a 5-gallon batch. In order to put the sugar into the beer, you would need to boil the ¾ cup of dextrose in about 1-2 cups of water to sanitize it, and then pour it into your beer and stir it in gently (to decrease any chance of oxidation) with a sanitized stirring utensil.
Be sure to take a hydrometer reading prior to bottling to properly measure your alcohol content of the beer. Alcohol content can be calculated by taking (OG-FG)/131.25. Bottle conditioning can actually increase this number by up to 0.2%
Siphoning should be handled by either using an auto-siphon tool or utilizing a sanitized hose and leaving some sanitizer in the hose to auto-start a transfer as listed below. Fill the hose with water (or preferably sanitizer) and then drain it into a separate container.
The liquid will pull the beer behind it, at which point you can plug the hose and move it to your bottling bucket or fermentor. By no means should sucking on the end of the hose be a technique to initiate a transfer as it is not sanitary!
This is a simple step, but an easily forgettable one. This can be accomplished by keeping your caps in a solution of sanitizer and removing each one prior to capping. I use a FastRack bottle sanitizer that has a reservoir on it for just this purpose.
No matter the means of filling, the goal is the same. The bottle should be filled to around 1” from the top using your bottling wand, bottling gun, or counter pressure filler. Once filled to this level, the bottle should be immediately capped with a sanitized cap using the bottle capper.
When filling a carbonated beverage, capping should be done on top of foam. The foam is CO2 coming out of suspension and takes up the extra space in the bottle keeping oxygen out reducing any oxidation.
As covered in the filling section, bottles should be capped immediately after filling to decrease any chance of oxidation using a sanitized bottle cap and bottle capper.
Bottle labeling is an optional part of the process and usually unnecessary if sending any beer to competitions. A majority of homebrewers these days either put masking tape on the bottle with information or simply use a marker on the bottle cap to identify the contents.
However, this doesn’t mean that you can’t have some fun by creating your own unique label for some of your favorite beers. It’s also a good idea to label beer if you’d like to give it as a gift to share with fellow brewers.
How long the beer sits after bottling depends on the style of beer and how it was bottled. If it was a style of beer that you plan on aging, (stouts, barleywines, etc.) it is best to let it condition in the bottle for some time, and crack one open and check on them periodically. If you bottled straight from a fermenter that was carbonated prior to bottling, the beer will be ready to drink immediately.
If you bottle conditioned the beer, then it’s best to wait 1-2 weeks prior to putting the beer in the fridge and getting it ready to drink. This lets the priming sugar re-ferment in the bottle creating the carbonation.
Discussed in this article are all of the different parts and pieces that are key to bottling beer. Some of them are a necessity and some are just optional and make the process easier. Just keep in mind that the key parts are keeping everything clean and sanitized and keeping oxygen out in order to keep what you created fresh and drinkable until it's gone. Which depending on how good the beer is…could be right away.
It’s been over a decade since Greg Wegiel upgraded from the stove to a 3-vessel electric brewing system, and he hasn’t looked back since. With over 170 batches under his belt and 30 medals to show for it, he is constantly looking for ways to experiment, improve and create delicious tasting brews.
]]>Fundamentally, the production of beer is simply an aqueous extraction of compounds of varying solubility from crushed grain that is sterilized, flavoured and stabilized against microorganisms through boiling in the presence of organic matter (i.e. hops), with subsequent fermentation by yeast. Of course, when you dig down it’s quite a bit more complicated than that, but the processes and ingredients are simplistic.
Yet, the over simplistic nature of the ingredients does not preclude a wide variety of recipes allowing the creation of numerous styles of beer – The brewer is the chef, and the brewery his or her kitchen.
Unfortunately, many of the delicate, volatile, aroma compounds we are in search of are lost to a myriad of brewing processes; particularly those on the hot side of brewing. These delicate flavours must be added back to preserve the flavour profile we are after and bolster the underlying hop intensity developed on the hot side.
The conversion of hop α-acids on the hot side provides a flavor base that needs additional layering of hop character to round out a balanced flavour profile; like a chef salting to-taste. Thus, the primary goal of a dry hopping regime is to extract flavor and aroma compounds from the hops, solubilize them in the beer matrix, and do this with a minimal impact on colloidal and oxidative stability.1
Dry hopping is defined as a cold extraction process (4–20 °C) of non-volatile and volatile chemicals from hops into an alcoholic solution without intending to increase product bitterness. In stark contrast to hot-side hopping, dry hopping is associated with a marked decrease in isomerization of hop ɑ- (and β-) acids, and thus results in a hop addition with that aims to preserve the fresh, fruity, aroma compounds present in the plant material, while limiting the bittering effects of isomerization.
Conversely, hop additions that occur during the boiling phase of brewing, and potentially during the whirlpool phase depending on temperature, are subject to thermal isomerization to α-iso-acids resulting in the production of bittering compounds.
The history of hop usage in beer is covered quite extensively elsewhere, and I will not cover it here. However, it is interesting to note that the first reported use of dry hopping took place in the British Empire, where brewers used kettle hops and presumably dry hopping techniques to increase both the microbial stability and flavor profile of beer.
In fact, more recent investigations using modern day science have begun to unravel the reasons that dry hopping indeed increases the oxidative stability of the final brewed product. Anita Oberholster and her group at the University of California Davis have shown that after ~24 h of dry hop contact time, at 1.43 g pellets per liter of beer (~0.05oz/gallon), the beers were chemically preserved to some degree.2 However, that is typically not the reason that most brewers are focused on the art of dry hopping.
The main purpose of dry hopping, as mentioned earlier, is to bolster the assertive hop base flavour in post-fermented beer through the addition of more delicate hop aroma compounds.
We can turn our attention to some scientific work to help us better understand how dry hopping influences the taste of beer. In an article by Thomas Shellhammer’s group out of OSU, researchers used a panel of 13 trained panelists to score the differences in the samples of dry hopped compared to non-dry hopped beer using a sensory analysis score of the orthonasal aroma, broadly defined as the ability to perceive flavor dimensions of foods and drinks. The descriptive sensory analysis score for 24h dry hopped beer samples demonstrate significant positive correlation between dry-hopping rate and the sensory attributes.
These sensory scores are supported through the evaluation of hop volatile analysis in the headspace of beer samples. Increasing dry hop doses broadly correlated positively with levels of many volatiles such as β-caryophyllene (spicy, woody), α-humulene (spicy), terpinen-4-ol (menthol), α-terpineol (citrus), linalool (floral, fruity, citrus), nerol (rose-like), geraniol (floral, rose-like), and geranial (green/grassy, floral).
So as one can see, there are certain volatile compounds that would be undesirable at elevated concentrations if the goal was to create a floral and citrusy IPA. Thus, it is not surprising that more is not always better. These authors show that overall hop aroma and intensity and citrus characteristics favour a nonlinear relationship with diminishing returns beyond 800g/hL.
Beyond this concentration, herbal/tea notes dominated the sensory analysis. It was broadly observed that the extraction rates of the terpene alcohols, like linalool, which impart citrus and floral notes, decreased with increasing dry hop rates. Therefore, this study suggests using a static dry-hopping rate between 400 and 800 g/hL (0.5-1oz/Gallon) to highlight fruity hop character.3
So time on hops matters, but what about timing of hop additions? Researchers at Sapporo brewery in Japan published an interesting article in 2016 showing how the timing of dry hop charge, defined as late (pre-fermentation after autoclaving), dry 1 (at day 3 of fermentation) and dry 2 (at day 6 of fermentation), changes the hop-derived flavour compounds in late-hopped and dry-hopped beers. In this investigation concentrations of key monoterpene alcohols (β-citronellol, nerol, geraniol and their derivatives), β-ionone and several esters (isobutyl isobutyrate, isoamyl isobutyrate, 2-methylbutyl isobutyrate and ethyl heptanoate) were generally higher in dry hopped beer when the hops were added at day 6 of fermentation compared to day 1 of fermentation.
Thus, it is suggested that the addition of hops later in fermentation is of critical importance in increasing the concentration of hop-derived flavour compounds. However, it is worth noting that linalool, a key monoterpene alcohol imparting citrus and fruity notes, demonstrated markedly increased concentrations in late-hopped beer (i.e. prior to inoculation with yeast) compared to either of the dry hopped samples.4
This finding is somewhat surprising yet does support the rationale for “dip hopping” where hops are steeped with hot water in the fermentation kettle prior to the addition of post-boil wort with subsequent inoculation with yeast. Dip hopping warrants a separate blog post and won’t be discussed further, but steeping hops appears to have a tremendous influence on hop character of the final product.
If you’ve ever added hops when you were sure fermentation was complete, and subsequently watched as your final gravity reading continued to drop, you are certainly not alone. This phenomenon, known as hop creep, is effectively the liberation of fermentable sugars due to enzymatic processes within the hop plant material.
The diastatic activity of hops was likely first outlined in 1941 in a publication by Janicki and colleagues from the University of Manchester. These sets of experiments showed that dry hop additions can produce an appreciable quantity of fermentable sugars in a dextrose-rich beer, and promote what the authors refer to as "after fermentation”.5
The cleavage of non-fermentable sugars to fermentable sugars reached near completion within 6h in these experiments suggesting that even the shortest times needed to achieve maximal extraction of hop aroma compounds,would not be short enough to mitigate the effects of saccharification.
What is interesting, is that these experiments also show that the diastatic activity of hop seeds is considerably more potent than whole hops, and thus hop varieties that do not contain seeds may lessen, but not prevent, the saccharifying effects of dry hopping.
Prevention of hop creep can be challenging. Removing yeast from fermentation vessels can be challenging for most homebrewers who do not have the luxury of bottom-draining fermenters. One strategy that has been anecdotally shown to be effective is “soft crashing” the beer below the ideal temperature threshold of the yeast. While we know biological processes simply do not stop when cold (or colder than “ideal”), this strategy is aimed at simply decreasing the rate at which the yeast will restart fermentation. Personally, I continue to use this technique with good success.
While dry hopping is generally associated with the extraction of the more delicate volatiles, research has shown that there are increased extraction rates of the non-volatiles that can contribute to perceived bitterness in the final beer in the absence of isomerization. Again, we turn to Thomas Shellhammer’s work, who has shown a positive correlation between the dry hopping rate and perceived bitterness in trained panelists.
As dry hopping rates increased, so did the extracted concentration of humulinones, which are naturally occurring compounds formed from the oxidation of α-acids in hop leaves. The presence of humulinones can be found in nearly 8-times the concentration in dry hopped Belgian trappiest beers compared to non-dry hopped counterparts and has been attributed to be responsible for nearly 30% of the bitterness.6
Thus, it is plausible, and even likely, that heavily dry hopped beer will present more bitter than the brewer may have expected.
It has been said, and shown anecdotally, that oxygen is the moral enemy of highly dry hopped beer, in particular hazy IPA’s. However, I’ve been unable to find much research to support the mechanisms at play in the context of dry hopping alone. It is proposed that the production of reactive oxygen species (ROS) in wort are the driving mechanism in the degradation of beer matrix compounds resulting in off-flavours and discolouration (a Maillard-type reaction resulting in browning seen in light beers).
While there is clearly complex interplay between various degradation pathways, in an investigation from researchers at Technische Universitat Berlin, it was demonstrated for the first time that the de novo formation of Strecker aldehydes, resulting from free radical attack on amino acids, was largely dependent on the concentration of dissolved oxygen and a key contributor to the staling reactions in stored beer.7
While this investigation was not focused on dry hopping, the principles would similarly apply. Methodology to reduce the exposure of beer to oxygen such as hop dosing under CO2, using a CO2-saturated hop doser, or dosing hops during active fermentation to consume excess oxygen, should be considered.
The pH of finished beer can have a drastic effect on a number of characteristics, including stability, flavour profile, and infection risk, particularly in pH ranges beyond 4.2-4.5. In a Master’s thesis by Matthew Schmick, at the University of Wisconsin-Stout, he describes a series of experiments illustrating the influence of dry hopping on final beer pH.
These experiments show a mean pH change between 0.040-0.056, and 0.233-0.332 at a rate equivalent to 0.5 lb./bbl. And 3.0 lbs./bbl., respectively, and thus suggest that beer with higher dry hop doses are at increased risk of pH drift.8
These data have been broadly shown in literature, including the work of Thomas Shellhammer and colleagues, who demonstrated a linear increase in pH with dry hop dosing with ~0.14 pH unit increase for every 0.5oz of dry hops per gallon of beer.3 Furthermore, the pH drift has been demonstrated to be independent of the hop variety and beer style.
There are many more variables to consider when adding dry hops to your post-fermentation vessel. As the transfer of soluble components out of the organic hop material follow dissolution kinetics (that is, follow a concentration gradient dependent on the aqueous solubility of each component), we must consider various factors that can influence those processes. In particular, variables that are within the control of the brewer are hop contact time, dry hop temperature, and agitation.
One would assume, more contact time would equate with more mass transfer of delicate hop compounds into the beer. As it turns out, this is not necessarily true, and may in fact be the opposite.
Peter Wolfe, a graduate student out of OSU, demonstrated in his 2012 Master’s thesis that day 7 concentrations for linalool and myrcene were not higher than those achieved with 24h of dry hopping. In fact, peak extraction of hop aroma compounds were reached in ~6h, suggesting that 24h might be sufficient to achieve complete extraction of α-acids and polyphenols.1 Further, some components of the hop extraction had declined by day 7 suggesting a partitioning of these extracts back into the organic hop material.
Twenty-four hours of contact time between fermented beer and hop material appears to result in near complete saturation of beer with hop-derived flavour compounds. But how might the temperature influence these processes? In 2013 a supplement by Mitter & Cocuzza showed that the increased polarity of the terpene alcohol linalool was not appreciably different, and nearly complete, by 24h at both 0°C and 20°C. Myrcene, on the other hand, showed marked differences with solubility limits reached by 48h at 20°C, doubling the limit reached at 4°C over the 2-week observation period.9
Thus it stands to reason that cold dry hopping techniques would favour beer styles characterized by the floral, citrusy notes of linalool, like NEIPA’s. Conversely, a warmer dry hop technique may favour beer styles characterized by more resin, piney notes, like West Coast IPA’s.
Sedimentation of organic matter can certainly influence the dissolution of hop aroma compounds by limiting exposure of the plant material to beer. In the short-term extraction data shown by Wolfe, these experiments were performed under conditions with constant agitation and at 20°C, and thus the influence of not only temperature, but also agitation, on the extraction solubilities of both linalool and myrcene would be of interest in helping understand the behaviour of terpene alcohols and α-acids during the dry hop period.
In an article by Scott Janish, he describes a study where recirculation of beer using a pump found a 58% increase of linalool after just 2 h of dry hopping compared with a control beer that was not recirculated.10 Scott also goes on to describe the “burping” techniques used at various professional breweries to disturb the hop material and ensure contact time between beer and the organic hops to facilitate mass transfer of hop-derived compounds.
For the most part, I believe that we do. Most recipes simply adopt the industry-standard practice of between 4-12 days of dry hop exposure. However, I hope that the data presented above suggest that these approaches simply may not be optimized for hop aroma compound extraction at the homebrew scale.
I’ve added a small decision tree that I’ve created based on the data presented in this blog post. It is nowhere near comprehensive, but does provide guidance on some of the thought processes I go through when considering my dry hop schedules.
Variable control, and understanding the aforementioned concepts, can only help your brewing process. But this does not mean you cannot make wonderful beer without following them. Brewing can be as easy or complex as you want it to be, and the process should be enjoyed in either camp.
As a scientist, I encourage experimentation with variables under proper control, and I recognize that’s not for everyone. When it comes down to it, the homebrewing experience is all that matters. It is uniquely personal in its methodology, stylings, and motivation. So, no matter your reasons for home brewing – and dry hopping – you do you!
Scientist, cyclist and avid, albeit somewhat novice homebrewer, Sam Gilchrist began his homebrewing journey during the COVID lockdown—fulfilling a desire that had been brewing (pun intended) in his mind for many years. A proud Spike Solo System owner, his understanding of science and methodological approach has significantly impacted how he brews, while rediscovering his love of biology, lab science and his oddly compulsive desire to control variables.
References:
Brewers yeast, Saccharomyces cerevisiae, is a unique and amazing microorganism (the same organism used in distilling and breadmaking). These organisms require sources of carbohydrates, in the form of simple sugars, to feed themselves and reproduce. When oxygen is present, yeast are able to produce large amounts of energy, which they use to replicate exponentially and increase their population. This same process, in the absence of oxygen, proceeds down a very different pathway known as fermentation.
Simply stated, fermentation in the brewing process happens when yeast convert sugars from wort (sugar water made from malted barley) and metabolize them into ethanol, carbon dioxide, and secondary flavor and aroma compounds.
The fermentation process is a necessary step in the creation of any alcoholic beverage, without which, we would have just plain sugar water. In beer production, yeast fermentation is especially important. Like all alcoholic beverages, the main purpose of yeast for a brewer is to produce ethanol and carbon dioxide from wort carbohydrates.
However, the secondary compounds that are produced during yeast fermentation are equally important, because they provide complex subtleties to beer, including mouthfeel, aroma, and taste.
It has been shown that yeast produce over 500 flavor and aroma compounds as secondary metabolites during fermentation, and give certain beer styles their distinct characteristics. The compounds that make up the spectrum of most beer descriptors can be generally categorized into some common groups: esters, fusel alcohols, phenols, aldehydes, diacetyl, and sulfur compounds.
Esters play a big role in the character of beer, especially in ales. An ester is a compound made up of an acid and an alcohol and it is esters that provide the fruity aromas and flavors that you find in beer.
Ester production varies by yeast strain and fermentation conditions. Some common esters are ethyl acetate (solvent), ethyl caproate (apple), and isoamyl acetate (banana).
Fusel, or higher, alcohols such as n-propanol, isoamyl alcohol, and isobutanol taste similar to ethanol, but they can add warming, hot, or solvent flavors and mouthfeel to beer.
While these are not desired traits at high levels in any beer style, many good-tasting beers do contain fusel alcohols at low levels where they add complexity. Yeast strains vary in fusel alcohol production, with ale strains generally producing higher fusel alcohol concentrations than lager strains.
Phenolic compounds can come from both ingredients and fermentation. Phenolic compounds from yeast are described as spicy, clovey and in high concentrations, plastic, medicinal, Band-Aid, and smoky.
In the majority of beer styles, phenolic flavors are a flaw, although there are some obvious exceptions. Bavarian hefeweizen must have clove and some Belgian beers have other phenolic characters, all of which are derived from yeast metabolic byproducts.
Sometimes noted as green apple or fresh cut pumpkin, acetaldehyde is a precursor compound in the fermentation process - it is an intermediate that is formed and reused to complete a metabolic cycle.
Most acetaldehyde is reused by yeast, but some can be left behind. While some level of this compound is acceptable in beer, and even adds to the complexity, excessive levels of acetaldehyde are generally referred to as an off-flavor and can be considered “green” or unfinished. Longer conditioning can often reduce levels of acetaldehyde if they are noticeable.
Even though many classic beer styles allow for low levels of diacetyl and some consumers find it pleasant, many consider it a flaw in any quantity. Even at low levels, it can contribute slickness or slipperiness to a beer’s mouthfeel. In higher quantities, it gives beer a buttery or butterscotch-like aroma and flavor.
Some yeast strains, particularly highly flocculent English ale strains, are heavy diacetyl producers.
Sulfur compounds in beer smell exactly the way you would expect - rotten eggs or, dare I say, like a fart. Yeast produce sulfur compounds during fermentation, but these compounds are volatile enough that strong fermentation activity drives them from solution along with CO2, greatly reducing sulfur by the time you drink the beer.
In colder temperatures, the volatility of the sulfur compounds is reduced, keeping them in solution more readily than at warmer temperatures.
Lager brewing results in more sulfur compounds than ale brewing because of the lower fermentation temperatures. Given enough patience, sulfur will almost always dissipate.
The primary types of beer fermentation are: ale/top-fermenting, lager/bottom-fermenting, mixed/”wild” culture fermentation, and spontaneous fermentation.
Ale yeast fermentations are often referred to as top-fermenting. Ale yeast strains prefer warmer fermentation temperatures (64F-78F), which promotes more active fermentation with high levels of CO2 production.
This results in yeast “floating” to the top of the fermentation with the carbon dioxide bubbles, so named top-fermenting. These warmer fermentation temperatures also promote more metabolic byproducts, like fruity esters, so ales are usually considered more flavorful than lagers.
On the flip side, lager fermentations are typically considered bottom-fermenting. Lager strains ferment well at cooler temperatures (48F-60F), making for less vigorous activity and what we call bottom-fermentation. Lager fermentations will also result in cleaner flavor and aroma profiles, due to the subdued activity and cooler temperatures.
Some alternative types are the mixed or wild culture and spontaneous fermentation. “Wild” cultures are strains of fermenting organisms that are not of the species Saccharomyces cerevisiae. They could be other species of yeast, such as Brettanomyces and Pichia or fermentative bacterial species such as Lactobacillus brevis, which can also produce ethanol and CO2.
Other non-ethanol producing organisms are also used in brewing, to produce specific flavor and aroma compounds, but are almost always used in conjunction with a strain that produces alcohol to create resulting beers. These are known as mixed culture fermentations, utilizing more than one organism, strain, or species.
Similarly, spontaneous fermentations are fermentations with a plethora of many different organisms including yeast and bacteria. While spontaneous fermentations depend heavily on natural organisms in the environment (no cultures added by the brewer), both spontaneous and “wild” culture fermentations will result in beers that are high in detectable amounts of acid compounds, contributing to their characteristic sourness and general funkiness.
This is a direct result of the bacterial and non-Saccharomyces yeast present in the fermentations.
The first stage in fermentation is referred to as the Lag Phase. This early part of fermentation is when yeast is acclimating to the physical environment of wort. While fermentation is defined as an anaerobic process, oxygen is critical at this stage to provide ample building blocks for new cells.
Here, cells begin uptake of dissolved oxygen, minerals, and amino acids (nitrogen); there is no/little detectable uptake in glucose. There is not much visible activity at this stage, but it is a critical one as yeast build new healthy cells to prepare for fermentation.
Exponential Log or Growth Phase is when all of the oxygen has been used and yeast begin to quickly consume wort sugars, producing CO2 and showing signs of active fermentation. This is the stage of exponential growth and the cell count will increase rapidly, while fermentation continues to become vigorous.
During the Stationary Phase, the rate of yeast growth and carbohydrate assimilation slows. The majority of the flavor and aroma compounds have been produced at this stage, and yeast will now reabsorb compounds like acetaldehyde and diacetyl.
This is also considered the beer maturation or conditioning phase, as yeast are “cleaning up” any compounds associated with young beer to reach the appropriate complex balance of flavors.
The time to ferment beer depends on a number of factors including yeast strain genetics, starting gravity, and fermentation temperature.
In general, most ales will ferment fully in approximately 7-10 days. Lagers, because of their slower fermentations and need for more conditioning, can take anywhere from 14-21 days.
Malting refers to the process of germinating and drying barley or other grains. This activates the naturally-occurring enzymes within the grain, making them more readily used down the line in the brewing process. Drying stops enzyme activity, allowing the grains to be stored and transported easily without spoiling.
Malting also causes the husk of the grain to become more friable (crumbly), making it easy to pass through a grain mill.
Milling the grains crushes the husk of the grain, making the starches contained within accessible for mashing.
During mashing, the milled malted barley (or other malted grains) is steeped in water at specific temperatures to activate the enzymes, which will break down the complex starches into smaller carbohydrates (sugars).
While various mash temperatures can be employed for different purposes, the primary goal of mashing is to create enough simple and fermentable sugars for yeast fermentation.
This happens effectively at 145-153F, where amylase enzymes are highly active and can cleave the starches into glucose, maltose, and maltotriose which can be metabolized by yeast.
Once starches are converted into fermentable sugars, the solids need to be separated from the liquid wort. Lautering is essentially like using a very large colander to remove the grains from the liquid, while rinsing the grains with fresh water to extract any remaining sugars.
Boiling serves a few purposes: halting the enzyme activity (amylase enzymes fall apart at temperatures above 155F), sterilizing the wort so it is free from any microorganisms, and allowing hops to be added and bittering hop oils to be isomerized (converted into bittering compounds).
Fermentation is the addition of yeast (in a non-spontaneous fermentation), and metabolism of wort sugars into ethanol and CO2. Secondary metabolites are also produced, adding flavor, aroma and complexity to beer. Yeast is removed from the beer once fermentation is complete.
During conditioning, small amounts of remaining yeast will clean up residual acetaldehyde and diacetyl compounds, helping to mature the beer. At this point, you may decide to naturally carbonate the beer by capping the fermentation vessel (or package, if already packaged) and allowing build up of low levels of CO2, which will stay in solution.
Finished beer can be packaged in many different forms, as long as the package is airtight and can handle the pressure of 2.5-2.8 volumes of CO2 (typical carbonation rates). At this point, it is critical to ensure there is no oxygen in the package, to ensure the beer is shelf stable and does not undergo oxidation.
Fermentation is a critical step in the beer-making process and the world of fermentation can be somewhat complex. From basic yeast metabolism to the array of flavor and aroma compounds, an entire book could be (and has been!) written on best practices. No matter your experience level, novice or expert, having a good grasp of yeast and fermentation can only help you make better beer.
For more information about yeast fermentation, check out Yeast: The Practical Guide to Beer Fermentation by Chris White.
To get that foolproof fermentation, get our latest innovation, PurePitch Next Generation.
Neva Parker earned a Bachelor’s Degree in Biology from Gonzaga University in Spokane, WA and first became interested in the brewing industry while studying abroad in London. She started at White Labs in 2003 as a lab technician and now serves as Director of Operations. Neva is married to an engineer, a mother of two wonderful kids and a world traveler. She loves cooking, cocktails, and entertaining.
]]>By Matt Dailey
For many of us, homebrewing begins as this feeling of excitement. The idea that we can brew a beer for our buddies to enjoy and call our own is something we all strive for. It doesn’t take long before it grows into more than that. It becomes a passion. For me, brewing is something mankind has been doing for thousands of years, and I always wanted to be a part of that history.
I’m Matt Dailey, and I run Oil Creek Brewing Co. I started with a one-gallon kit fermenting in my closet, and now I write blog posts, recipes, and share insights and tips on Instagram and Facebook on a regular basis.
Many of us love a good IPA or a stout on a cold day. But after a hot day in the sun, we reach for a nice, cold, crisp refreshing lager. I mean, is there anything better?
Even though these two beer styles are constantly being used interchangeably, they really need (and deserve!) their own individual spotlight—because they are very different!
In this blog, I’ll be shining light on the differences between ales and lagers and how you can distinguish them from one another.
The key difference between ales and lagers is the yeast they’re brewed with. When it comes to these two styles of beer, yeast is the star of the show.
Speaking of yeast, let’s start with a few of the main ingredients of beer. Reminder that beer is made up of four main ingredients: water, grain, hops and yeast.
If you make a beer with 10lbs of 2 row, some chocolate malt, roasted malt, a handful of caramel malt and 25 IBUs of hops and pitch a vial of English ale yeast, the result is a porter ale.
“Beer is made up of four main ingredients: water, grain, hops and yeast.”
If you use those same malts and hops but pitch a vial of Czech Lager yeast, you’ll have a dark Czech lager. Similar ingredients, but worlds apart when it comes to flavor, mouthfeel and aroma.
So what makes them different? Once again…it comes down to yeast.
Saccharomyces cerevisiae, also known as ale yeast, is the largest and oldest yeast variety known in the brewing world. There are literally hundreds of strains of this yeast. It ferments between 65°F and 95°F. You can use a different strain of this yeast to brew a Kölsch, IPA, stout, ESB, Hefeweizen or any other beer in the ale family.
Of course, each strain has its respective characteristic esters that make each ale unique. You may also hear this yeast called a top fermenting yeast.
Saccharomyces pastorianus, also known as lager yeast, is a relatively newer yeast in the brewing world (150 years as opposed to thousands of years with ale yeast). There are far fewer strains of this yeast as well, since it hybridized itself apart from its ale counterpart much more recently. For the most part, it produces alcohol under much colder temperatures.
While it typically ferments between the upper 40s to 55°F, one strain, California lager, will ferment at 65°F. These beers are less fruity in ester production and ferment much slower than ales. You will also hear these called bottom fermenting yeasts.
Each variety is dependent on temperature. If you don’t have the ability to keep your fermenting beer between the upper 40s and under 60°F, you’ll be brewing mostly ales.
Lagers can withstand high abv, but you’ll need a lot more yeast to produce a higher abv beer. This means building a bigger starter. Typically, the higher abv beers you find will be ales. Not to say you won’t find an 8% Doppelbock (lager).
As stated before, ales ferment between 65°F and 95°F. Some Kviek strains can even handle over 100°F! Lagers ferment in the upper 40s to 55°F.
Each beer style benefits from being stored cold, but lagers require an extended storage time at cold temperatures. Being patient with your lager will pay off in the end—I promise.
Make yourself a good helles and drink a fresh pour, then drink it again 6-8 weeks after being lagered. You’ll then understand why being patient is one of the biggest aspects of lager brewing.
“Being patient is one of the biggest aspects of lager brewing.”
Neither ales or lagers are bound by hop content. From the biggest baddest ales out there, think Heady Topper or Pliny the Elder, there are bold lagers that match the hops, think Pivo or Mass Rising. Hoppy Pilsners or India Pale Lagers aren’t as common because lager beer is just now making headway on the craft beer radar.
Both ales and lagers can be light in color or dark in color. Most folks probably prefer a pale lager after mowing the grass but may prefer a dark rich stout in the winter. Seek out the dark lagers this winter.
You’ll be pleasantly surprised.
The body in most lagers is generally lighter than that of its ale counterpart. In brewing, you’d probably mash in at a lower temp with a lot of lager styles. Even the darker ones. This leads to a drier and very crisp finish in most of your lager styles.
We all know the most popular beer style in the United States is the tried and true IPA. No surprise there. But what is the most popular lager? Still, the American light lager reigns supreme. The craft beer industry is making a valiant effort to change the perception of American light lagers.
Just a couple years ago, you’d walk into a craft brewery and find a few IPA’s, a stout and maybe a sour. Now, you’re likely to find a lager or two on that tap list as well. It’ll be exciting to see what is to come for lager beer in the American craft beer scene.
Whether you’re brewing or drinking, there’s a beer for every occasion. Ales and lagers are separated by yeast. It all comes down to that. It depends on what you want to brew and have the capability to brew. If you do not have the ability to keep your beer cold during fermentation, you should avoid lagers as you’ll get off flavors.
Ales can provide for hundreds of interesting styles and combinations of ingredients. The main reason homebrewers tend to brew more ales comes down to that temperature control. If you’re looking to get into lager brewing, check out some temperature control options at your local homebrew store, online retailer or the TC-100 kit at Spike.
For more information, history lessons, tips, tricks and (most importantly!) to see what I’m brewing, follow along at Oil Creek Brewing Co.
Cheers!
Matt Dailey lives in Titusville, Pennsylvania and is a high school emotional support teacher. He has a bachelor's degree in history from Southern Illinois University and a Masters in Special Education from Slippery Rock University. He and his wife have 2 boys, ages 4 and 1. If he’s not spending time with his family or brewing and the weather allows, you can find him on the golf course.
Lagers are bottom-fermented beers made with bottom-fermenting yeast at cooler temperatures, while ales are top-fermented beers made with top-fermenting yeasts at warmer temperatures. Lagers tend to be lighter and crisper than ales, which are generally richer and fruitier.
Examples of lager include Pilsner, Bock, and Marzen, while examples of ale include Pale Ale, India Pale Ale, and Wheat Beer.
Pilsners are a type of lager, but they are generally lighter in color and body than other lagers. They also have a more pronounced hop flavor, due to the increased use of hops during the brewing process.
is lager stronger than ale?
No, lagers typically have a lower alcohol content than ales.
]]>1 min
When it comes to scaling a beer recipe, Adam Ross has notable experience. With ten-plus years as a homebrewer, a certified Cicerone and now head brewer at newly-opened Twin Span Brewing in Bettendorf, Iowa, he’s taken his fair share of great recipes and made them work at any volume.
Below, Adam shares his recommendations for scaling a recipe up or down, regardless of your intended batch size.
Key 1 – Let software like BeerSmithTM do the heavy calculations for you. BeerSmith’s “scale recipe” feature (tutorial here) lets you take your favorite recipe and transform it quickly and accurately. To make sure you get your desired results, understand both your current system and scaled systems’ brewhouse efficiency.
Key 2 – If you are really scaling up, be mindful of both your open- and full-bag grain inventory. With malts, Adam likes to round recipes to the nearest bag size to minimize the number of partial bags lying around. If you suspect a small batch will need to be scaled up at some point, it helps to design the big recipe first with grains in bag-size increments, and then scale down to your smaller batch.
Key 3 – Process changes need to be considered in scaling, too. If your small batch is batch sparged on a direct flame and your big batches are fly sparged on steam heat, you won’t get the exact same beer without modifying one of the recipes.
Key 4 – Hops extract differently at various scales. For example, you may get more IBU extraction as your batch sizes increase. Adam recommends rounding down on the hop additions when you scale up until you can find how your system changes hop utilizations.
Key 5 – Scaling isn’t perfect. It’s important to remember that there’s both an art and a science to effective scaling. Take notes, test, and make changes for the next batch to really dial in your efforts.
Ryan Oxton is the Market Development Manager at Spike. When he’s not guiding aspiring homebrewers with their first systems or working with breweries as they upgrade their operations, he enjoys spending time with family and losing the occasional golf ball or two. Email: ryan@spikebrewing.com
Special thanks to Adam Ross from Twin Span Brewing for sharing his tips. If you ever find yourself in the Quad Cities area, make sure you stop by and sample a cold one.
]]>Date: July 11, 2020
Posted by Ryan Oxton
Moving to electric brewing and turning your basement into your new favorite taproom is an exciting step for many homebrewers. You get your system set up without a hitch, you get your electrician over to wire the proper outlet, you connect your hoses and mill your grain and get ready to brew. Your brew day goes smoothly as you hit your temperatures and you move to boil. Soon you have beautiful, rolling bubbles and plumes of steam and you’re on the road to making your next great beer!
Steam? That’s something you didn’t plan for when you designed your brewery and it will certainly lead to problems. Without proper ventilation, a few brew days a year can cause moisture buildup on your ceiling and walls, resulting in unwanted mold and mildew if you don’t address the issue.
For years I have advised our customers to consider a vent hood installation to remedy the problem. Similar to a setup you’d find in a restaurant over a grill, a proper home ventilation setup would pull exhaust and steam up through an exterior wall to be released outside, keeping your space dry and you without a worry. But after talking with Ryan from Old Standby Brewing in Salem, Oregon, I quickly learned that my recommendation could be an expensive one. Ryan had just finished a similar ventilation setup for his system and was kind enough to share his experiences and related fees in an effort to help others in the brewing community.
Here’s a quick look at Ryan’s vent hood installation costs (Note: some costs may vary, depending on the location of your brew space and the price of materials and labor in your area):
Long story short, think ahead and plan accordingly. A great location for brewing beer isn’t great without proper ventilation. Some solutions can be expensive, but the cost to clean up a mold problem could be even more. If a professional install is cost-prohibitive, consider using a little DIY elbow grease to save some cash. If the idea of ventilation sounds good, but having another project to tackle doesn’t, there are cost-effective accessories like steam condenser lids that can do the job without all the hassle. Whichever solution you choose, just make sure you keep the moisture off your walls and in your beer.
Ryan Oxton is the Market Development Manager at Spike. When he’s not guiding aspiring homebrewers with their first systems or working with breweries as they upgrade their operations, he enjoys spending time with family and losing the occasional golf ball or two. Email: info@spikebrewing.com.
Special thanks to Ryan from Old Standby Brewing for sharing the costs, process and photos of his vent hood installation.
]]>Date: June 19, 2020
Posted by Ryan Oxton
In a recent conversation I had with Laurence Livingston, a professional brewing consultant and experienced brewer, we touched on the topic of the times, Covid19. I was curious to get his perspective on how the brewing community was doing as a whole and how some operations, big and small, were making ends meet. The discussion ultimately led to the subject of pilot systems and Laurence’s thoughts about how now, more than ever, they’re a necessity in today’s thriving brewery. I thought I’d pass five nuggets on to you… without his fee, of course.
Laurence:
I advise all our craft brewing clients to seriously consider purchasing a pilot system – many breweries are currently either using one or planning to buy one. Here are five important strategic advantages of owning and operating a pilot system.
So, whether you’re considering opening up a taproom or have been in operation for years, there’s likely a place for a pilot system in your arsenal. They are versatile setups that can evolve with your brewery as your needs change and definitely worth a look as you’re mapping out your next move. In the meantime, I’d like to thank Laurence for his time and insights – I think I owe him a beer!
Ryan Oxton is the Market Development Manager at Spike. When he’s not guiding aspiring homebrewers with their first systems or working with breweries as they upgrade their operations, he enjoys spending time with family and losing the occasional golf ball or two. Email: info@spikebrewing.com.
Laurence Livingston is a full-time brewery consultant at Kettle and Still Consulting. after a 30+ year career in commercial brewing, he shifted gears to focus on helping others pursue their dreams of brewing professionally. Contact Laurence at www.kettleandstillconsulting.com to bring your aspirations to life!
]]>A lot of things add flavor and aroma to beer. Malts, hops, sugars, spices, fruits and water all contribute to the sensory aspects of your beer. Often overlooked, though, is yeast. Depending on the strain, yeast can make a minor contribution or have a major impact on the aroma and flavor of your beer. Selecting flavor-enhancing yeast strains and/or mixing yeast strains can add new dimensions of complexity to your brews.
To get ever more different flavors and aromas, we often use more than one yeast strain in a given beer and add the yeasts at different stages of fermentation.
Bruz Beers is an all-Belgian-style brewery and we use many different Belgian yeasts (22 different strains last year). Most American yeasts are fairly neutral – by design. If you are making an IPA and want your hops to be the stars of the beer, a neutral yeast makes sense. Belgian yeast strains, on the other hand, contribute considerable flavor and aroma to the finished beer. Depending on the beer style (and there are a lot of different styles made in Belgium) we select yeast(s) that will enhance that style. To get even more different flavors and aromas, we often use more than one yeast strain in each beer and add the yeasts at different stages of fermentation. Done well, this results in greater complexity and a more interesting final product.
If you are ready to try using multiple strains, I recommend doing some experimentation on the front end.
As you experiment, you will no doubt discover some interesting combinations of yeasts that will set your beers apart from the ordinary.
Happy brewing!
Charlie Gottenkieny Brewmaster at Bruz Beers Denver, CO
]]>At Brewster Bros. Brewing Co., we believe that wort aeration is essential to ensure a complete fermentation cycle. Aeration is simply adding oxygen to wort prior to fermentation. This is an important practice for several reasons:
In a nutshell, yeast and oxygen need each other. Oxygen promotes healthy, active yeast. Oxygen is essential for the yeast to produce the sterols and fatty acids needed for cell growth. The challenge is to maintain adequate oxygen levels in the wort delivered to the fermentation vessel. Not having proper oxygen levels in the wort that the yeast is feeding on can cause a lag time before fermentation starts, incomplete or stuck fermentation, or excessive ester flavors.
We believe that wort aeration is essential to ensure a complete fermentation cycle.
Temperature and specific gravity affect how oxygen dissolves into wort, i.e., colder and less concentrated wort absorbs more oxygen. Since wort loses its oxygen during the boiling process, it must be replenished. Oxygen should be put into the wort after it is cooled and before the yeast is pitched.
At our brewery, we inject the oxygen into the wort in the transfer line after the plate chiller using an oxygen stone. Sterile air can also be injected. Ideally, a range of 8 to 10 parts per million (ppm) dissolved oxygen is achieved. The injection rate of air or oxygen must be monitored to avoid too little oxygen or too much oxygen.
There are several methods for aerating wort. As a home brewer for 15 years before opening the brewery, I aerated my wort using a few different methods.
James Stirn
Brewmaster and Co-founder at Brewster Bros Brewing Co.
Chippewa Falls, WI
]]>Water chemistry is a fairly important component to your brewing, whether you realize it or not. Water is, after all, the largest component in your beer! Unfortunately, water chemistry can be intimidating and is not at the forefront of the novice homebrewer’s mind. As homebrewers, we typically stick to the basics – and for the most part that’s generally good enough to make a great beer.
If you’re willing to take a step towards refining your beer, water chemistry can be a next step that can make a big difference.
Simply put, if it’s water you wouldn’t want to drink, it’s probably not great for your beer. If it tastes like a garden hose, it’s going to throw garden hose flavor into the beer. If there’s an algal or sulfurous note to it, you should think about not using this water source. Does the water taste metallic? Maybe it’s a good idea to grab some distilled water from the store to use instead. Does the water taste free of any flavors, and look clean and clear? Probably just fine for your brew!
That being said, if you’re willing to take a step towards refining your beer, water chemistry can be a next step that can make a big difference.
Water chemistry can be broken down into two major components:
These two factors can significantly alter the perceived flavor and texture of your beer. If you haven’t been testing your water, or don’t know where to start, it’s safest to purchase purified (reverse osmosis, deionized) water from your grocery store and then simply calculate (Beersmith and Brewer’s Friend have excellent calculators!) the amount to add hardness or alkalinity. There are multiple ways of adjusting for each parameter, so be sure to experiment with each and compare.
Starting with your own tap water, compared to the purified water from the grocery store, is a good place to start. From there, adjusting each parameter slightly and comparing against a reference sample (keep extra bottles of each test!) refines your water to provide you with the best beer for each style you want to brew! Generally, the more carbonate, the more buffering capacity (ability to resist pH change) and increased efficiency (ability to convert and extract sugars) you have in your mash – particularly with dark malts that exhibit higher acidity – and so naturally high amounts of carbonates won’t need as much alkaline addition. There’s a limit to this, however, so shoot for an appropriate mash pH (low to mid-5’s) to make sure you’re not overdoing it either way. Additions of calcium sulfate or chloride will help introduce calcium, but don’t go overboard: aim for around 150ppm to start, and about 50ppm minimum.
Tip: Use of more sulfate or chloride will depend on whether you are shooting for a very hoppy beer (use sulfate) or a sweeter malt beer (chloride).
Happy Brewing!
Ethan Tsai
Quality Control Specialist at Tivoli Brewing Company
Beer Industry Program Instructor at MSU Denver Beer Industry Program
]]>